Updated 12-Dec-2019
Now that the host has a static IP address, you can begin more of the host’s configuration. You do the minimal configuration for now. Just enough to allow the installation of the vCenter Server Appliance in the next article.
To continue, start an Internet browser and browse to your host’s IP address. For me, that is https://192.168.1.53.
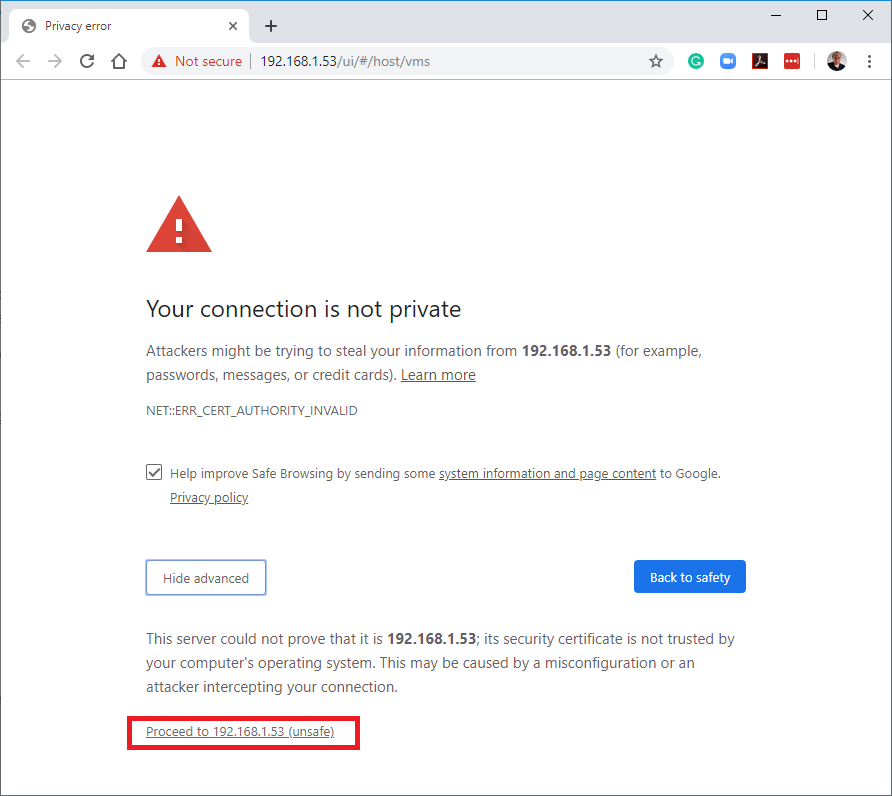
Most browsers should display an SSL certificate warning, as shown in Figure 1.
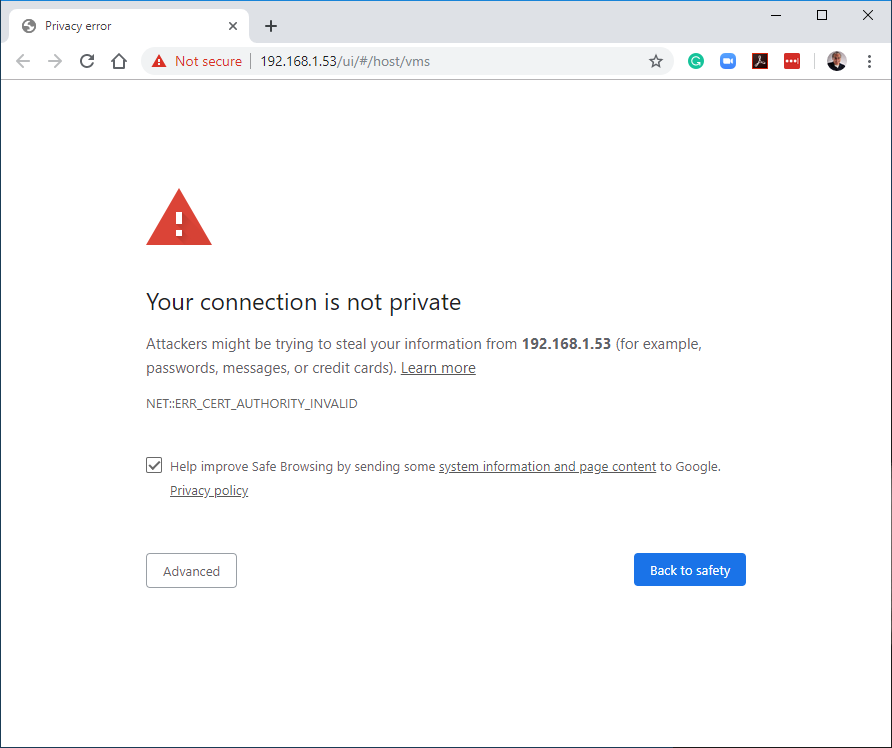
The warning is because, for now, the host is using a VMware self-signed SSL certificate. It is safe to ignore any warnings and proceed to connect to the host. For a Chromium-based browser, click Advanced and then click Proceed to <ip address> (unsafe) as shown in Figure 2.
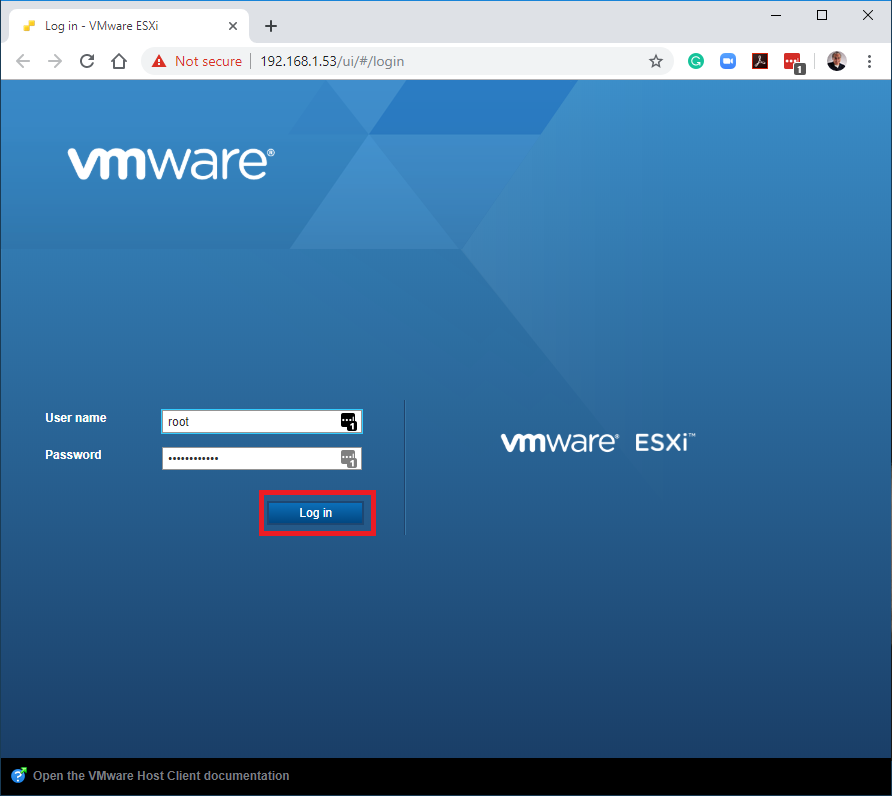
Log in using the root credentials you created during the initial ESXi installation and click Log in, as shown in Figure 3.
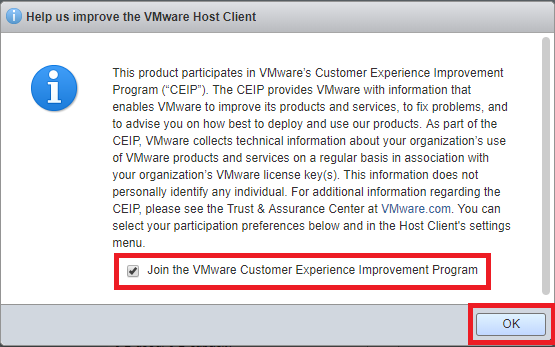
Decide whether to Join the VMware Customer Experience Improvement Program and click OK, as shown in Figure 4.
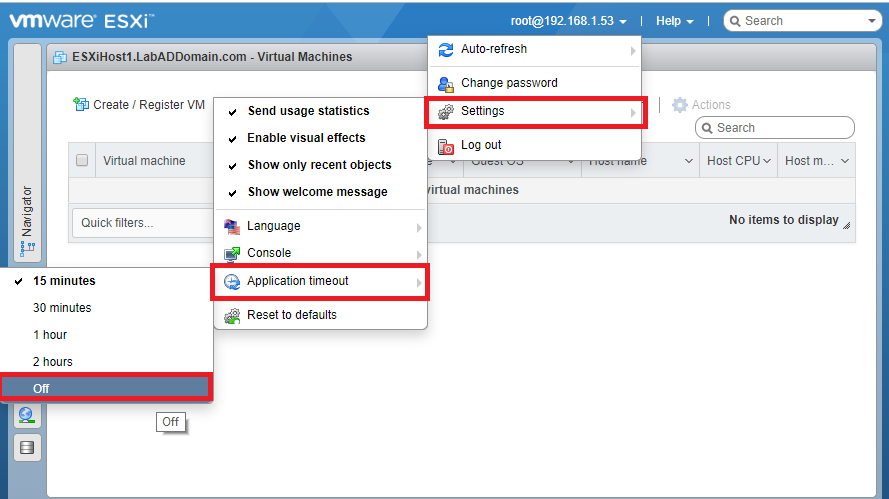
Because I am taking screenshots and typing this article, the first thing I did was turn off the timeout interval for the web console. Click the drop-down next to [email protected] and then hover the mouse pointer over Settings -> Application timeout and then click Off as shown in Figure 5.
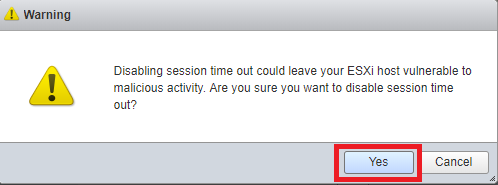
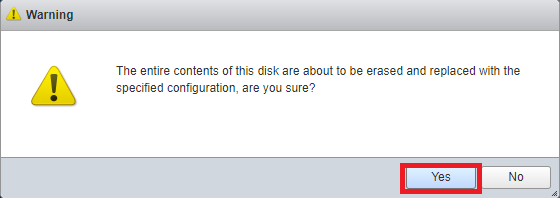
Click Yes on the Warning popup as shown in Figure 6.
The browser or the browser tab needs closing for the change to apply. Relaunch the browser or open another tab and log back into the host.
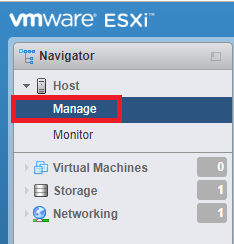
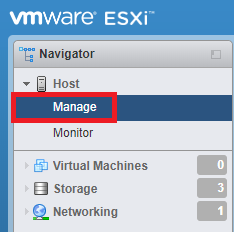
The first thing needed is to license our host. Click Manage, as shown in Figure 7.
Note: If you do not have a license key, you can use ESXi 6.7 in evaluation mode for 60 days.
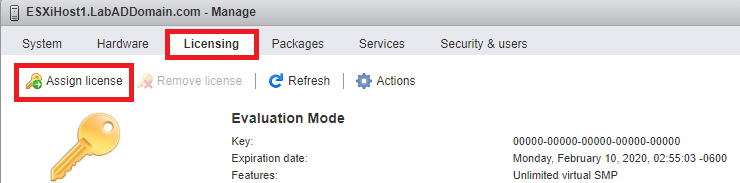
In the top-right frame, click the Licensing tab and then click Assign license as shown in Figure 8.
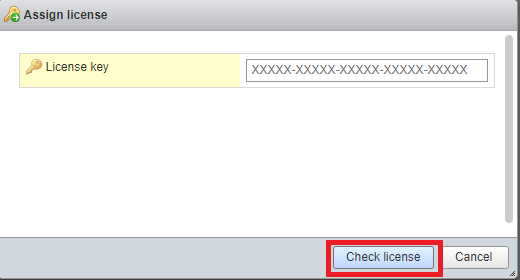
Enter your License key and click Check license as shown in Figure 9.
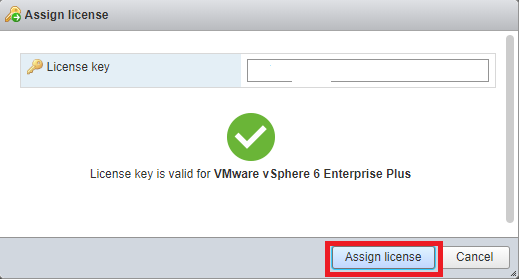
If your License key is valid, click Assign license as shown in Figure 10.
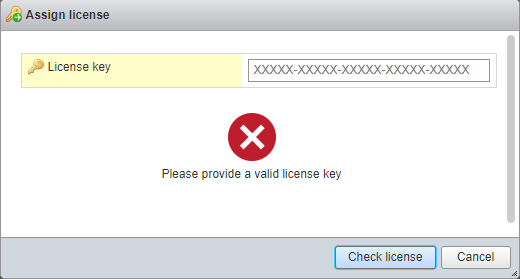
If the License key is not valid, as shown in Figure 11, try another License key.
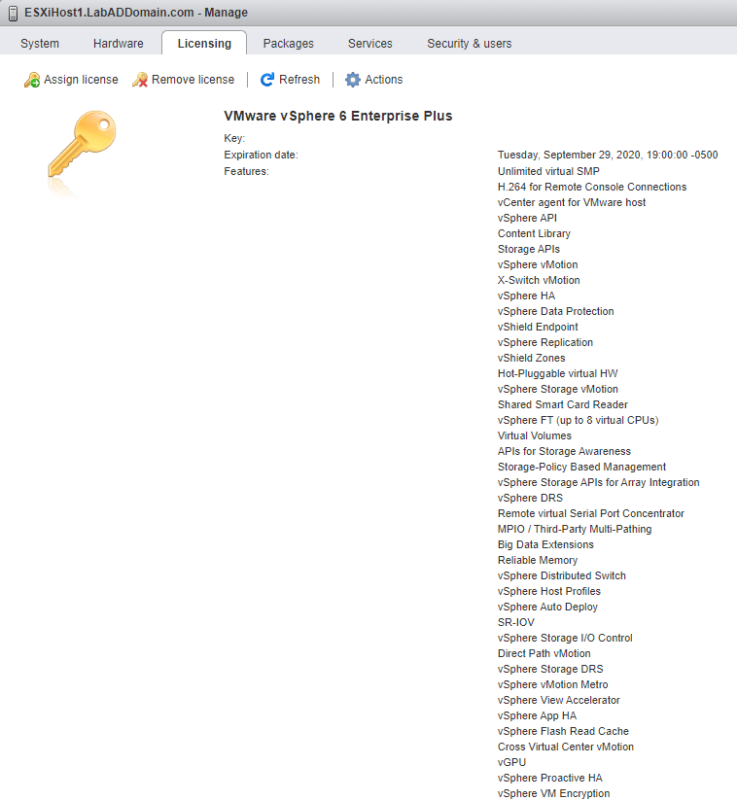
You now see all the licensed features, as shown in Figure 12.

Now on to configuring Storage.
My TinkerTry server has two local SSDs I use for datastores.
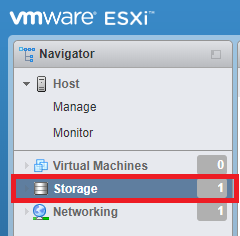
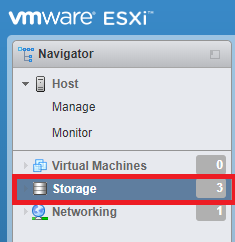
In the browser’s left frame, click Storage, as shown in Figure 13.
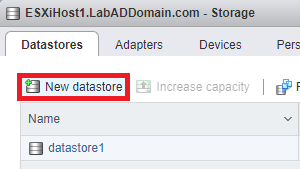
In the right browser frame, on the Datastores tab, click New datastore, as shown in Figure 14.
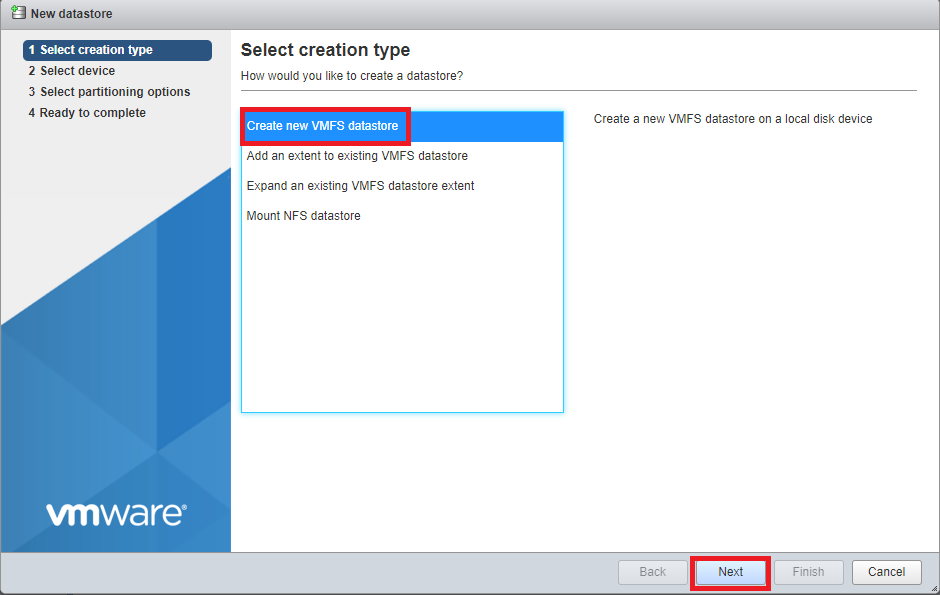
Click Create new VMFS datastore and click Next as shown in Figure 15.
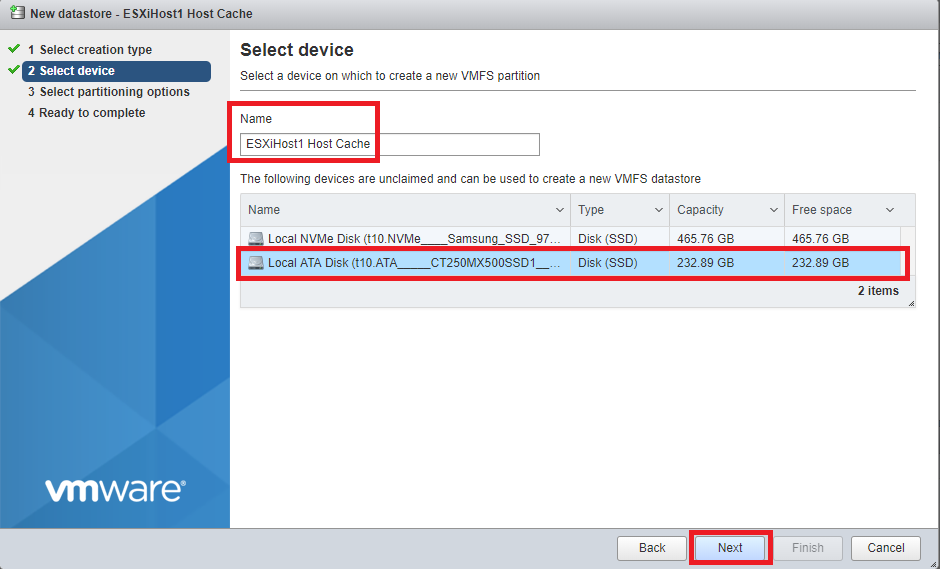
This local datastore is for Host Cache. I am selecting my 250GB SSD and entering the Name of ESXiHost1 Host Cache. Click Next, as shown in Figure 16.
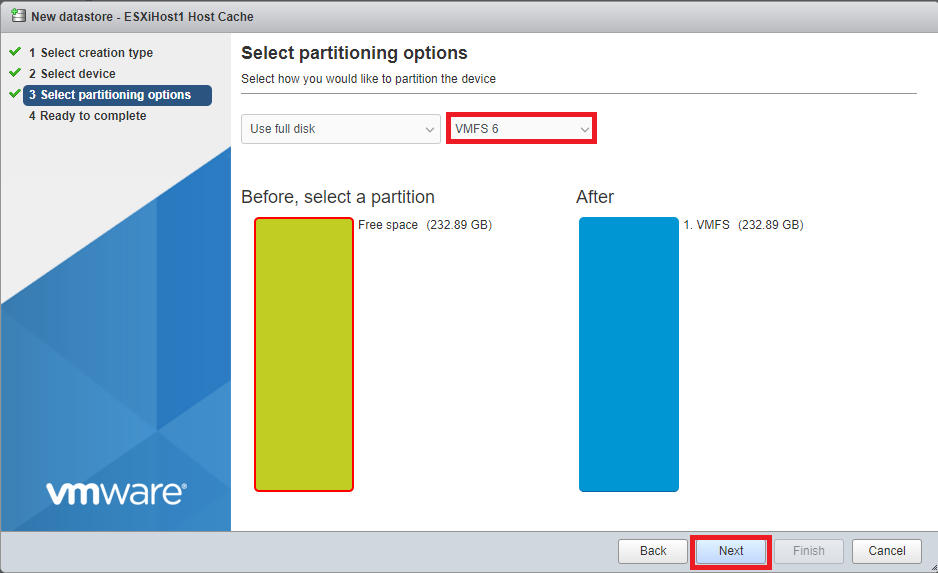
For the datastore File System, I am using VMFS 6.
Select VMFS 6 from the dropdown list and click Next, as shown in Figure 17.
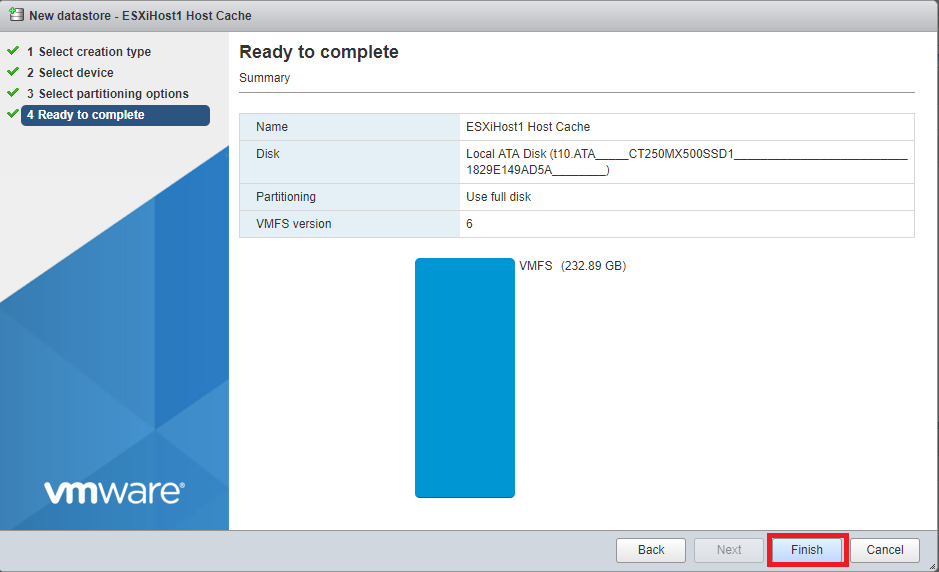
Verify the information is correct and click Finish as shown in Figure 18. If the information is not correct, click Back, correct the information, and then continue.
Click Yes to confirm the erasing of the drive, as shown in Figure 19.
Now for the local datastore for VMs.
Click New datastore, as was shown in Figure 14.
Click Create new VMFS datastore and click Next as was shown in Figure 15.
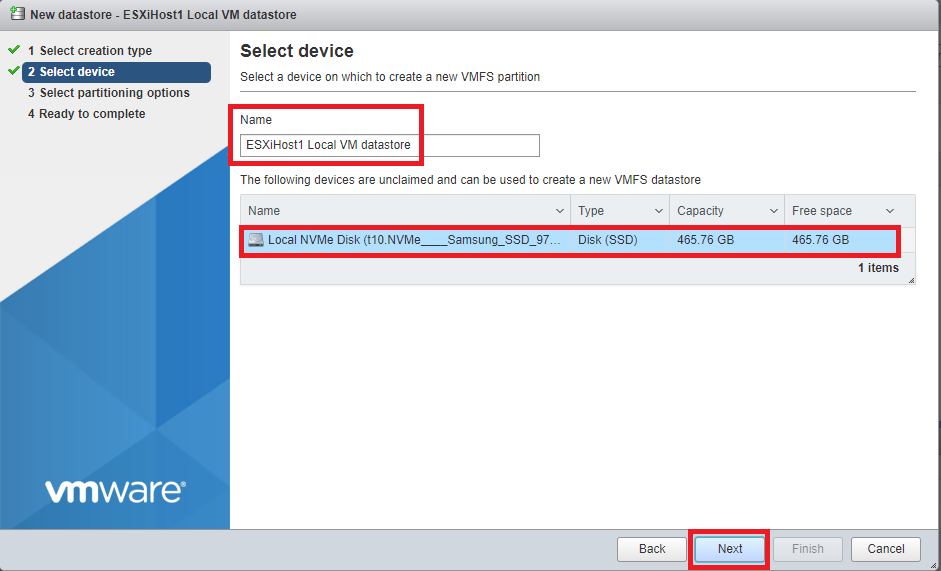
This local datastore is for VMs. I am selecting my 500GB SSD and entering the Name of ESXiHost1 Local VM datastore. Click Next, as shown in Figure 42.
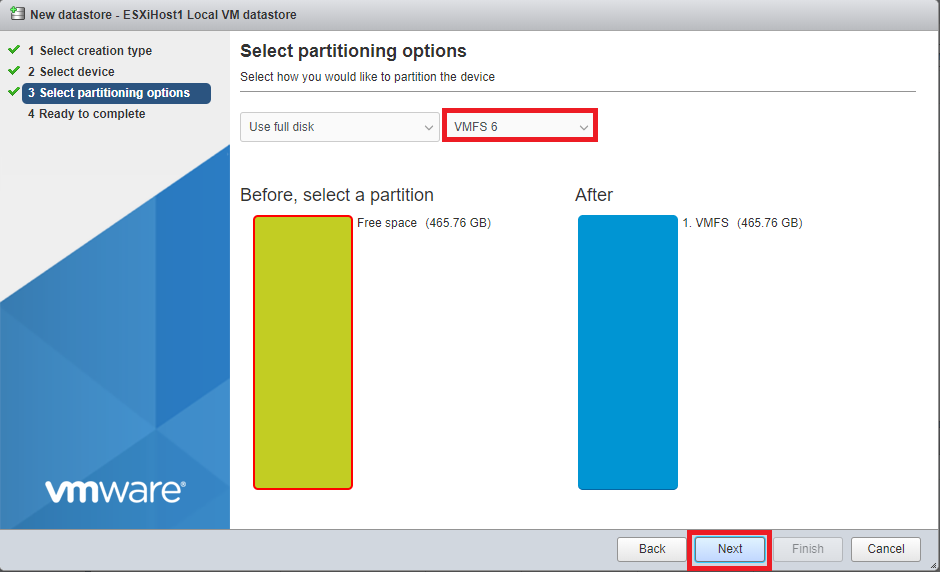
Select VMFS 6 from the dropdown list and click Next, as shown in Figure 21.
Verify the information is correct and click Finish as shown in Figure 22. If the information is not correct, click Back, correct the information, and then continue.

Click Yes to confirm the erasing of the drive, as was shown in Figure 19.
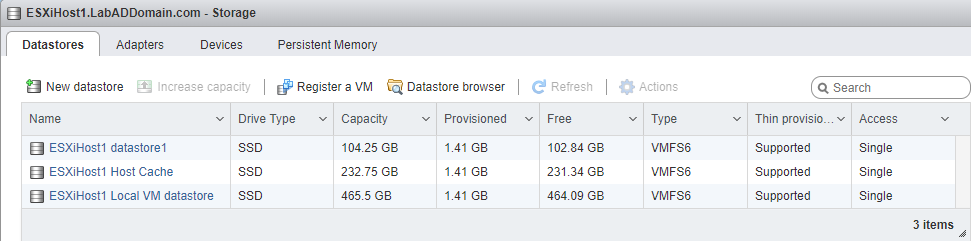
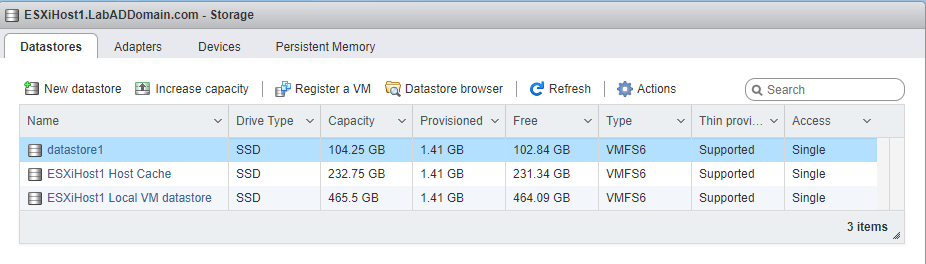
As seen in Figure 23, the Datastores tab shows all three datastores. The two we created and the one created by the installation of ESXi 6.7.
Since we added a datastore for Host Cache, the Host configuration needs that datastore added.
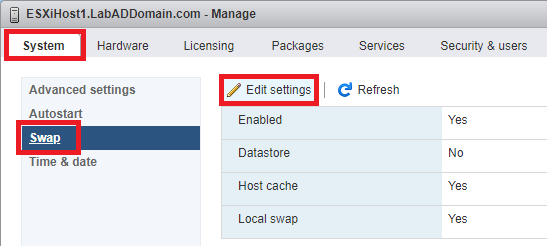
In the browser’s left frame, under Host, click Manage, as shown in Figure 24.
In the right frame, click the System tab, click Swap and then click Edit settings as shown in Figure 25.
For the Datastore, Select the host cache datastore created earlier and click Save as shown in Figure 26.
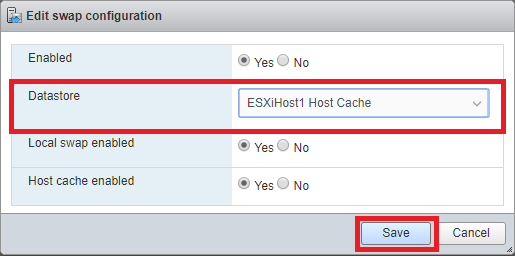
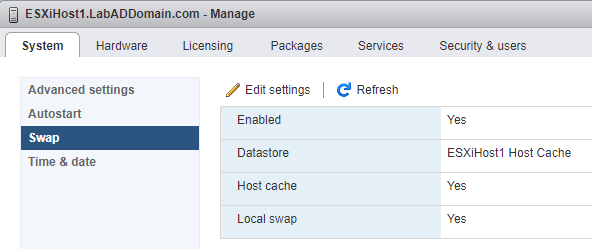
Figure 27 shows the updated configuration.
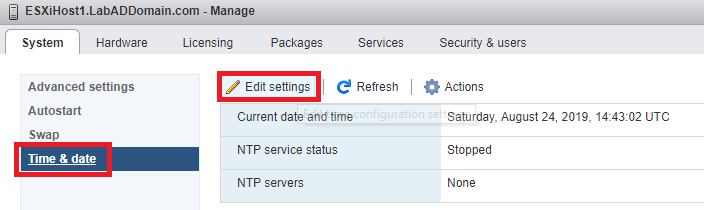
While on the System tab, you can set the NTP server.
Click on Time & date and then click Edit settings as illustrated in Figure 28.
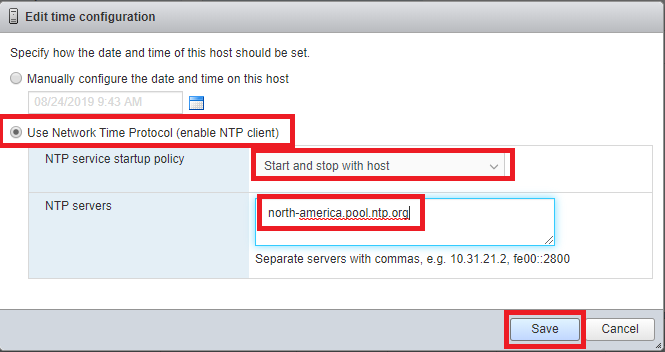
Select Use Network Time Protocol (enable NTP client), for NTP service startup policy select Start and stop with host, and for the NTP servers enter north-america.pool.ntp.org (or the NTP pool servers for your geographic area) and click Save as shown in Figure 56.
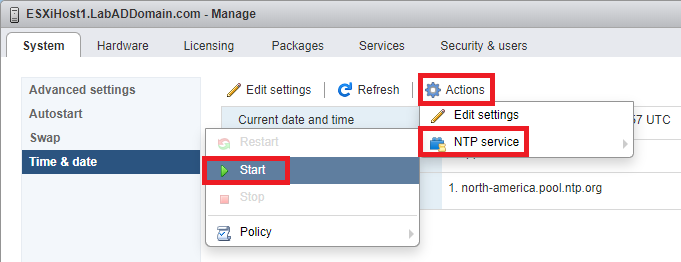
To start the NTP service, click Actions, NTP service, Start, as illustrated in Figure 30.
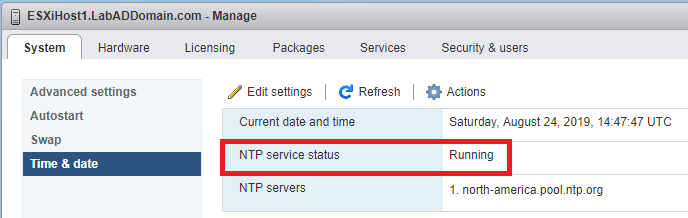
After a few seconds, the NTP service status changes from Stopped to Running, as shown in Figure 31.
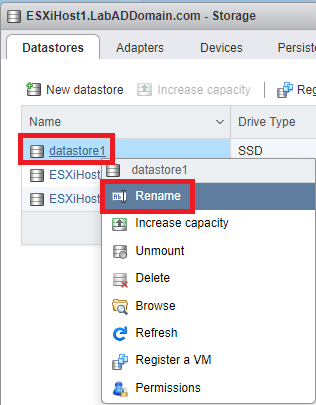
Since my lab has four hosts that will become part of a cluster of vSphere hosts in the next article, the host’s default datastore needs renaming. That way, there are not four datastore1 datastores. They would show as datastore1, datastore1 (1), datastore1 (2), and datastore1 (3).
In the left pane, click Storage, as shown in Figure 32.
Right-click datastore1 and click Rename, as shown in Figure 33.
Choose a name for the default datastore, enter the New name and click Save, as shown in Figure 34.
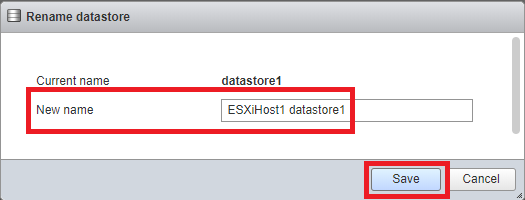
Figure 35 shows the Datastores.