Updated 14-Dec-2019
Before getting to work adding Citrix Virtual Apps and Desktops (CVAD), Parallels RAS, and VMware Horizon to the lab, there are a few additional items on the to-do list for vCenter.
- Join vCenter to the lab’s Active Directory (AD) domain
- Add the lab’s AD to the SSO
- Create a Citrix related service account with minimum VMware permissions for the hosting connection in Citrix Studio and with Citrix App Layering
- Create a VMware related service account with minimum vCenter permissions for Horizon
Log in to vCenter.
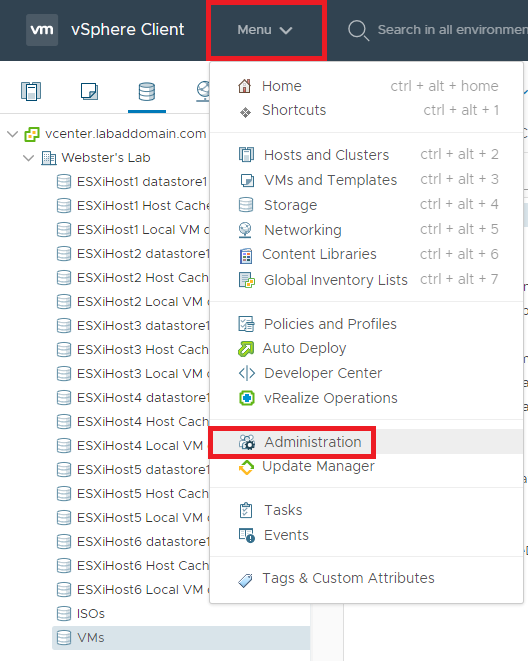
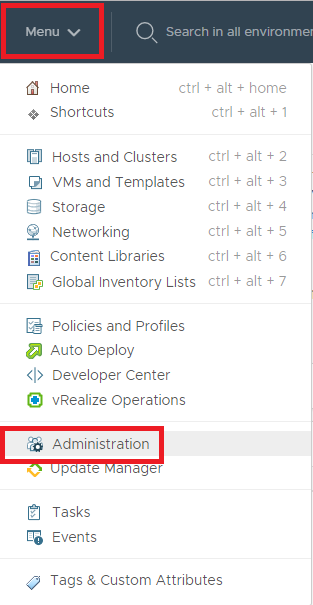
From the Menu dropdown, select Administration, as shown in Figure 1.
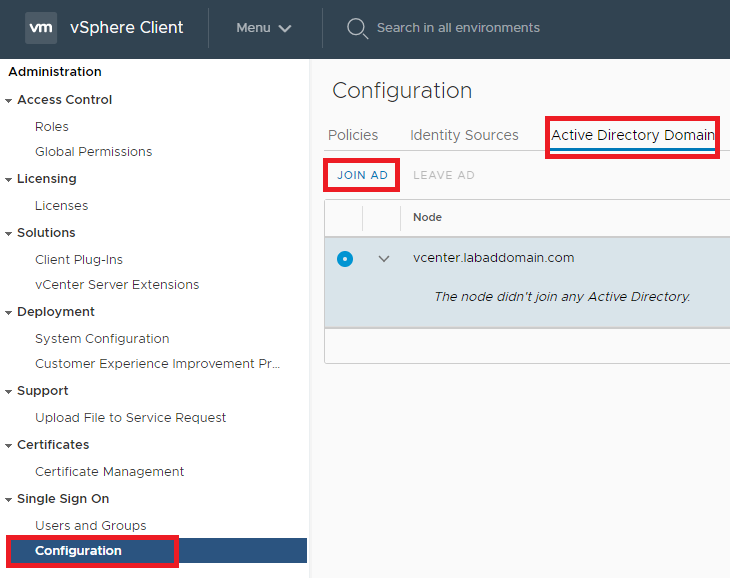
Click Configuration, Active Directory Domain, and click Join AD, as shown in Figure 2.
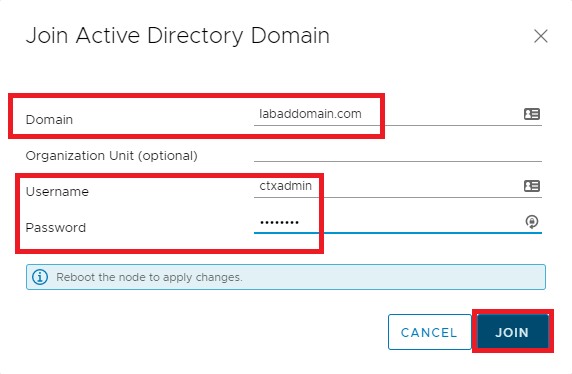
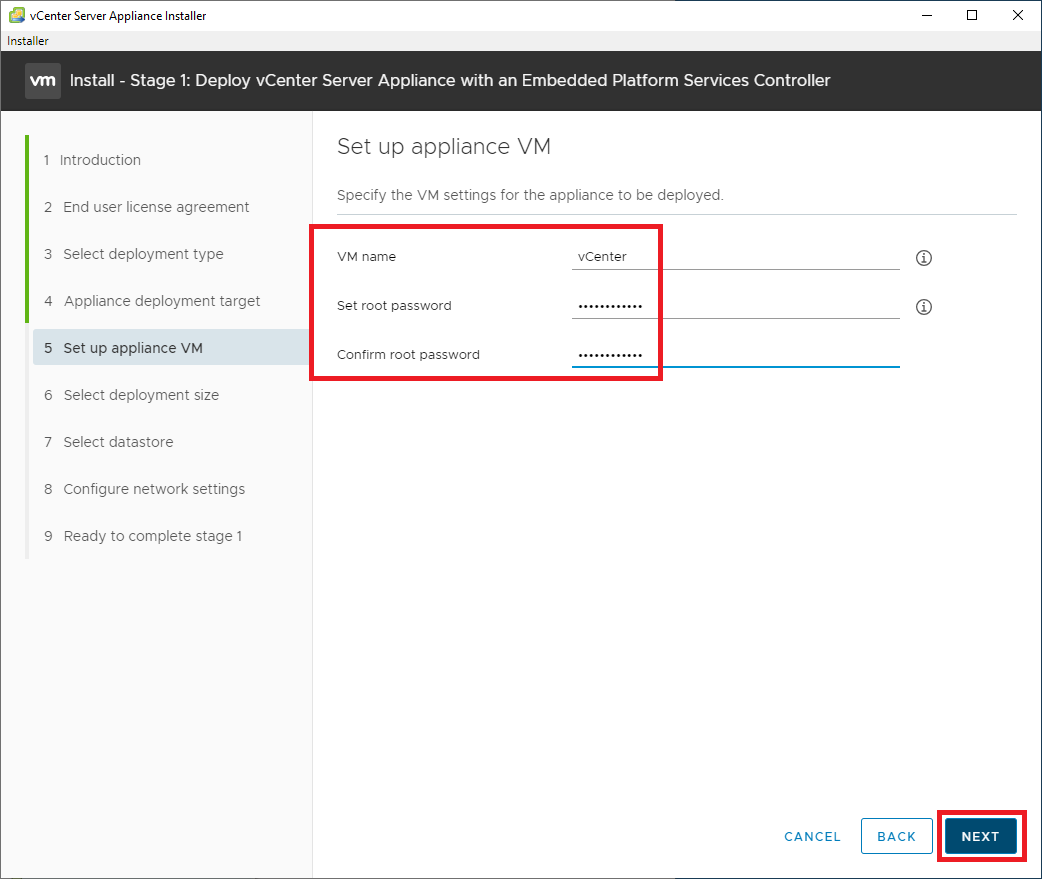
Enter the Domain, a Username/Password, and click JOIN, as shown in Figure 3.
The vCenter appliance is now a domain member but needs a restart.
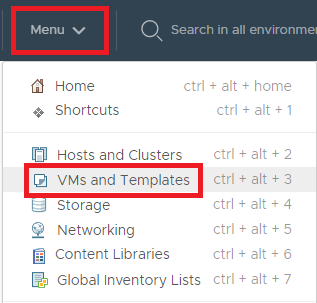
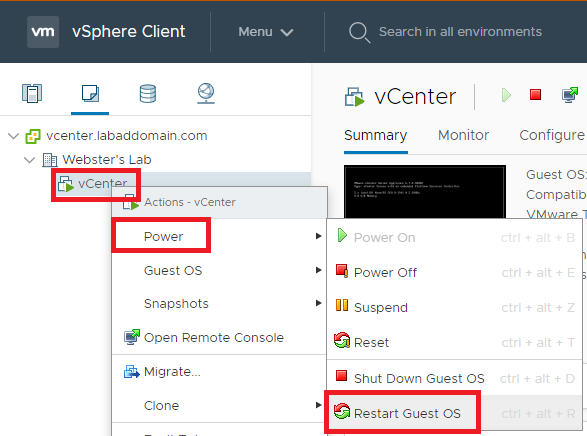
From the Menu dropdown, select VMs and Templates, as shown in Figure 4.
Expand the cluster, right-click the vCenter VM, click Power, and click Restart Guest OS, as shown in Figure 5.
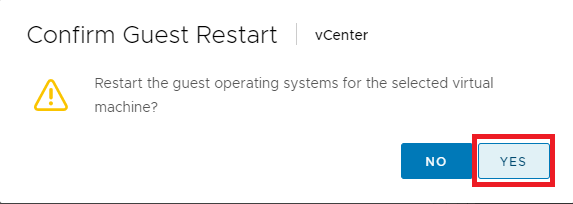
Click Yes to confirm the restart, as shown in Figure 6.
Wait about 10 minutes before trying to log in to vCenter. At this point, you must use the administrator vCenter account to log in. Even though we joined, vCenter to the AD domain, the AD domain isn’t a Single Sign-On domain yet.
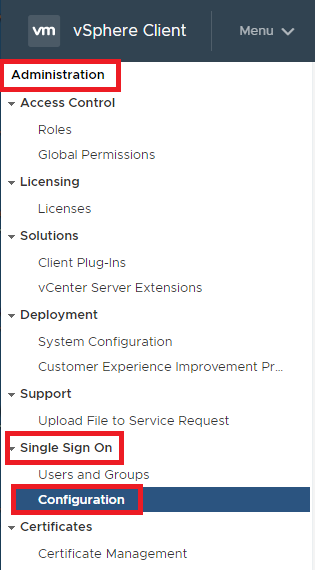
Once you have logged on to vCenter, go back to Administration/Single Sign On/Configuration, as shown in Figure 7.
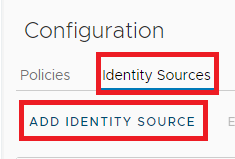
Click Identity Sources and click ADD IDENTITY SOURCE, as shown in Figure 8.
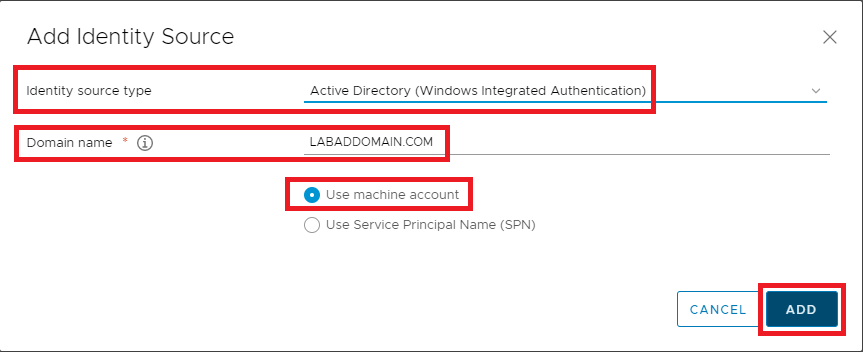
Select Active Directory (Windows Integrated Authentication) from the Identity source type dropdown, if it is not already populated, enter the Domain name, select Use machine account, and click ADD, as shown in Figure 9.
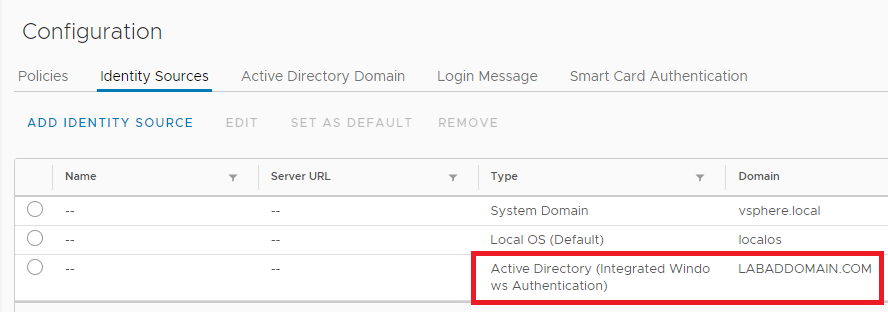
The AD domain now shows as an Identity Source, as shown in Figure 10.
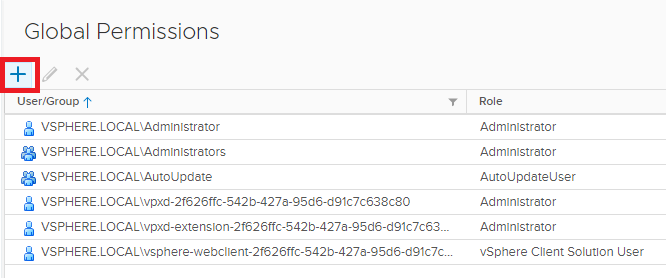
We are not yet ready to log in to vCenter with AD credentials. First, we must add users and groups from the AD domain to a vCenter security role.
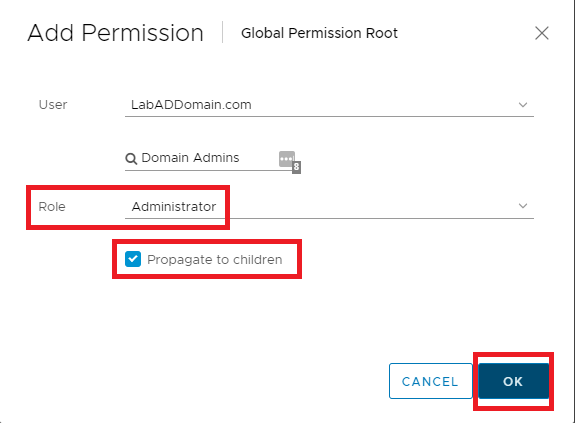
Click Global Permissions, as shown in Figure 11.

Click + (Plus sign) as shown in Figure 12.
Select the AD domain name from the User dropdown, and as you type characters into the next field, users and groups appear, as shown in Figure 13.
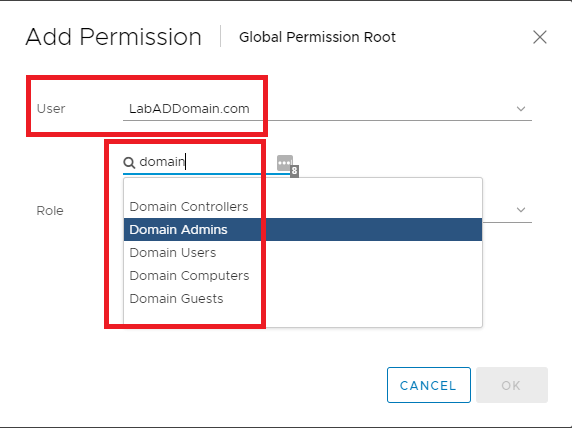
Click the user or group you wish to add, the Role the user or group requires, select Propagate to children, and click OK, as shown in Figure 14.
Now we can log in to vCenter with an AD domain account.
Log off vCenter and log in with an AD domain account that was just granted permission, as shown in Figures 15 and 16.
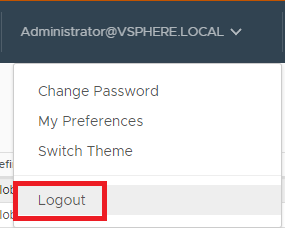
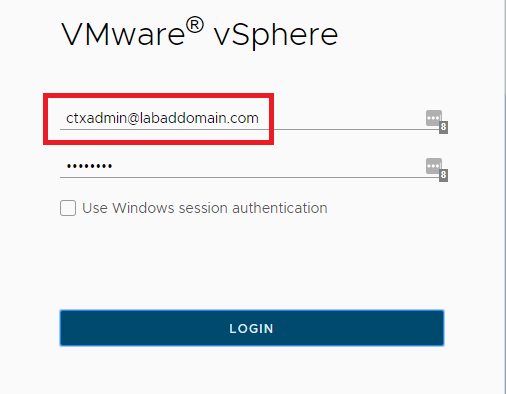
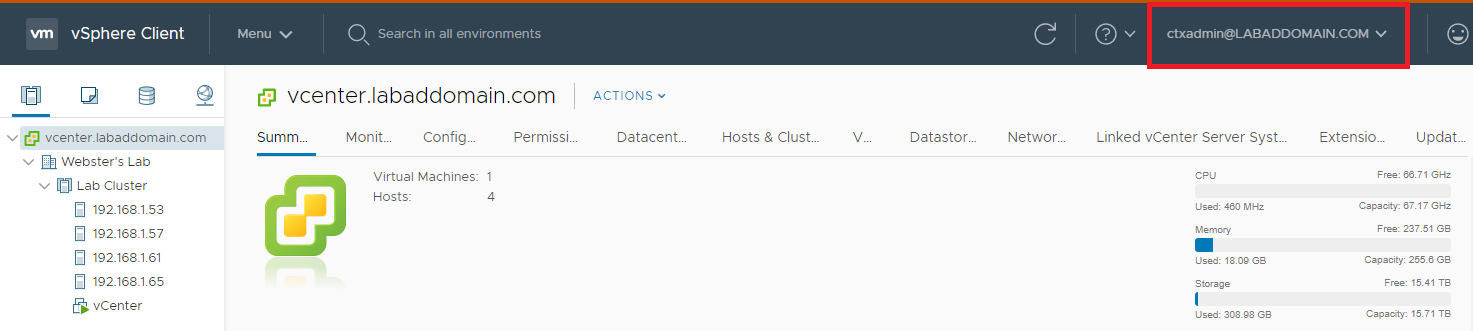
Figure 17 shows a successful login with AD domain credentials.
Next, permissions for service accounts needed for CVAD and Horizon. First up, CVAD.
For my lab, I need a vCenter account to use with both the CVAD Hosting Connection in Citrix Studio and Citrix App Layering.
Citrix details the required permissions at CVAD VMware virtualization environments and Citrix App Layering VMware vSphere.
To save time, here are the combined permissions with all the duplicates removed.
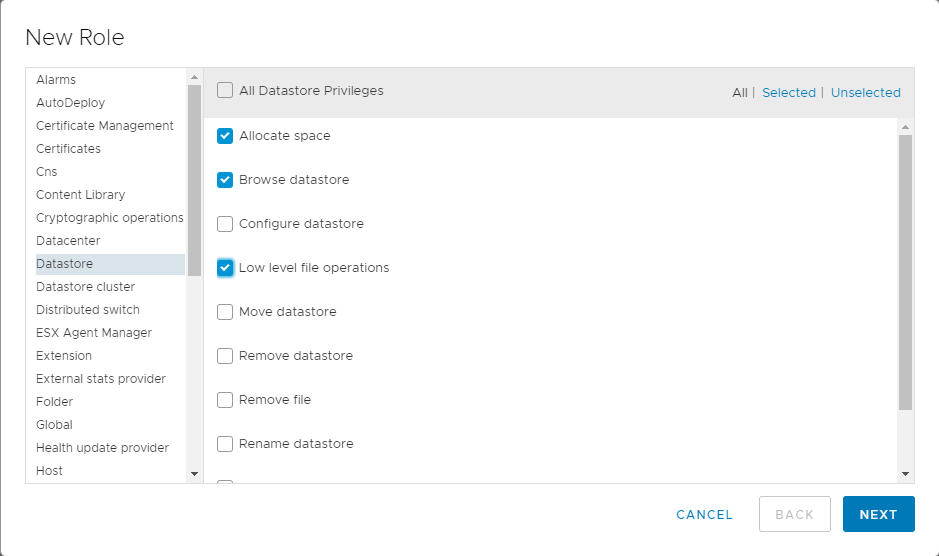
Table 1 vCenter Permissions for CVAD and App Layering
| Datastore > Allocate space |
| Datastore > Browse datastore |
| Datastore > Low level file operations |
| Folder > Create folder |
| Folder > Delete folder |
| Global > Cancel task |
| Global > Manage custom attributes |
| Global > Set custom attribute |
| Host > Configuration |
| Network > Assign network |
| Resource > Assign virtual machine to resource pool |
| vApp > Export |
| vApp > Import |
| vApp > vApp application configuration |
| Virtual machine > Configuration > Add existing disk |
| Virtual machine > Configuration > Add new disk |
| Virtual machine > Configuration > Add or remove device |
| Virtual machine > Configuration > Advanced (or Advanced Configuration) |
| Virtual machine > Configuration > Change CPU Count |
| Virtual machine > Configuration > Change resource |
| Virtual machine > Configuration > Configure managedBy |
| Virtual machine > Configuration > Disk change tracking (For App Layering, but I can’t find it in vCenter 6.7 U3) |
| Virtual machine > Configuration > Memory (CVAD and App Layering, but I can’t find it in 6.7 U3. I selected Change Memory.) |
| Virtual machine > Configuration > Modify Device Settings |
| Virtual machine > Configuration > Remove disk |
| Virtual machine > Configuration > Rename |
| Virtual machine > Configuration > Reset guest information |
| Virtual machine > Configuration > Set annotation |
| Virtual machine > Configuration > Settings (In 6.7 U3, Change Settings) |
| Virtual machine > Configuration > Swapfile placement (In 6.7 U3, Change Swapfile placement) |
| Virtual machine > Configuration > Upgrade virtual machine compatibility |
| Virtual machine > Interaction > Answer question |
| Virtual machine > Interaction > Configure CD media |
| Virtual machine > Interaction > Console interaction |
| Virtual machine > Interaction > Device connection (I can’t find this in 6.7 U3. I used Connect devices.) |
| Virtual machine > Interaction > Power Off |
| Virtual machine > Interaction > Power On |
| Virtual machine > Interaction > Reset |
| Virtual machine > Interaction > Suspend |
| Virtual machine > Inventory > Create from existing |
| Virtual machine > Inventory > Create new |
| Virtual machine > Inventory > Register |
| Virtual machine > Inventory > Remove |
| Virtual machine > Provisioning > Clone template |
| Virtual machine > Provisioning > Clone virtual machine |
| Virtual machine > Provisioning > Customize (In 6.7 U3, Customize guest) |
| Virtual machine > Provisioning > Deploy template |
| Virtual machine > Provisioning > Mark as template |
| Virtual machine > Snapshot management > Create snapshot |
| Virtual machine > Snapshot management > Remove snapshot |
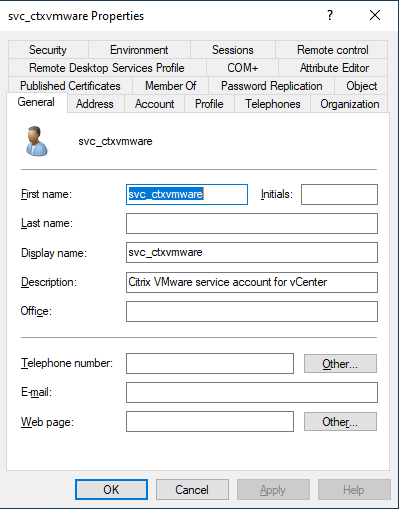
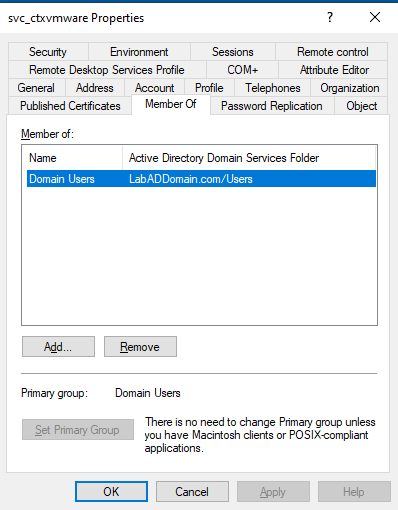
First, I created a regular domain user account in AD, as shown in Figures 18 and 19.
In the vCenter console, go to Menu -> Administration, as shown in Figure 20.
Expand Access Control, click Roles, and click the + (Plus sign), as shown in Figure 21.

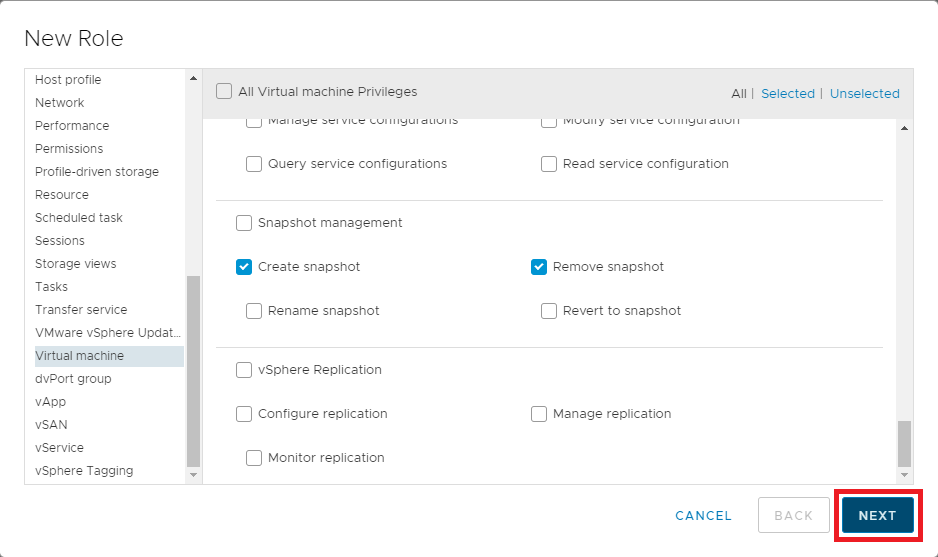
The hard part is going through all the settings in Table 1 and selecting the required permissions, as shown in Figure 22.
Continue selecting the required permissions. When all permissions are selected, click Next, as shown in Figure 23.
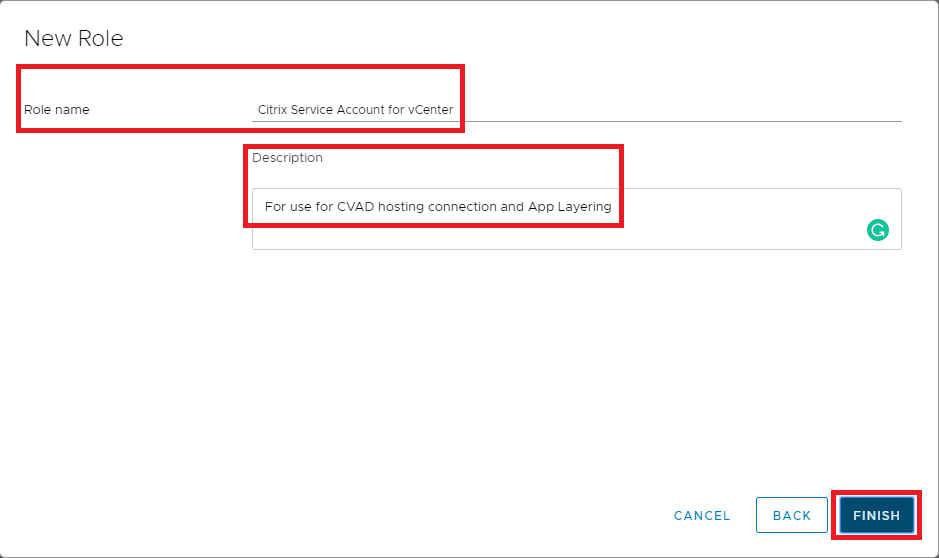
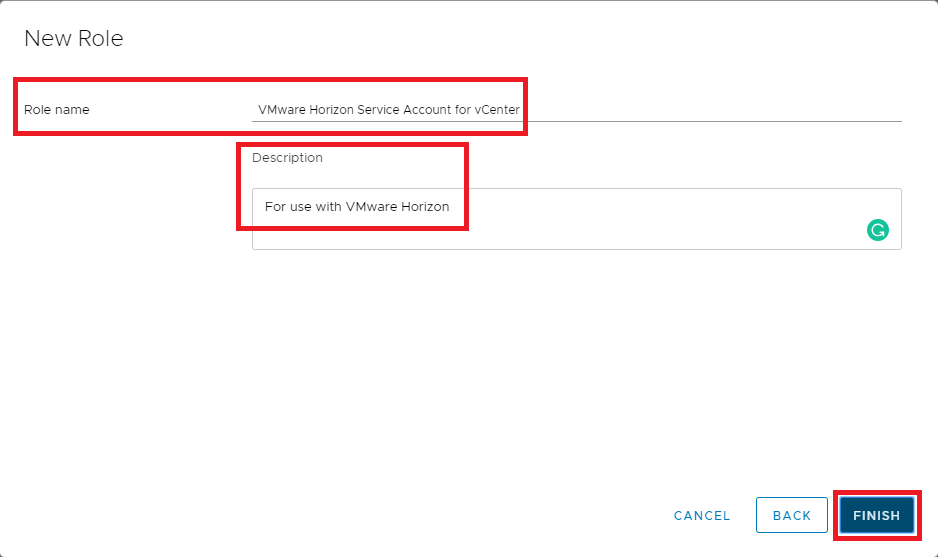
Enter a Role name and an optional Description, click Finish, as shown in Figure 24.
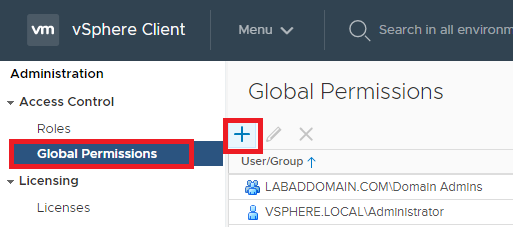
Click Global Permissions and click the + (Plus sign), as shown in Figure 25.
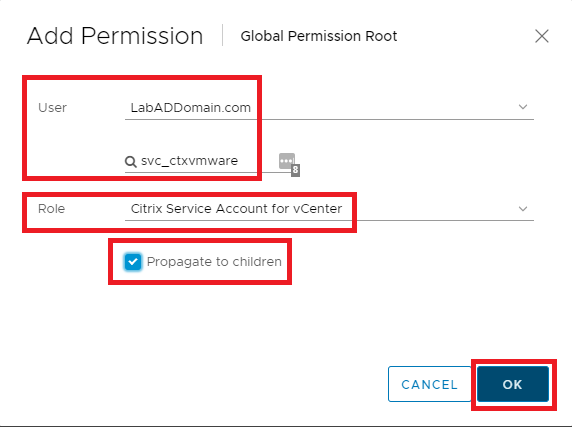
Select your AD domain in the User dropdown, then enter the service account name, select the just created Role, you must select Propagate to children, and click OK, as shown in Figure 26.
To test the new service account, launch Citrix Studio, and either create a new Hosting Connection or run through the Site creation wizard (what I am doing), as shown in Figure 27.
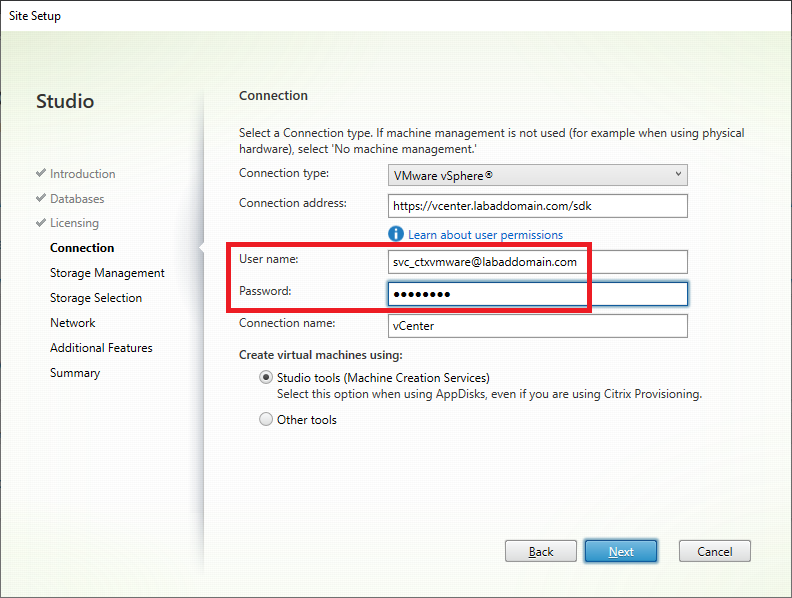
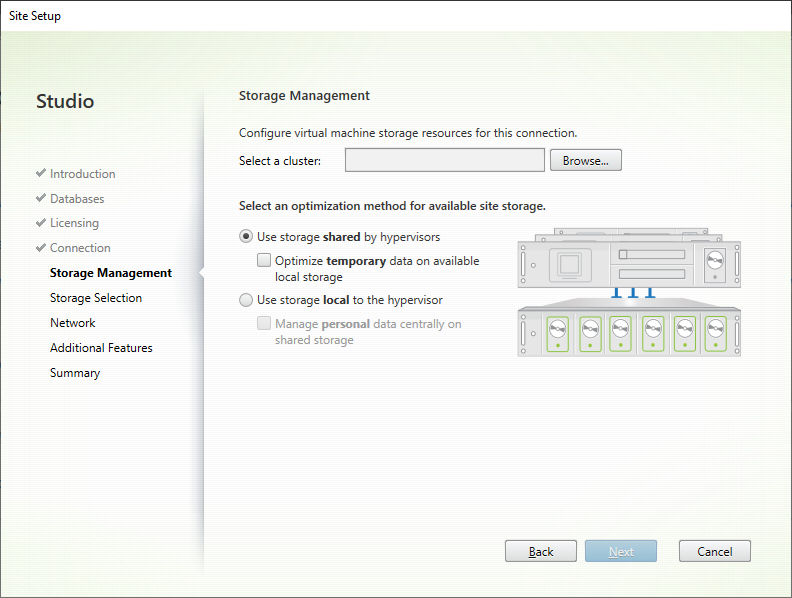
Clicking Next tests whether the service account has the required permissions. If the account does not, an error message stating “The user does not have the required permissions on the hypervisor”. If the service was set up correctly in vCenter, the wizard continues to the Storage Management screen, as shown in Figure 28.
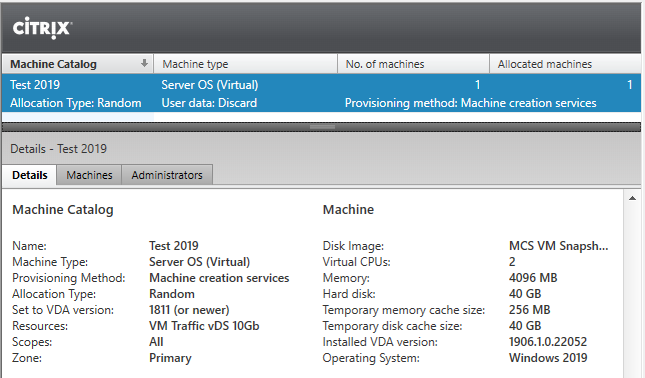
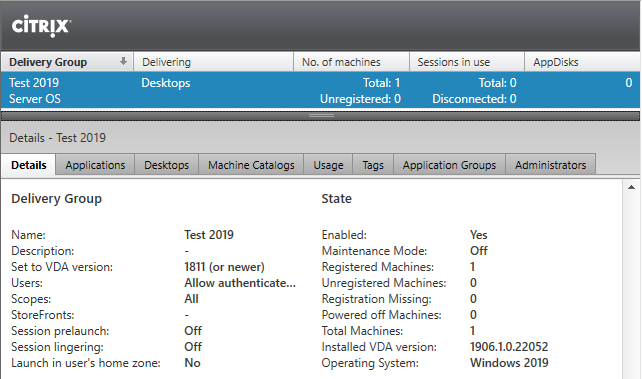
Once, creation of the new Hosting Connection or initial Site succeeds, test creating a Machine Catalog to verify the service account works, as shown in Figures 29 and 30.
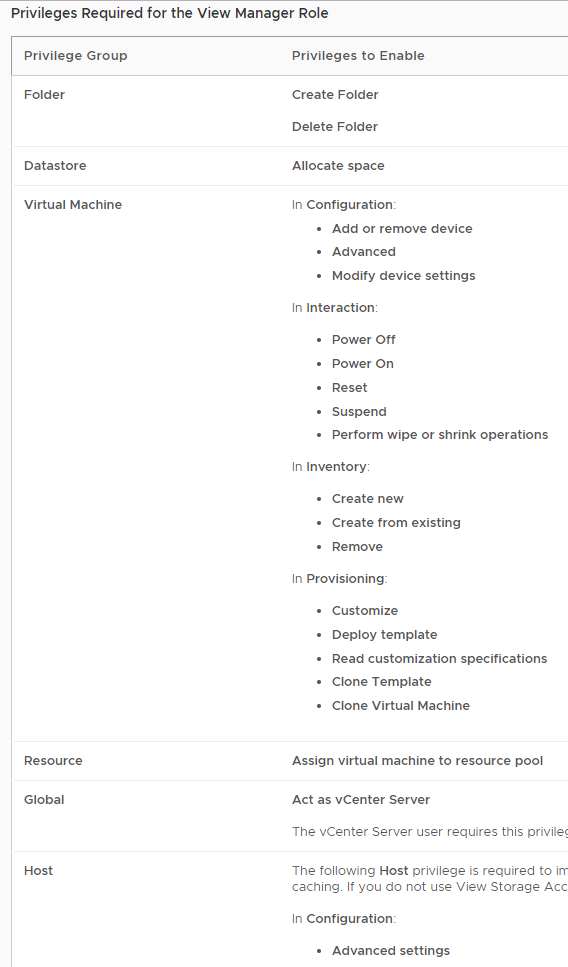
VMware lists their required permissions for Horizon at Privileges Required for the vCenter Server User.
Figure 31 shows the required permissions for the VMware Horizon service account.
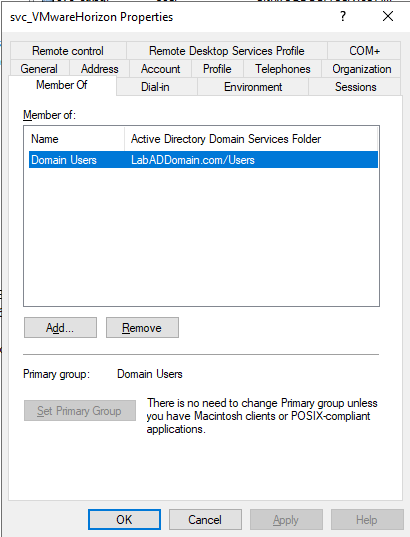
First, I created a regular domain user account in AD, as shown in Figures 32 and 33.

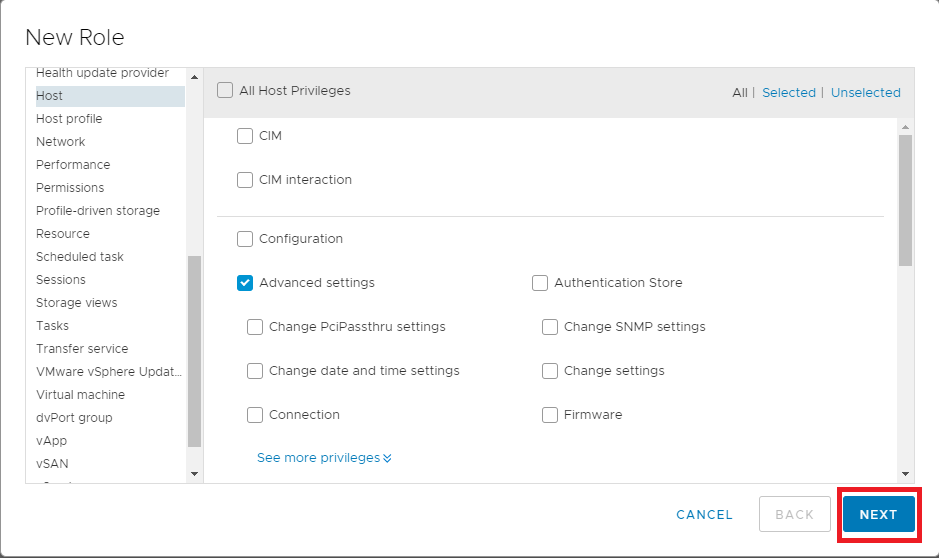
Expand Access Control, click Roles, and click the + (Plus sign), as shown in Figure 34.

The hard part is going through all the settings in Figure 31 and selecting the required permissions, as shown in Figure 35.
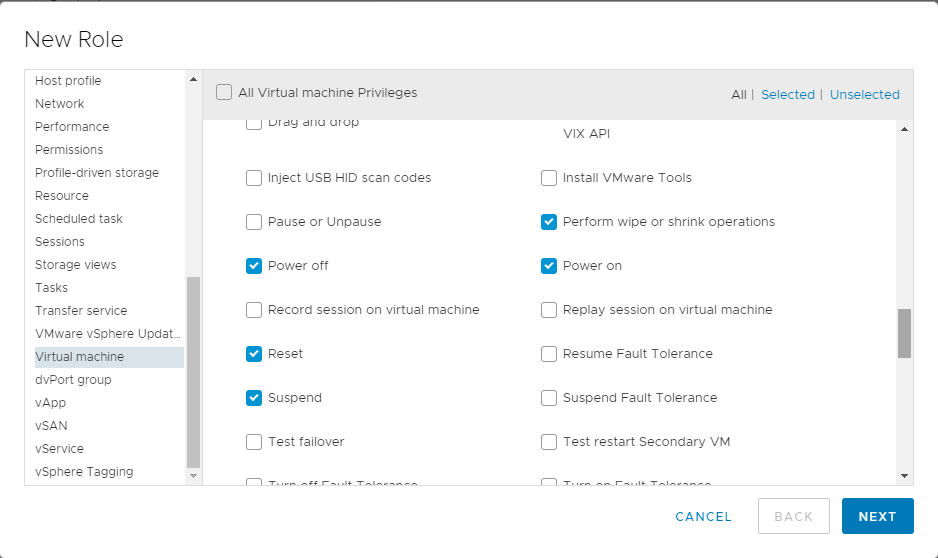
Continue selecting the required permissions. When all permissions are selected, click Next, as shown in Figure 36.
Enter a Role name and an optional Description, click Finish, as shown in Figure 37.
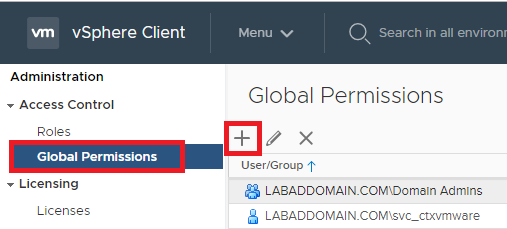
Click Global Permissions and click the + (Plus sign), as shown in Figure 38.
Select your AD domain in the User dropdown, then enter the service account name, select the just created Role, you must select Propagate to children, and click OK, as shown in Figure 39.
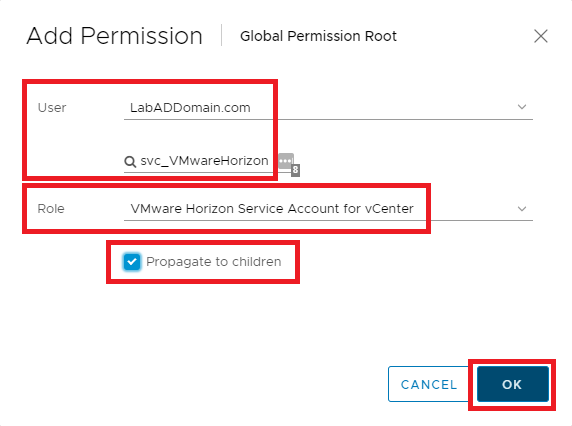
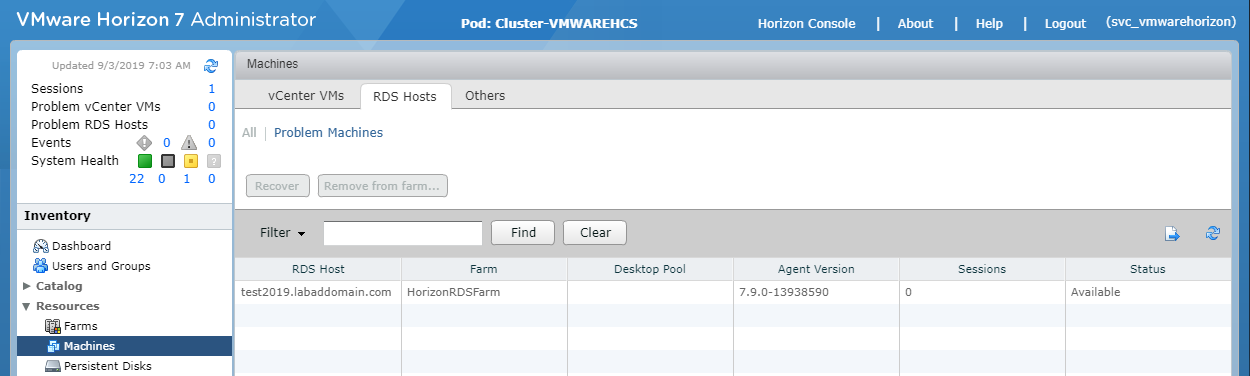
Figure 40 shows the service account logged in to the VMware Horizon 7 Administrator Console.
New Stuff
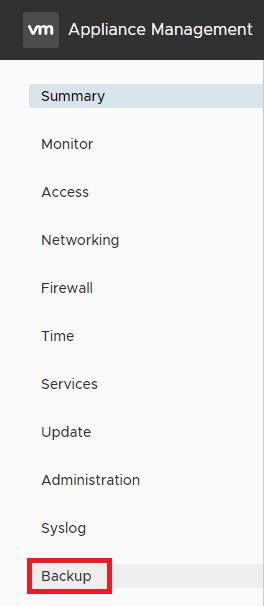
Backup the vCenter Server Appliance
One of the new things covered is updating the vCenter Server Appliance (VCSA). Before updating the appliance, VMware recommends making a backup of the VCSA.
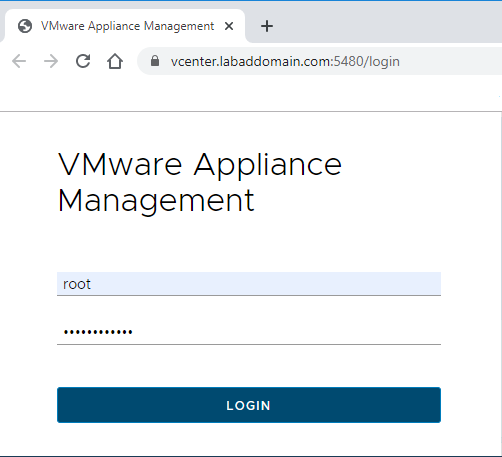
In your web browser, go to the VCSA management interface, https://VCSA-ip-address-or-fqdn:5480, as shown in Figure 41.

Login as root using the password created during the install of the VCSA as shown in Figures 42 and 43.
Click Backup as shown in Figure 44.
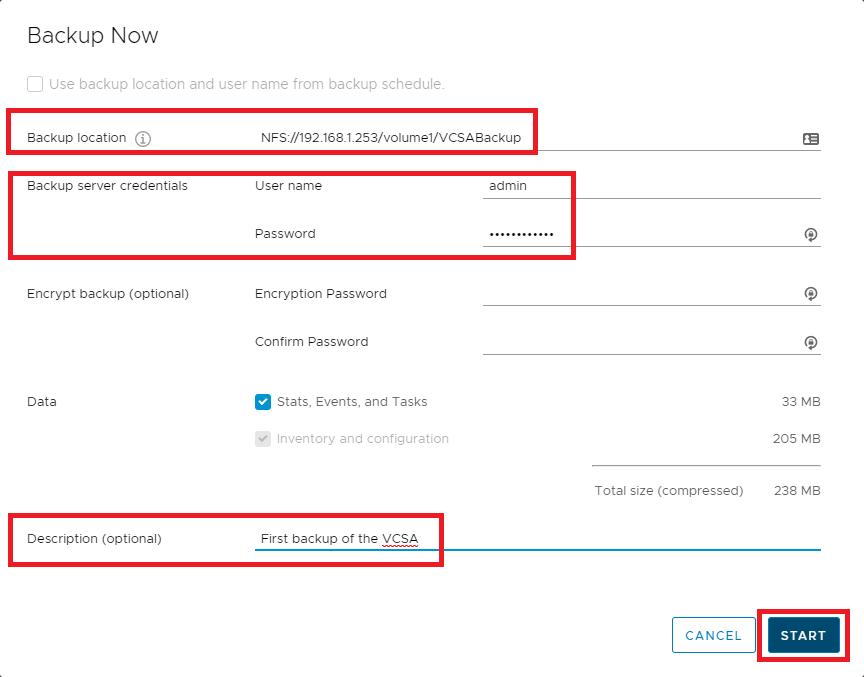
Click BACKUP NOW as shown in Figure 45.
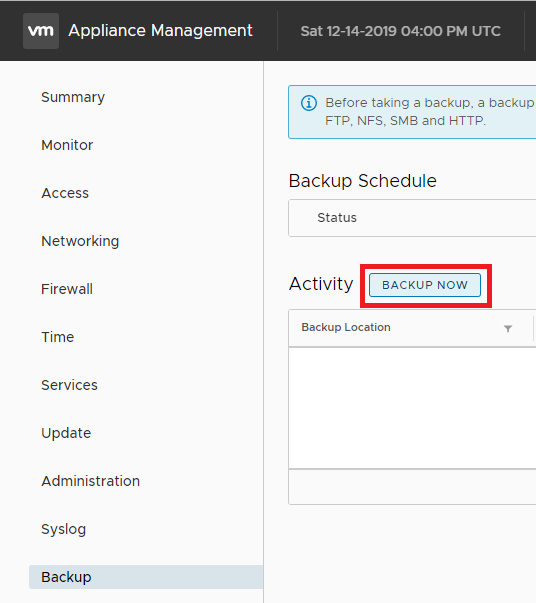
Enter the following information:
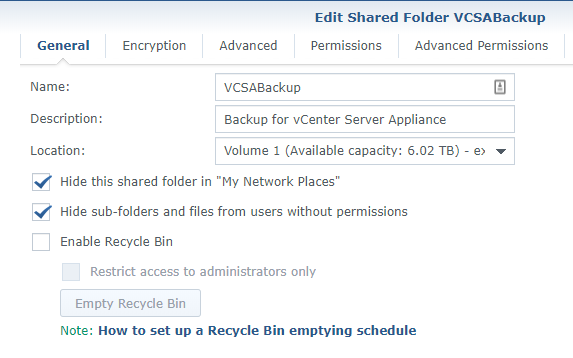
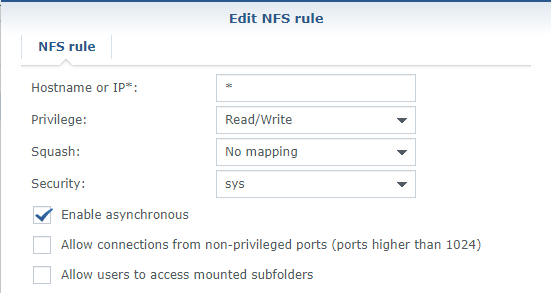
- The Backup location (I created an NFS share on my Synology NAS as shown in Figures 46 and 47)
- The credentials to access the Backup location
- Optional, credentials to encrypt the backup
- Optional, enter a description
- Click Start to start the backup process, as shown in Figure 48
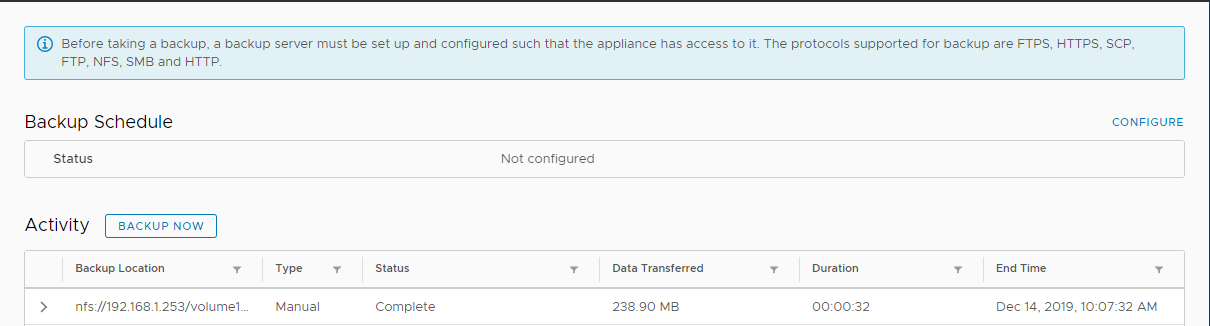
The completed backup is listed under Activity, as shown in Figure 49.
Update the VCSA
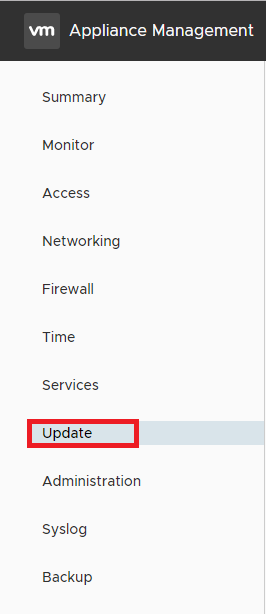
In the left pane, click Update as shown in Figure 50.
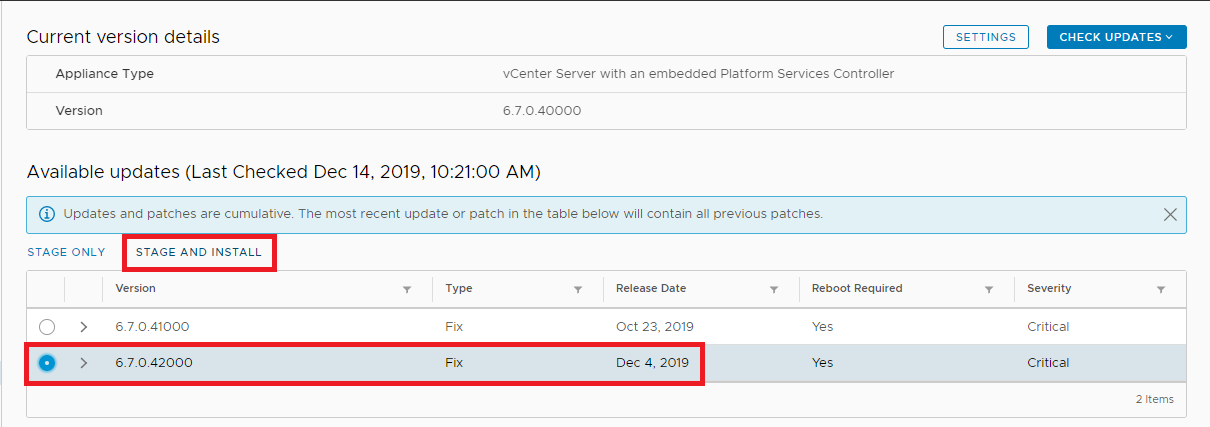
As noted on the Update screen, VCSA updates are cumulative.
Select the most recent update available and click STAGE AND INSTALL, as shown in Figure 51.
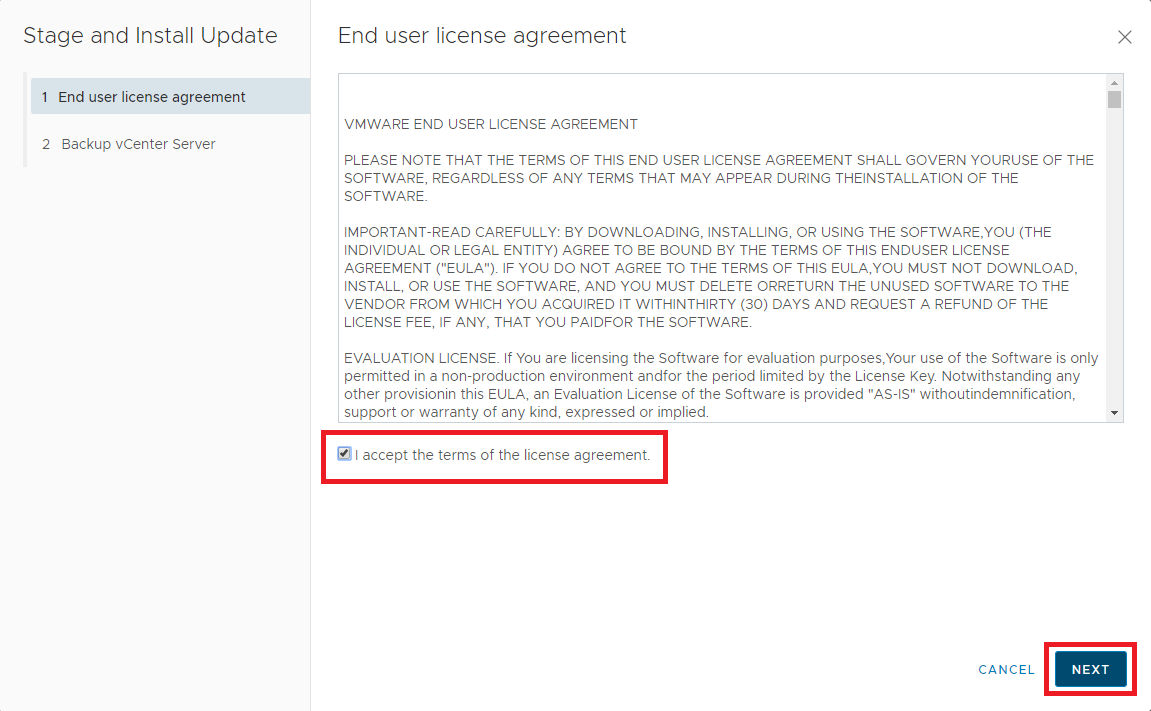
Select I accept the terms of the license agreement and click Next as shown in Figure 52.
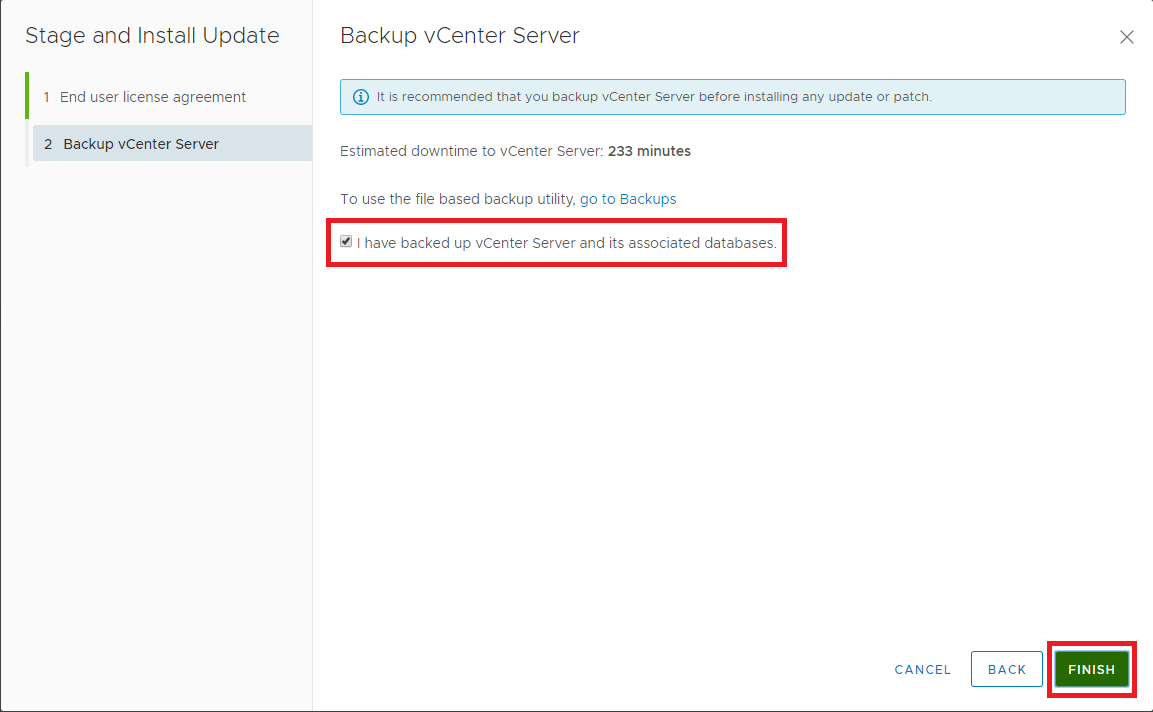
Select I have backed up vCenter Server and its associated databases and click Finish as shown in Figure 53.
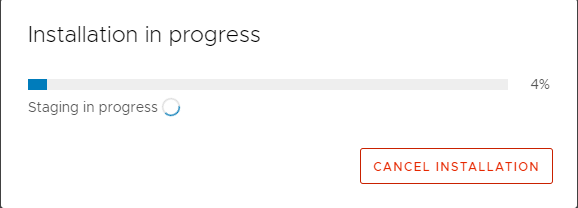
The Staging and Installation begin, as shown in Figure 54.
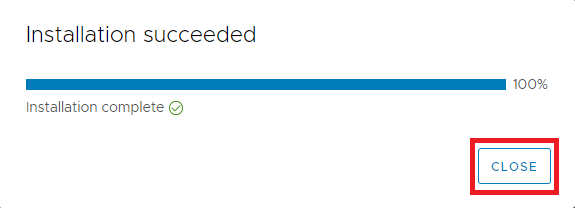
After about 10 to 20 minutes, you should be able to log in to the VCSA appliance management interface. The Installation shows success, as shown in Figure 55. Click Close.
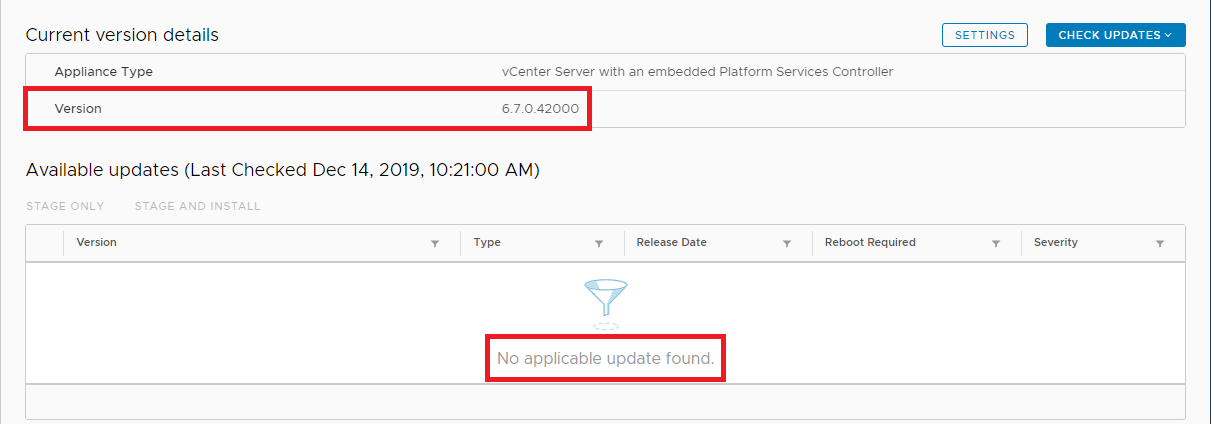
On the Update screen, you will see the VCSA’s current version and no Available updates, as shown in Figure 56.
Exit the VCSA management interface.
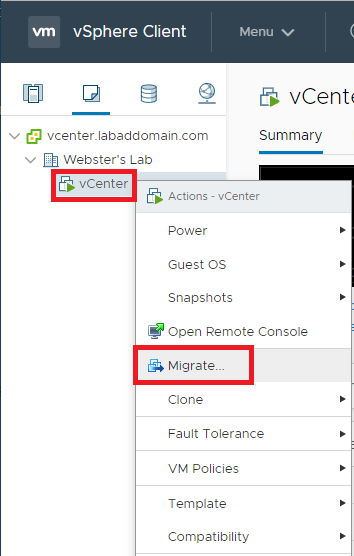
Move the VCSA to Shared Storage
The VCSA was installed in local storage. It can be migrated to shared storage now.
Log in to the VCSA.
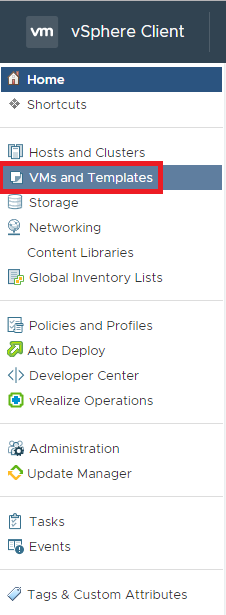
From the Home menu, click VMs and Templates, as shown in Figure 57.
Right-click on the VCSA VM and click Migrate, as shown in Figure 58.
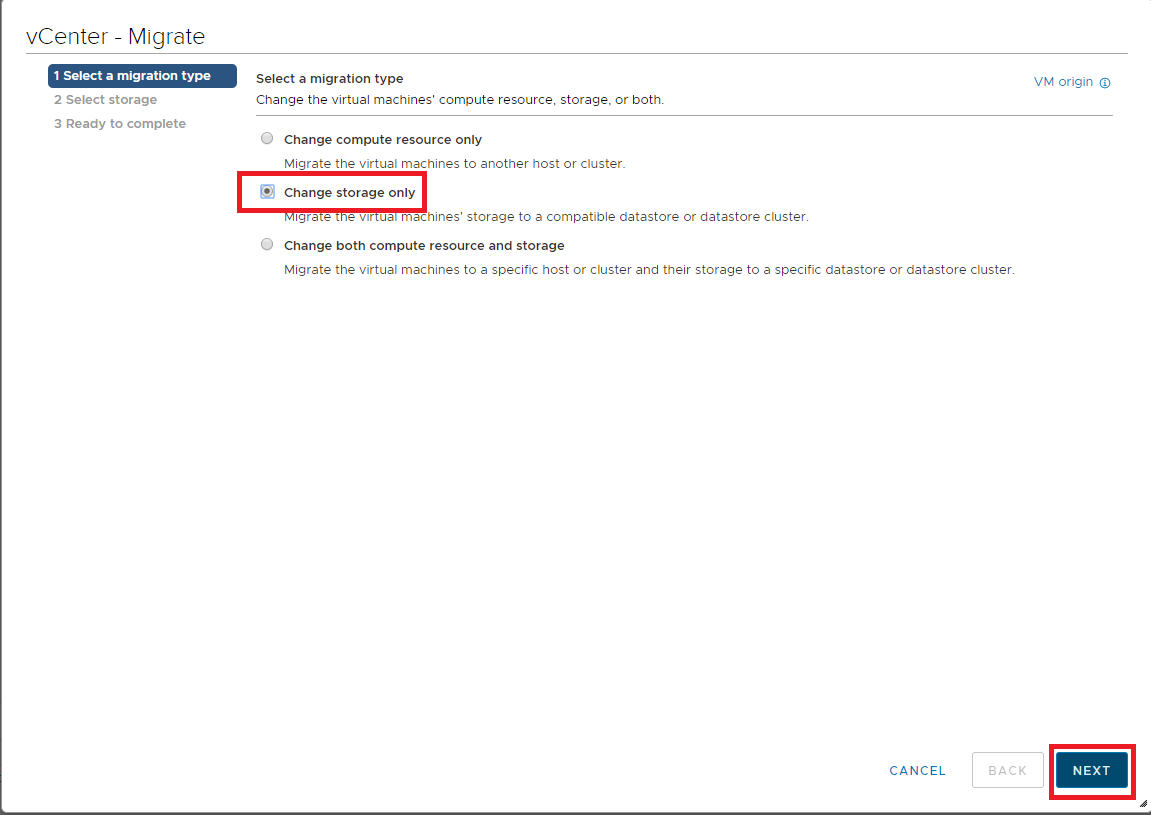
Select Change storage only and click Next, as shown in Figure 59.
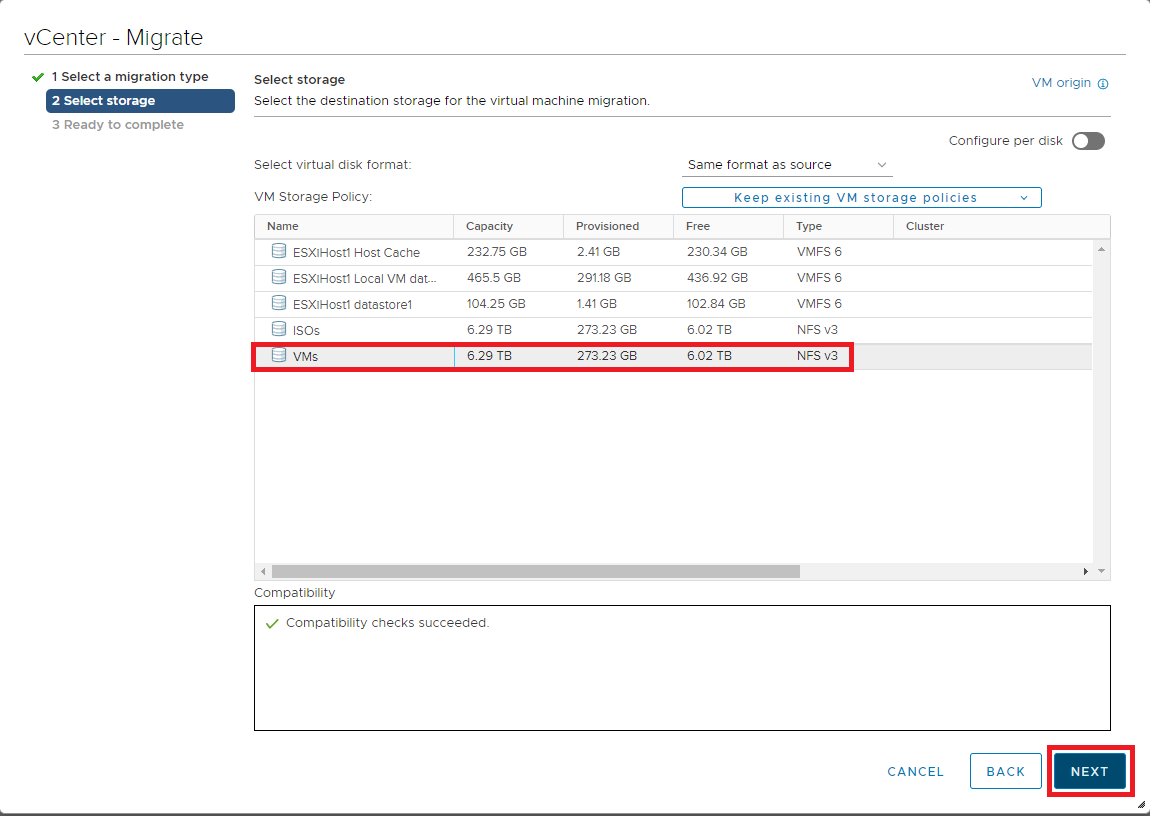
Select the NFS datastore for the VMs, verify the compatibility checks succeeded, and click Next as shown in Figure 60.
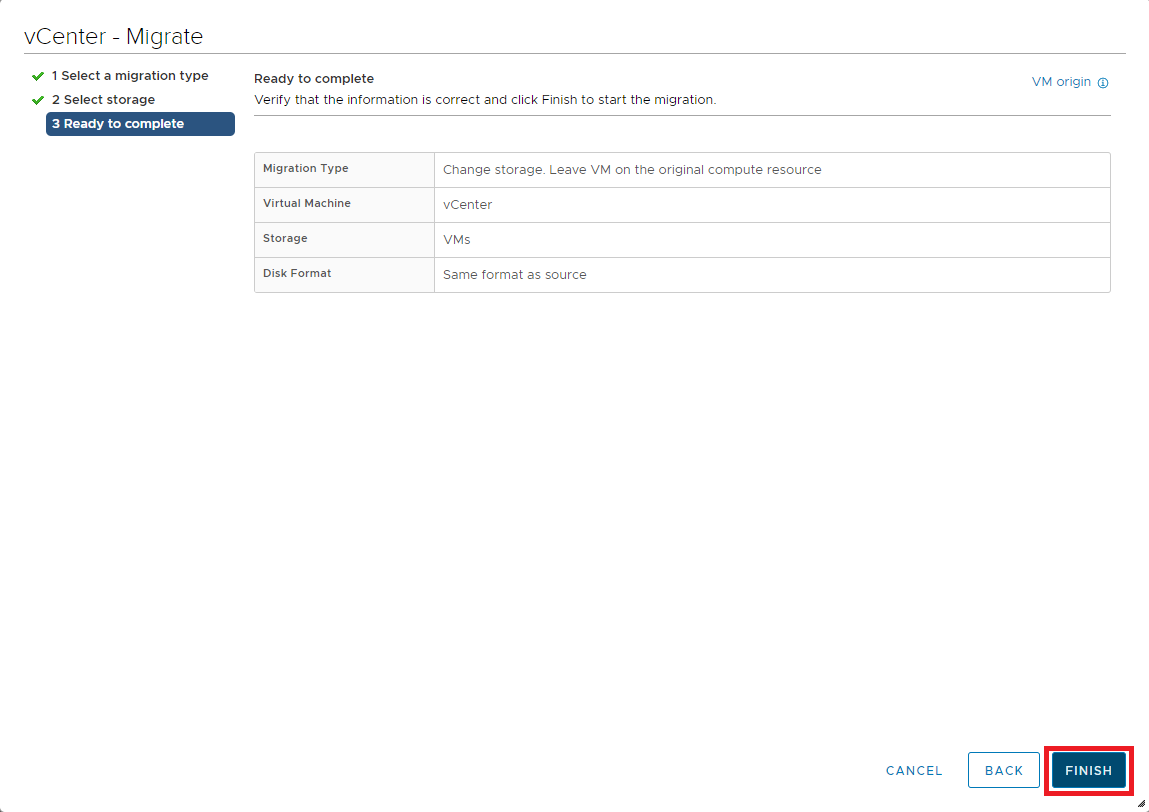
Click Finish, as shown in Figure 61.
The VM storage vMotion starts, as shown in Figure 62.

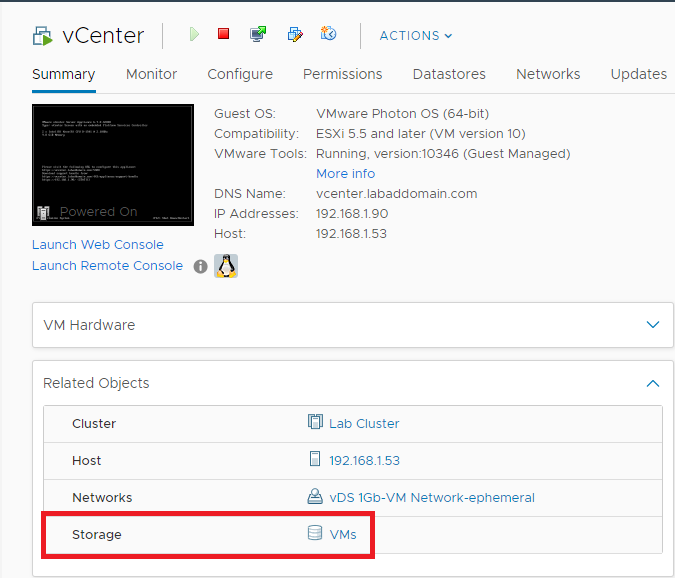
When the storage vMotion completes, as shown in Figure 63, the VCSA VM Summary shows the Storage as the shared datastore, as shown in Figure 64.

Up next: Install Citrix XenServer 8.0
Excellent Information, very useful. Thank you very much carl