[Updated 8-Nov-2021]
The next step is to create an additional management server VM from the Server 2019 template. We use the VM built in this article for an additional infrastructure server. My lab’s infrastructure VMs reside in my XenServer pool, as explained in the Introduction article. Building a server VM from the Server 2019 template was covered earlier.
From the introduction article, this is the VM we are building.
| Name | Description | IP Address |
| LabGoliath | Goliath Technologies Server | 192.168.1.208 |
Follow the process covered earlier to build the server above, but do not power on the server. Before we power on the new server, we need to verify that the hardware meets Goliath Technologies’ (Goliath) requirements.
Request Trial
Goliath offers end-user experience monitoring and troubleshooting software with embedded intelligence and automation that enables IT pros to anticipate, troubleshoot, and document performance issues regardless of the location of workloads, applications, or users.
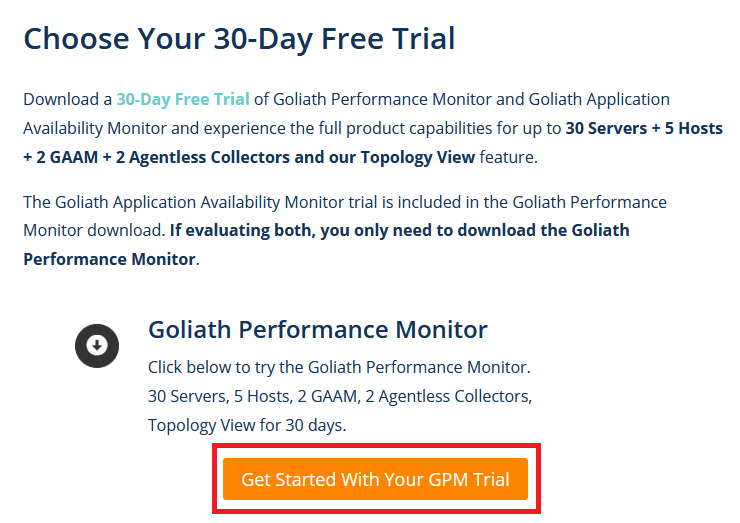
To receive a free trial of Goliath, use your internet browser and browse to https://goliathtechnologies.com/ and click on Free Trial, as shown in Figure 1.

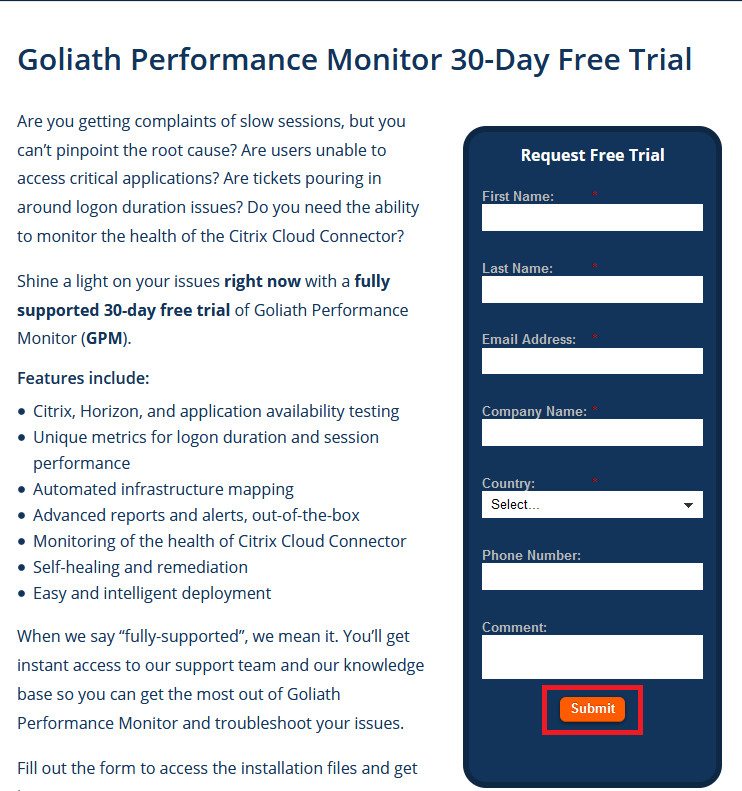
Click Get Start With Your GPM Trial, as shown in Figure 2.
Fill in the requested information and click Submit, as shown in Figure 3.
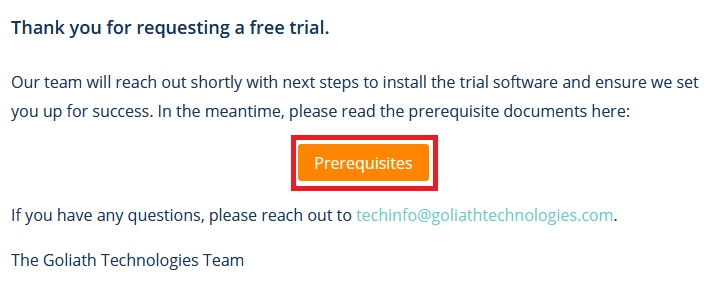
While waiting on the email to arrive, click Prerequisites, as shown in Figure 4.
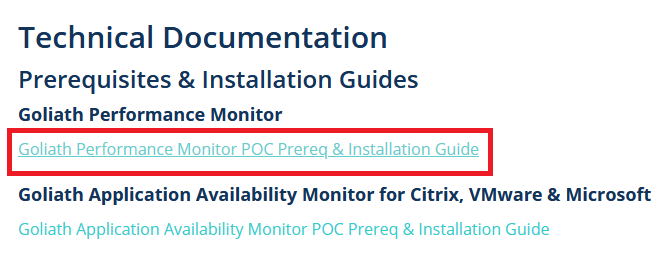
Click the link for Goliath Performance Monitor POC Prereq & Installation Guide, as shown in Figure 5.
When the PDF opens, scroll down to Goliath Performance Monitor Prerequisites, as shown in Figures 6 and 7.
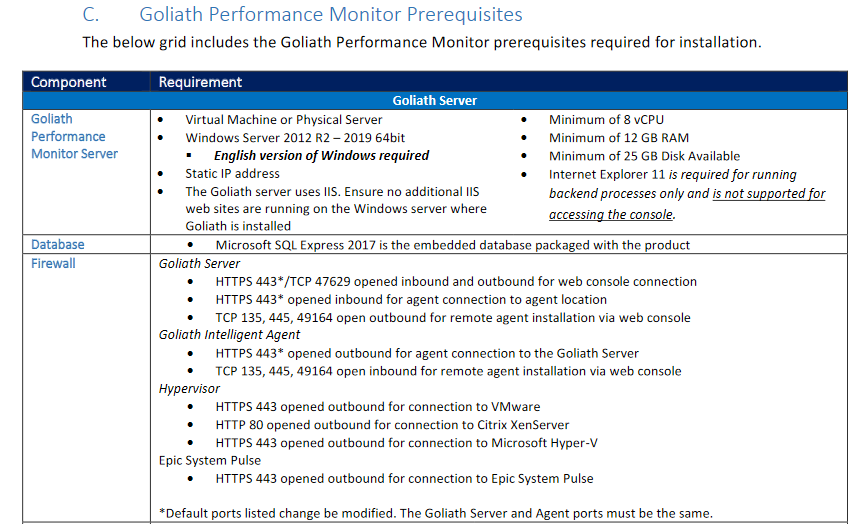

From this information, we learn the following about the Goliath server’s VM:
- It needs a static IP address
- Increase the vCPUs to 8
- Increase the RAM to 12GB
- Requires the installation of an additional internet browser
- Requires Windows firewall configuration
- Requires Windows Defender configuration
Further down the PDF, there are also Windows Defender exclusions for the computers the Goliath monitors.
Following the process used for the other lab servers built, create a new VM from the Server 2019 template and do not power it on.
Change CPU and RAM
VMware
In vCenter, right-click the LabGoliath VM, click Edit Settings…, and change the CPU and Memory settings, as shown in Figure 8.
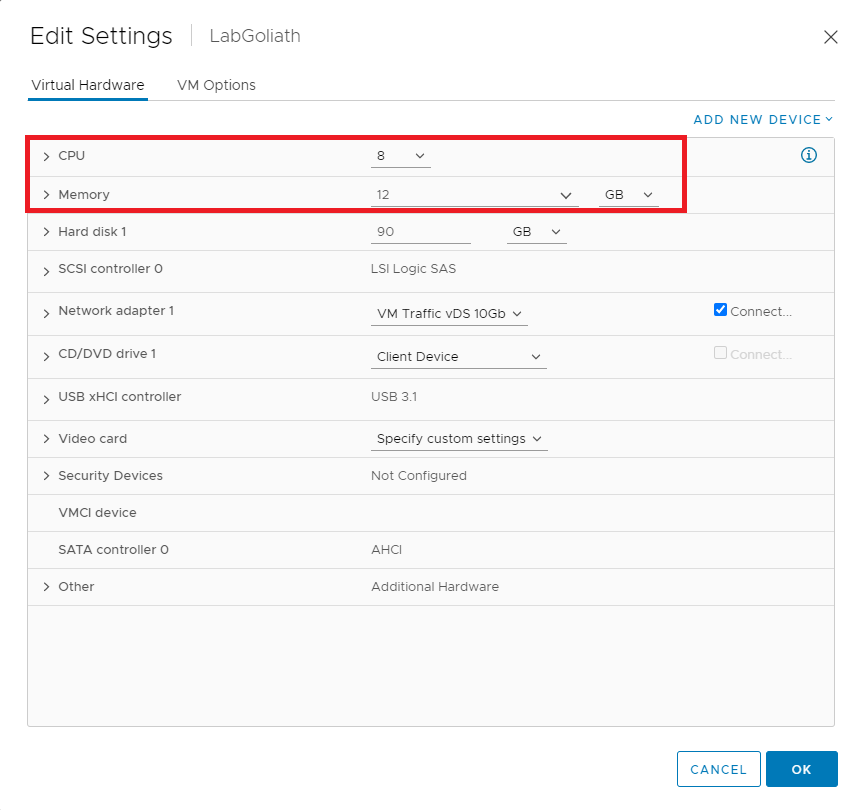
Power on the VM, enter the required hostname, enter the required IP address information, and install all Windows Updates.
XenServer
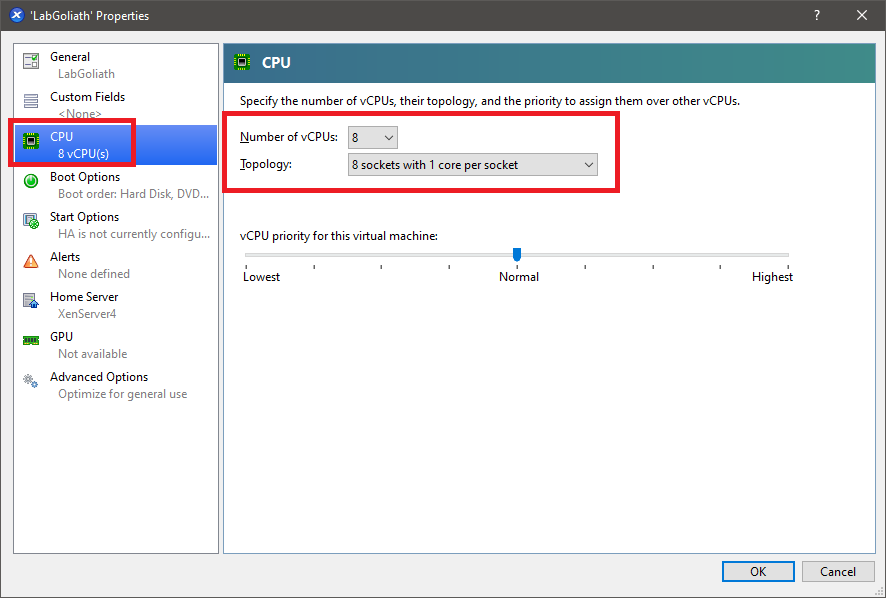
In the Properties for the LabGoliath VM, change the CPU to 8, as shown in Figure 9.
Click the Memory tab and click Edit…, as shown in Figure 10.
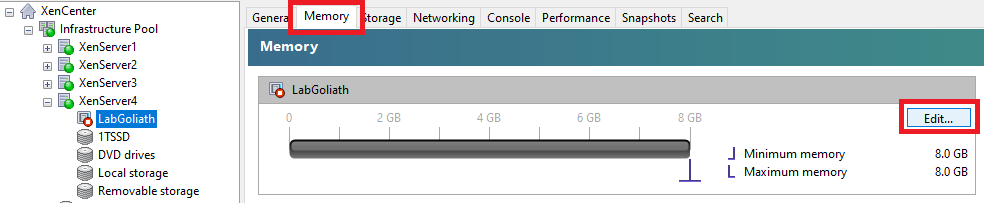
Select Set a fixed memory of and change the value to 12.0, as shown in Figure 11.

Power on the VM, enter the required hostname, enter the required IP address information, and install all Windows Updates.
Active Directory
We need to join our Goliath server to the domain.
First, we need to create an OU.
If you remember, when we created Active Directory in Part 14, I placed all my infrastructure servers in a specific OU.
Lab
Infrastructure
We place the Goliath server in an OU to apply GPOs for Windows Firewall and Windows Defender configurations.
Lab
Infrastructure
Goliath
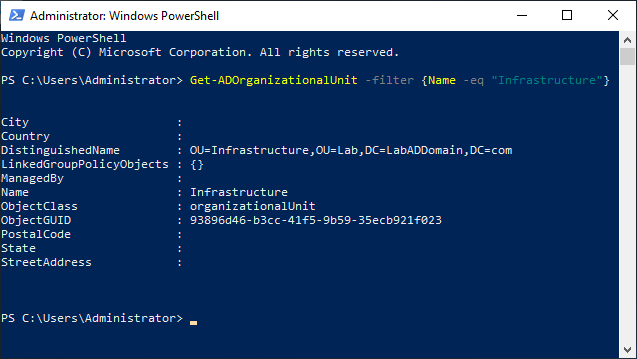
From the lab’s management computer, start an elevated PowerShell session and type in the following, as shown in Figure 12.
Get-ADOrganizationalUnit -filter {Name -eq "Infrastructure"}
Create the Goliath OU.
Copy and paste the following into the elevated PowerShell session and press Enter, as shown in Figure 13.
Remember to set the values you need.
Note: Lines may wrap
#create the Goliath OU

$ADDomain = "LabADDomain"
$TLD = "com"
$Protect = $True

New-ADOrganizationalUnit -Name "Goliath" `
-Path "ou=Infrastructure,ou=Lab,dc=$ADDomain,dc=$TLD" `
-ProtectedFromAccidentalDeletion $Protect -verbose

Get-ADOrganizationalUnit -filter {Name -eq "Goliath"}
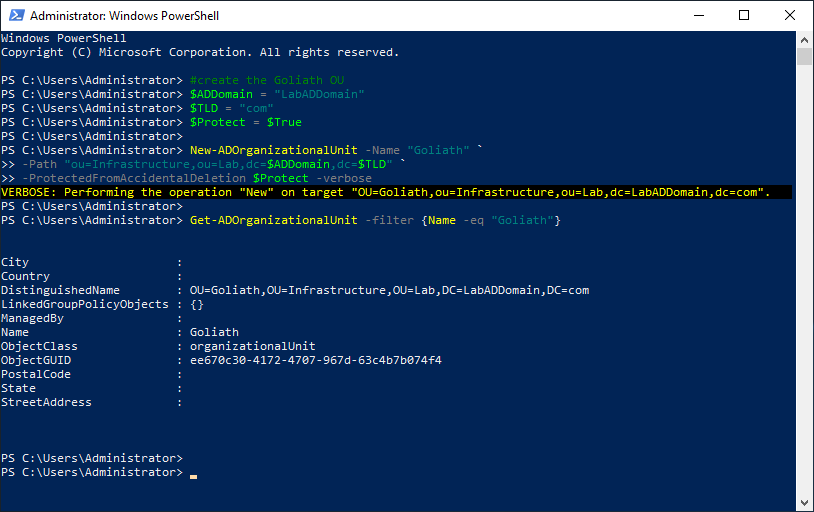
Copy the DistinguishedName property to the clipboard.
LabGoliath Server Work
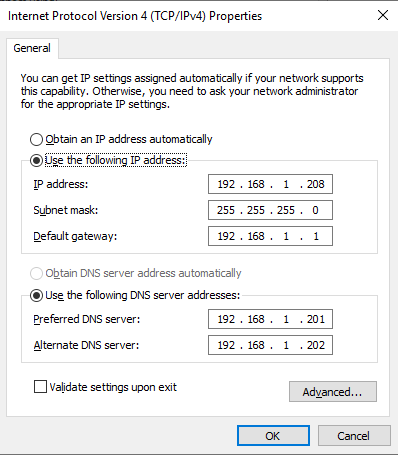
Verify that the server has a static IP address and uses the IP addresses of the domain controllers for the DNS servers, as shown in Figure 14.
Verify that the server has the correct hostname, as shown in Figure 15.

Use mstsc to remote into the VM that is our Goliath server.
Exit Server Manager and start an elevated PowerShell session.
Copy and paste the following into the elevated PowerShell session and press Enter. The process took less than the blink of an eye to happen, which is why there is no screenshot.
Remember to set the values you need.
Note: Lines may wrap
#Join the computer to the domain

add-computer -Credential LabADDomain\Administrator `
-DomainName "LabADDomain.com" `
-OUPath "OU=Goliath,OU=Infrastructure,OU=Lab,DC=LabADDomain,DC=com" `
-Force `
-Restart

#server reboots
After the VM restarts, log in using the domain’s Administrator account and password.
Now to install the server certificate from the CA.
Save the following to a file name c:\CertFiles\computer-request.inf.
I want to thank Michael B. Smith for creating this INF file for me.
Use the data needed for your environment.
LabGoliath                = the name of your Goliath server
LabADDomain.com           = your domain name
"LabCA\LabDomain CA Root" = the name of your CA server and the name of your CA.

;----------------- computer-request.inf -----------------
; LabGoliath.LabADDomain.com
;
; certreq -new computer-request.inf computer-request.req
; certreq -submit -config "LabCA\LabDomain CA Root" computer-request.req computer-request.cer
; certreq -accept -config "LabCA\LabDomain CA Root" computer-request.cer
;

[Version]
Signature="$Windows NT$"

[NewRequest]
Subject = "CN=LabGoliath.LabADDomain.com" ; replace with the FQDN of the File Server
FriendlyName = "Computer (Machine) for LabGoliath.LabADDomain.com"
KeyLength = 2048
; Can be 1024, 2048, 4096, 8192, or 16384.
; Larger key sizes are more secure, but have
; a greater impact on performance.
KeySpec = 1                     ; AT_KEYEXCHANGE
Exportable = TRUE               ; private-key is exportable
MachineKeySet = TRUE            ; goes in machine store instead of user's personal store
SMIME = False                   ; cannot be used for signing S/MIME messages
PrivateKeyArchive = FALSE
HashAlgorithm = sha256          ; "certutil -oid 1 | findstr pwszName" -- gives a list (including sha1)
UserProtected = FALSE
UseExistingKeySet = FALSE       ; we are not renewing a key that already exists
ProviderName = "Microsoft RSA SChannel Cryptographic Provider"
ProviderType = 12               ; for ProviderName and ProviderType, see "certutil -csplist"
RequestType = PKCS10            ; if empty or set to "CERT" then a self-signed cert is created
KeyUsage = 0xa0                 ; 0xa0 - CERT_DIGITAL_SIGNATURE_KEY_USAGE + CERT_KEY_ENCIPHERMENT_KEY_USAGE

[EnhancedKeyUsageExtension]
OID=1.3.6.1.5.5.7.3.1 ; this is for Server Authentication - PKIX_KP_SERVER_AUTH

[Extensions]
; Note: 2.5.29.17 is the OID for a SAN extension.

2.5.29.17 = "{text}"
_continue_ = "dns=LabGoliath.LabADDomain.com"

[RequestAttributes]
CertificateTemplate = "Server Template"

;-----------------------------------------------
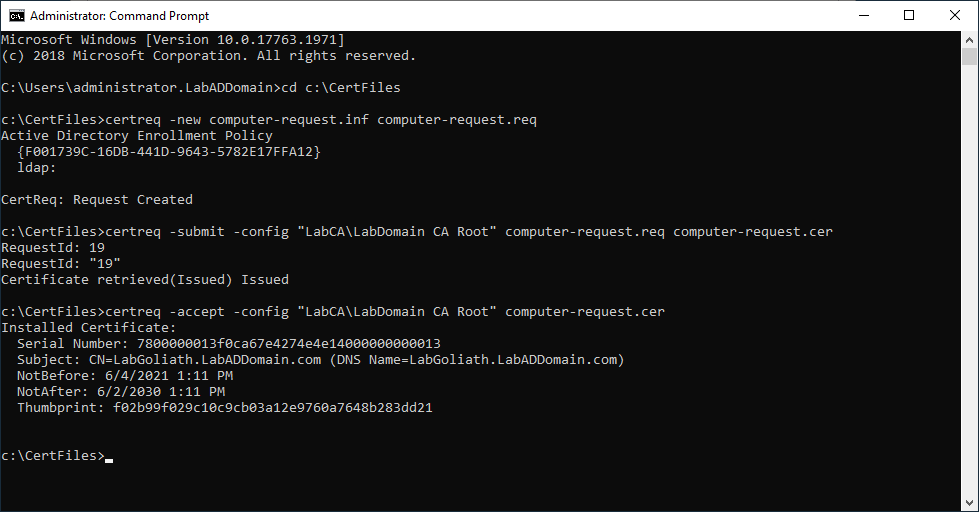
Open an elevated command prompt.
Type in cd c:\CertFiles and press Enter.
The three commands we need to run are at the top of the computer-request.inf file.
Type in notepad computer-request.inf and press Enter.
Copy the line certreq -new computer-request.inf computer-request.req, paste it in the elevated command prompt, and press Enter.
Copy the line certreq -submit -config “LabCA\LabDomain CA Root” computer-request.req computer-request.cer, paste it in the elevated command prompt, and press Enter.
Note: If you get a warning similar to the following, you can ignore the warning. The warning tells you that the certificate request validity period is past the lifetime of the CA’s root certificate lifespan.
Certificate retrieved(Issued)Issued The certificate validity period will be shorter than the Server Template Certificate Template specifies because the template validity period is longer than the maximum certificate validity period allowed by the CA. Consider renewing the CA certificate, reducing the template validity period, or increasing the registry validity period.
Copy the line certreq -accept -config “LabCA\LabDomain CA Root” computer-request.cer, paste it in the elevated command prompt, and press Enter.
Figure 16 shows the results of running the certificate request commands.
Install Goliath Performance Monitor
You receive an email similar to the one shown in Figure 17.

Later you receive an email similar to the one shown in Figure 18 with links to download the software.
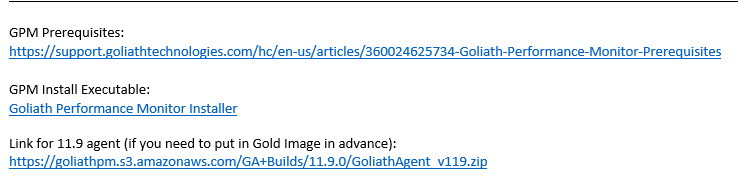
Extract the files to C:\Goliath, as shown in Figure 19.

Double-click GoliathServer.exe.
The install starts, as shown in Figure 20.
Click Next, as shown in Figure 21.
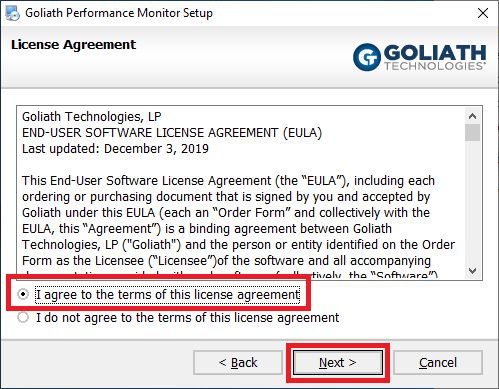
Select I agree to the terms of this license agreement and click Next, as shown in Figure 22.
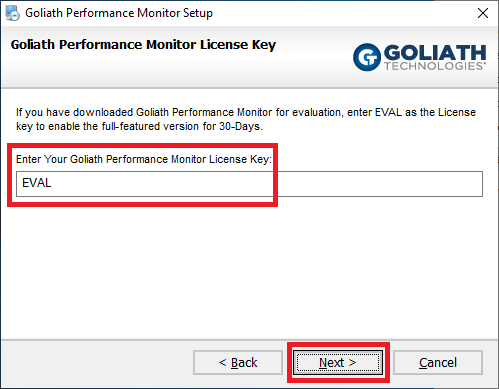
If Goliath sent you a License Key, enter it here and then click Next, as shown in Figure 23. If you do not have a license key, click Next and stay with the 30-day evaluation period.
Verify the Static IP address is correct and click Next, as shown in Figure 24.
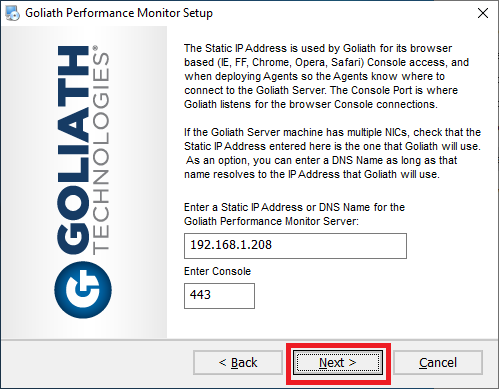
The installer verifies that the TCP Port entered for Enter Console is valid and available.
Click Next, as shown in Figure 25.
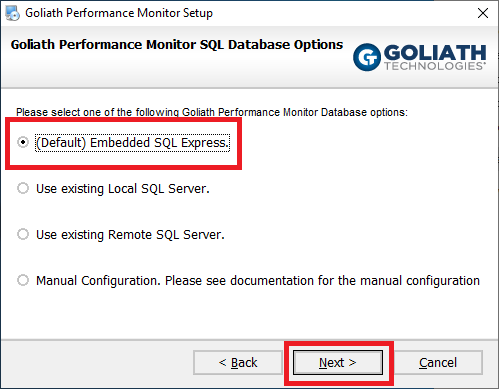
Select (Default) Embedded SQL Express and click Next, as shown in Figure 26.
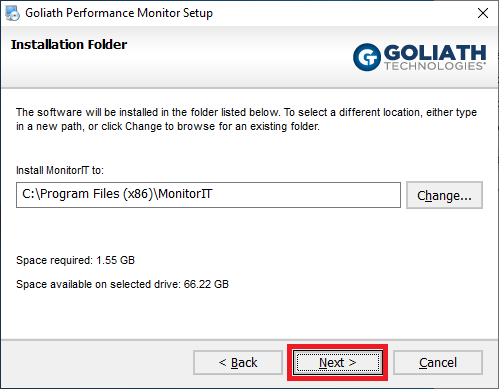
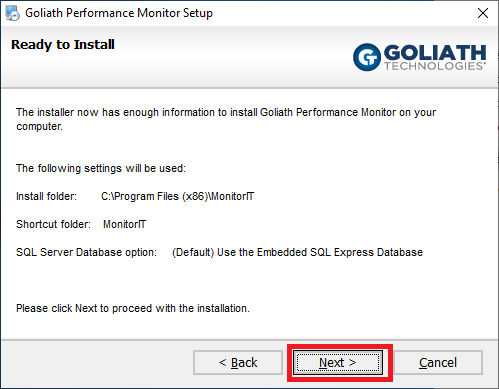
Verify all the information is correct and click Next, as shown in Figure 27. If any information is not correct, click Back, correct the information and continue.
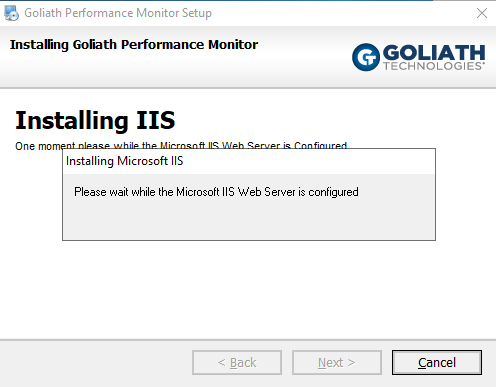
The installation starts, as shown in Figure 28.
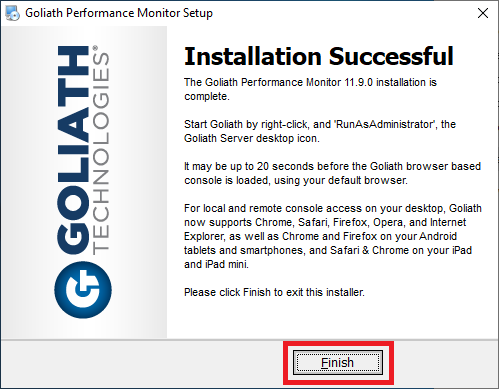
After several minutes (ten minutes in my lab), the installation completes. Click Finish, as shown in Figure 29.
Before continuing, install an additional internet browser. I installed Google Chrome because I could not get the installer for the new Microsoft Edge to work from Internet Explorer 11 (IE11).
The backend Goliath monitor processes require IE11, but Goliath requires a modern browser to use the management console.
GPOs
Before configuring the Goliath Performance Monitor, we need four GPOs created.
- One for the Goliath server Windows Firewall ports
- One for the Goliath server Windows Defender exclusions
- One for the monitored computers Windows Firewall ports
- One for the monitored computers Windows Defender exclusions
On the Lab management computer, open the Group Policy Management Console (GPMC).
In the Group Policy Objects node, create and name four GPOs. For example, I named mine as follows.
- (C) Goliath Windows Defender Exclusions – linked at the domain level, Deny applied to LabGoliath
- (C) Goliath Windows Firewall Ports – linked at the domain level, Deny applied to LabGoliath
- (C) Goliath Server Windows Defender Exclusions – linked to the Goliath OU and applied only to the LabGoliath computer account
- (C) Goliath Server Windows Firewall Ports – linked to the Goliath OU and applied only to the LabGoliath computer account
Let’s work on the (C) Goliath Server Windows Firewall Ports GPO first.
We need the following Windows Firewall ports configured for the server from the Goliath Prereq and Install Guide PDF.
Goliath Server
- HTTPS 443*/TCP 47629 opened inbound and outbound for web console connection
- HTTPS 443* opened inbound for agent connection to agent location
- TCP 135, 445, 49164 open outbound for remote agent installation via web console
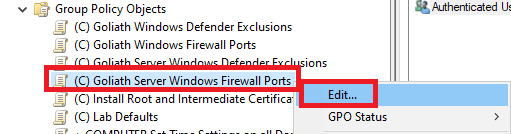
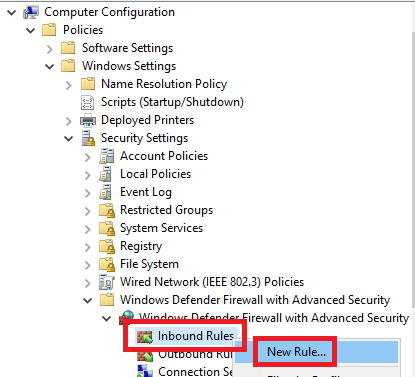
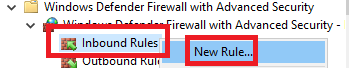
In the GPMC, right-click the (C) Goliath Server Windows Firewall Ports GPO in the Group Policy Object node and click Edit, as shown in Figure 30.
Expand Policies.
Expand Windows Settings.
Expand Security Settings.
Expand Windows Defender Firewall with Advanced Security.
Expand Windows Defender Firewall with Advanced Security.
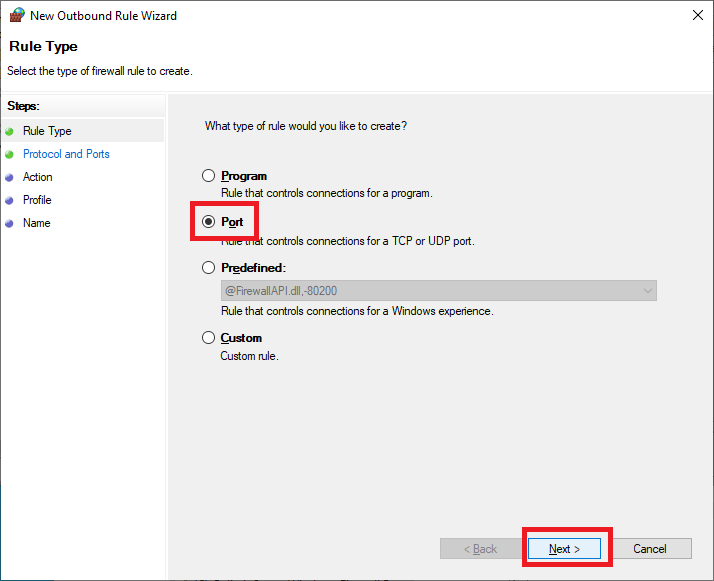
Right-click Inbound Rules and click New Rule…, as shown in Figure 31.
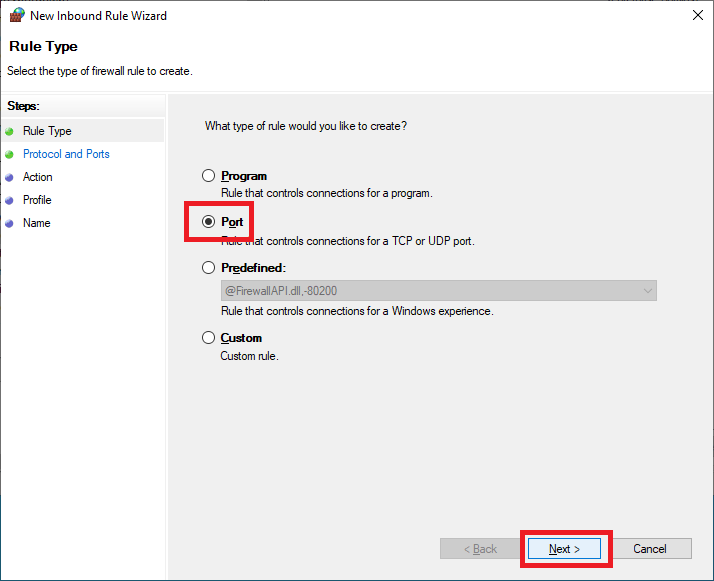
Select Port and click Next, as shown in Figure 32.

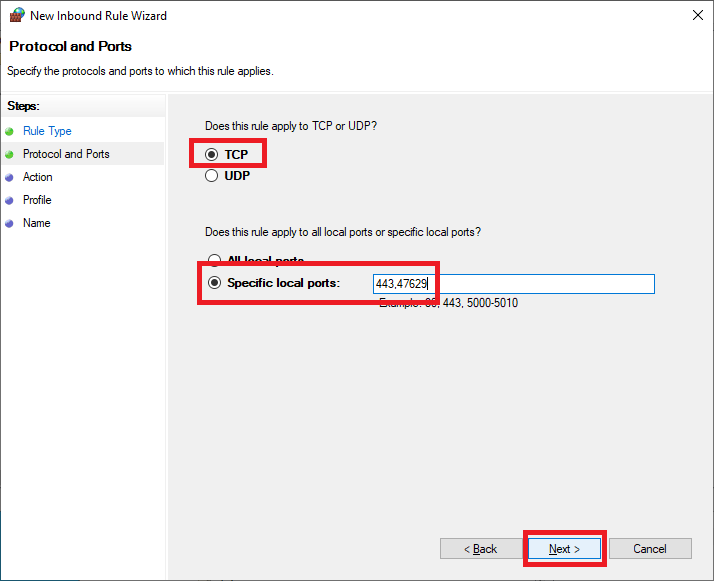
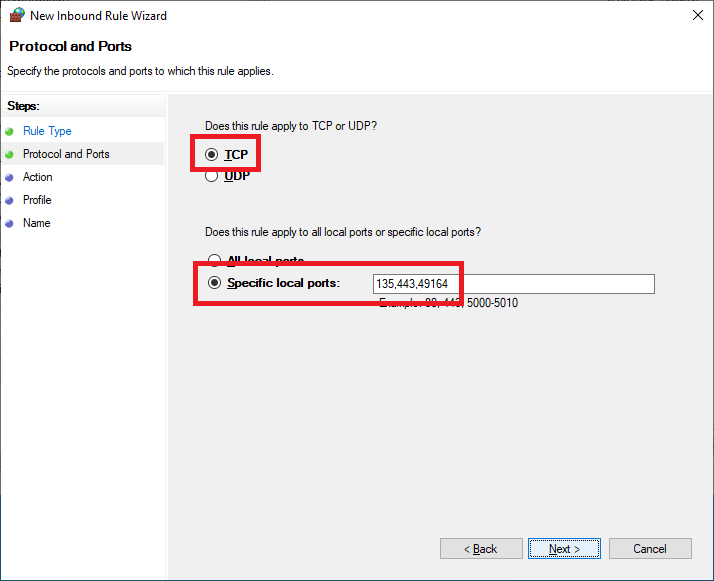
Select TCP, select Specific local ports, enter 443,47629, and click Next, as shown in Figure 33.
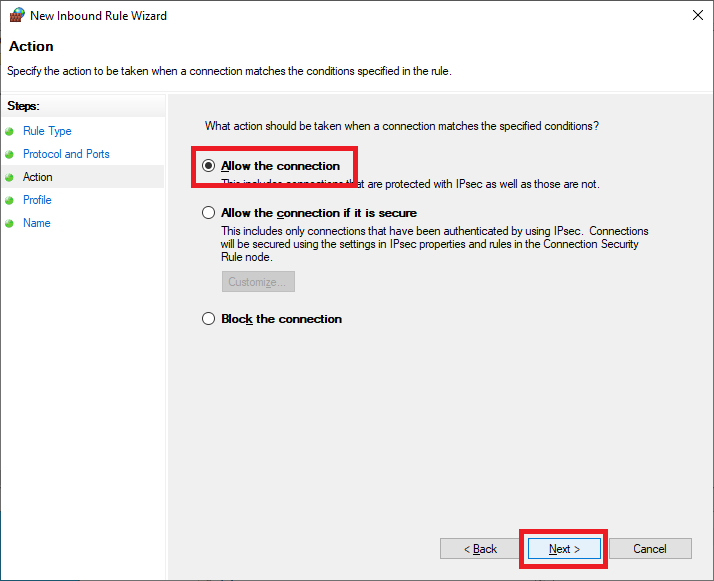
Select Allow the connection and click Next, as shown in Figure 34.
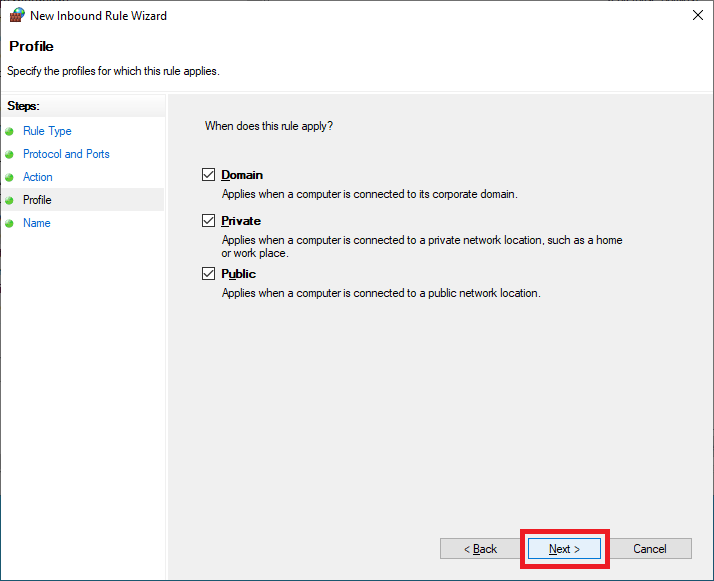
Click Next, as shown in Figure 35.

Enter a Name and click Next, as shown in Figure 36.

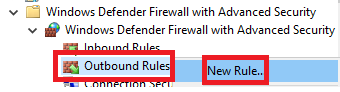
Right-click Outbound Rules and click New Rule…, as shown in Figure 37.
Select Port and click Next, as shown in Figure 38.
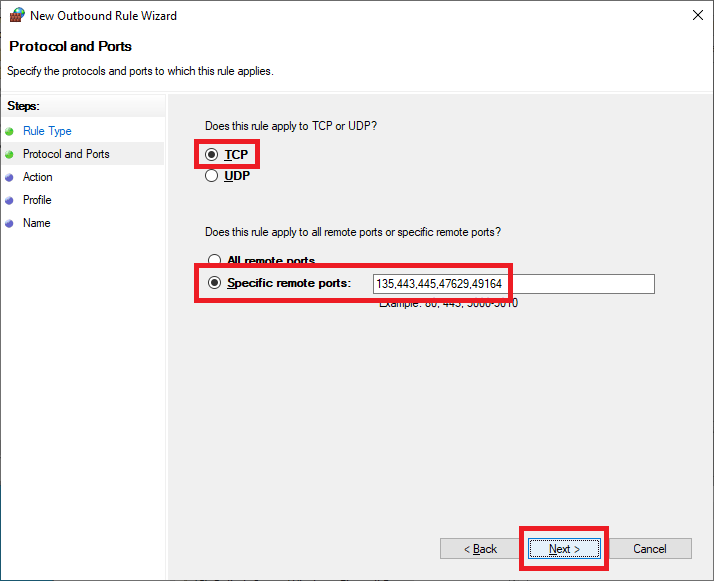
Select TCP, select Specific remote ports, enter 135,443,445,47629,49164, and click Next, as shown in Figure 39.
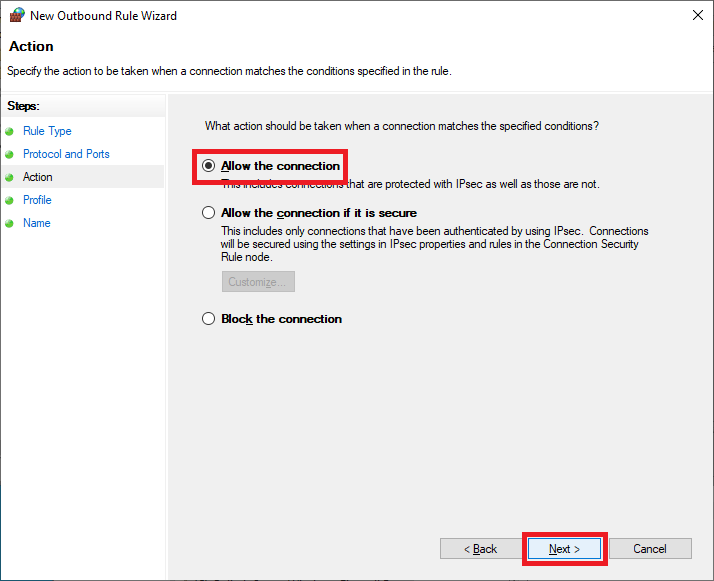
Select Allow the connection and click Next, as shown in Figure 40.
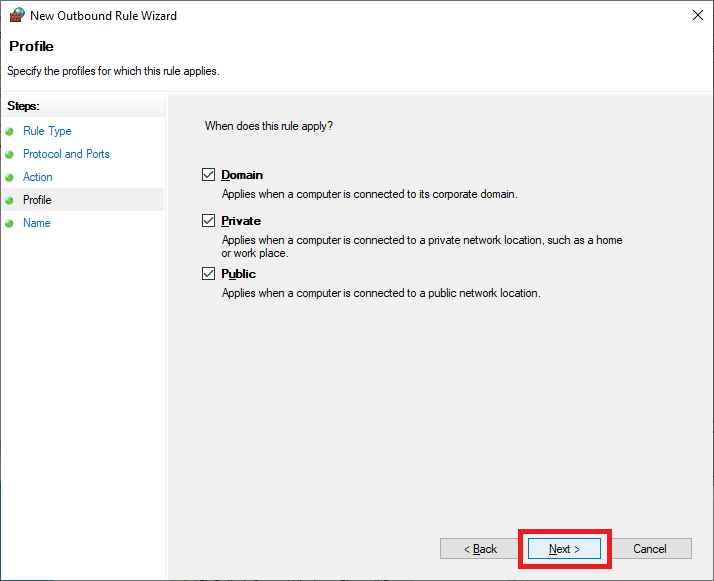
Click Next, as shown in Figure 41.
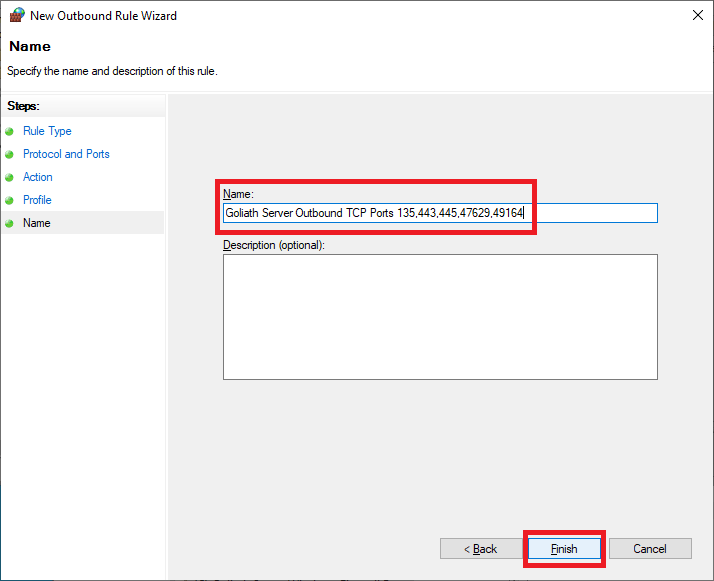
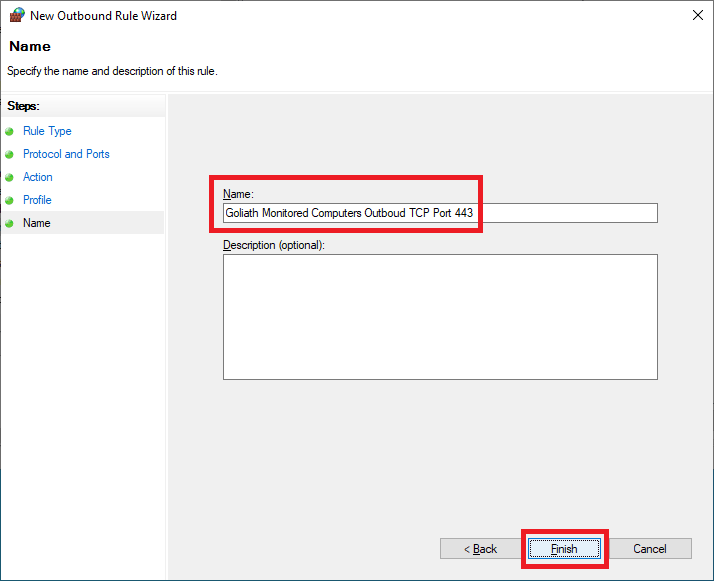
Enter a Name and click Finish, as shown in Figure 42.
Exit the Group Policy Management Editor (GPME).
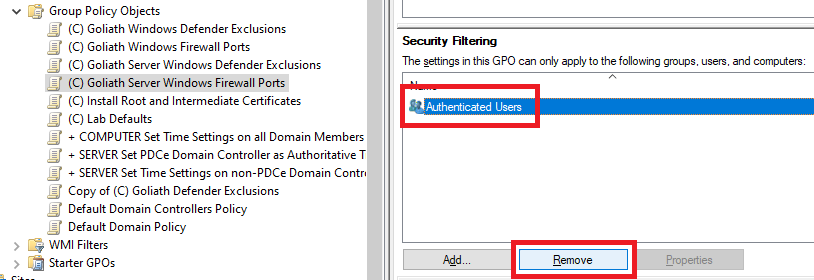
This GPO applies only to the Goliath server.
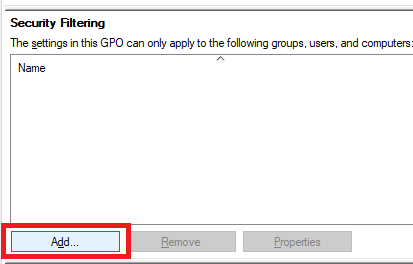
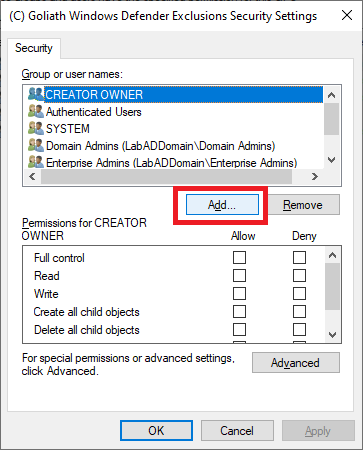
In the middle pane, in Security Filtering, click on Authenticated Users and click Remove, as shown in Figure 43.
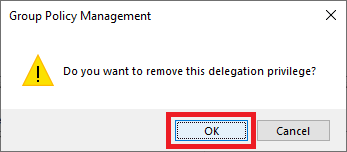
Click OK, as shown in Figure 44.
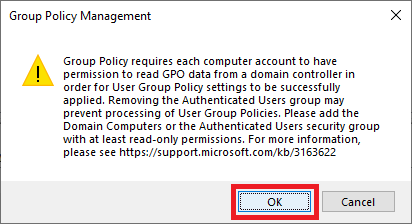
Click OK, as shown in Figure 45.
Click Add, as shown in Figure 46.
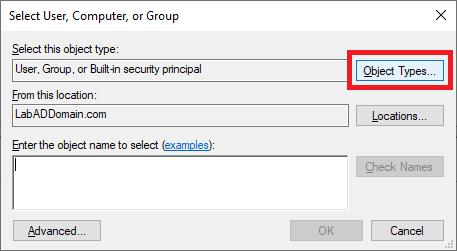
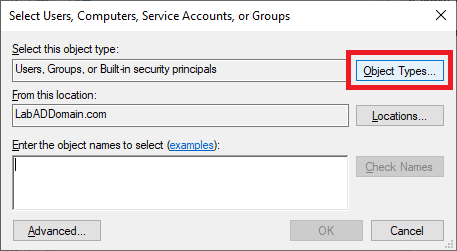
Click Object Types…, as shown in Figure 47.
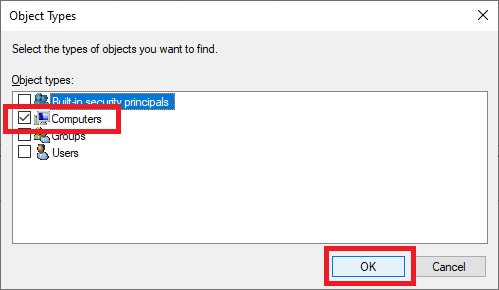
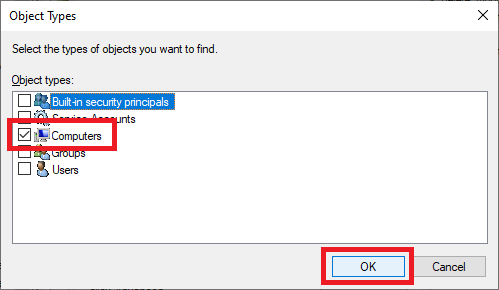
Select only Computers and click OK, as shown in Figure 48.
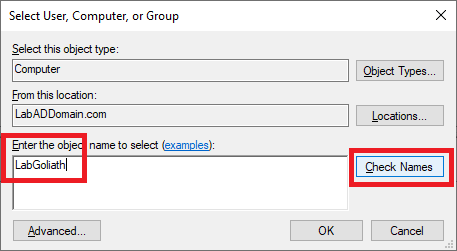
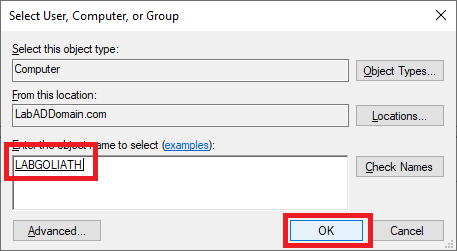
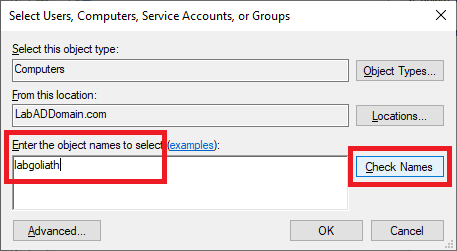
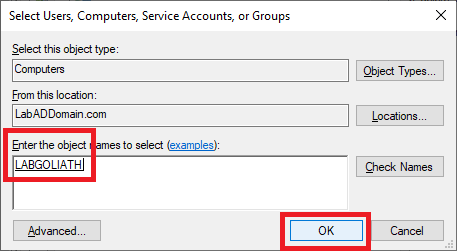
Type in the name of the Goliath server and click Check Names, as shown in Figure 49.
Once the computer name is verified, click OK, as shown in Figure 50.
Now on to the (C) Goliath Server Windows Defender Exclusions GPO.
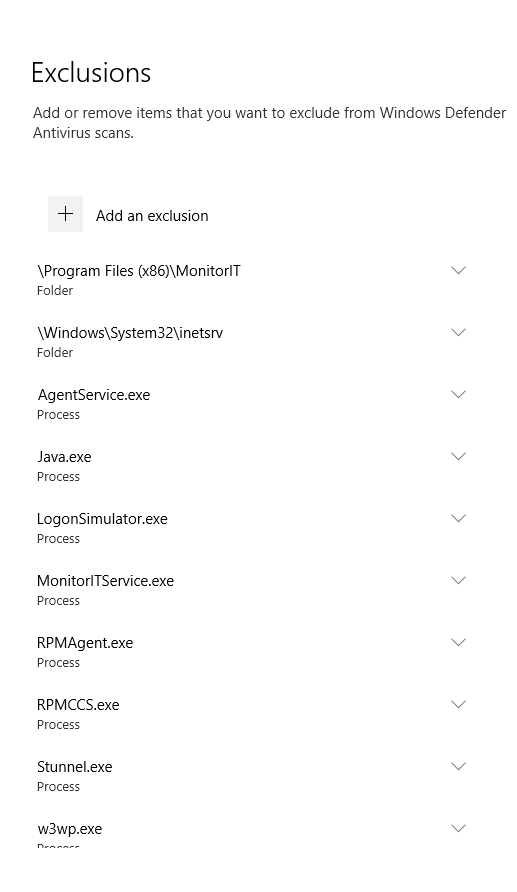
From the Prereq & Install Guide PDF, here are the exclusions needed for the Goliath server.
- Main Goliath Server
- Directory Exclusions:
- \Program Files (x86)\MonitorIT\** – This is the install directory of the Goliath Server, the local Agent, and relevant files (please include all subfolders/files)
- \Windows\System32\inetsrv\** – This is the install directory of the IIS Web Server
- Process Exclusions:
- exe – This is the process launched by the Agent’s Service
- exe – This is the process launched by the Server’s Service
- exe – Process supporting the Agent’s Windows Service
- exe – Supports hypervisor API communication
- exe – This is the process for the IIS Web Server
- exe – Process supporting the Goliath Server’s Windows Service
- exe – (Optional component) Used to support sending alerts and notifications via SSL/TLS enabled mail servers
- exe – (Optional component) Used if GAAM is running locally
- Directory Exclusions:
In the left pane, right-click the (C) Goliath Server Windows Defender Exclusions GPO and click Edit.
Expand Policies.
Expand Administrative Templates.
Expand Windows Components.
Expand Windows Defender Antivirus.
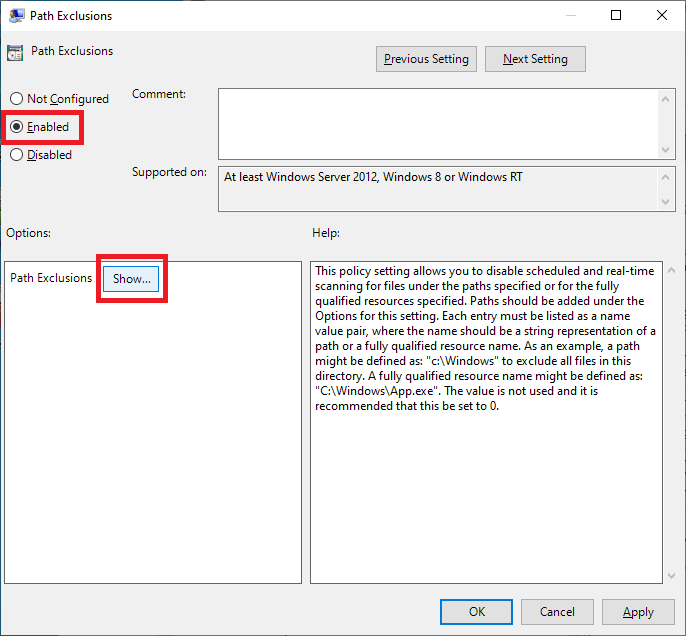
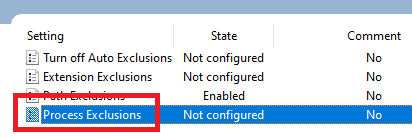
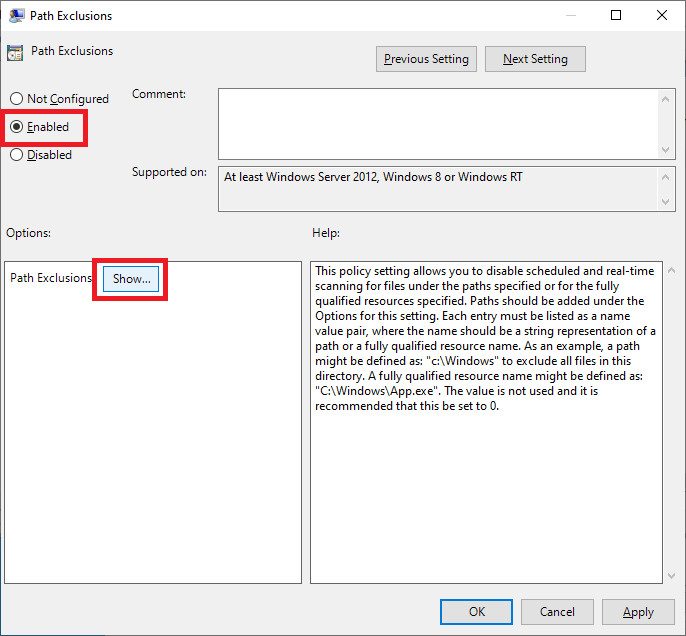
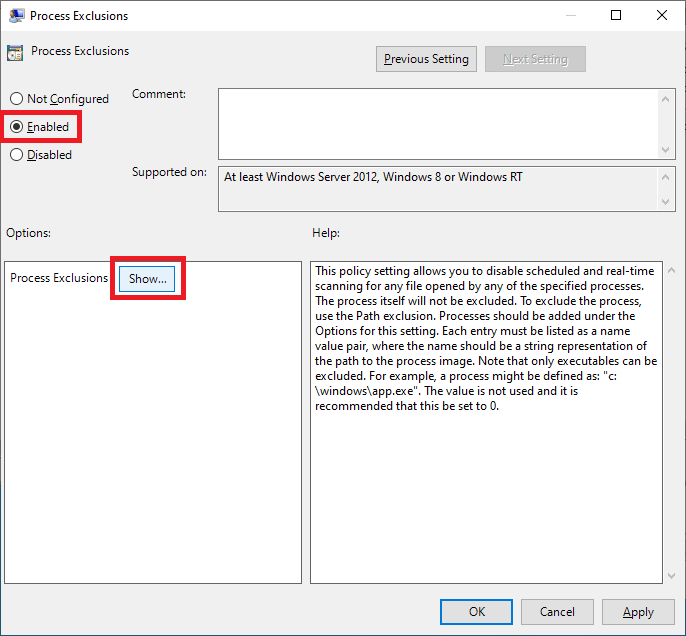
In the left pane, click on Exclusions, and in the middle pane, double-click Path Exclusions, as shown in Figure 51.

Select Enabled and click Show…, as shown in Figure 52.
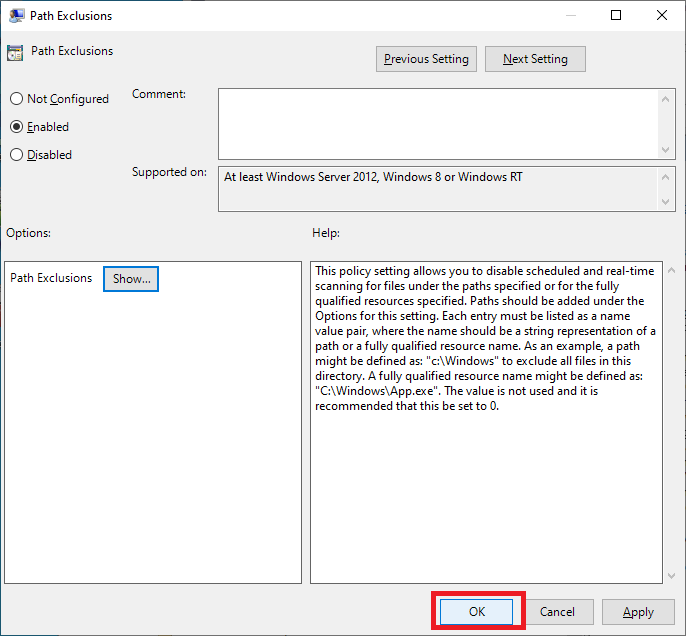
Enter the following, as shown in Figure 53, and click OK.

Click OK, as shown in Figure 54.
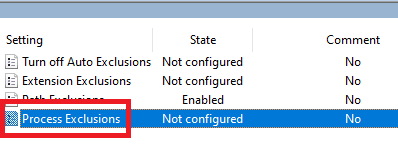
Double-click Process Exclusions, as shown in Figure 55.
Select Enabled and click Show…, as shown in Figure 56.
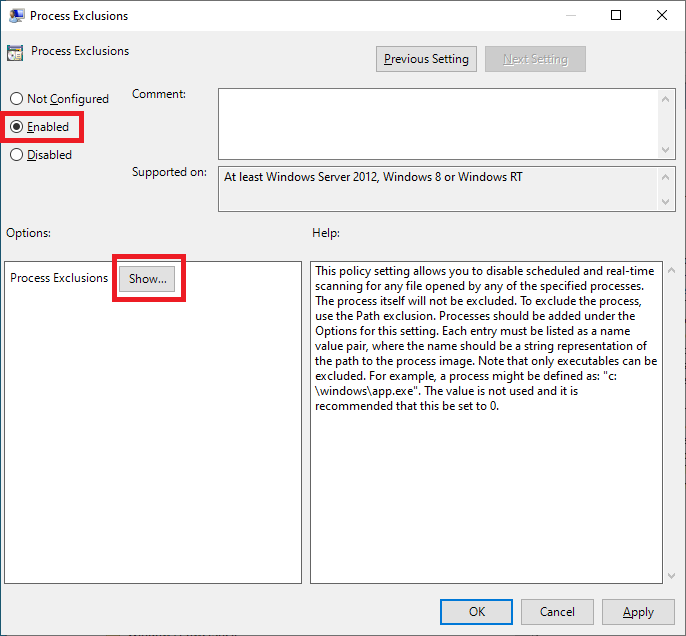
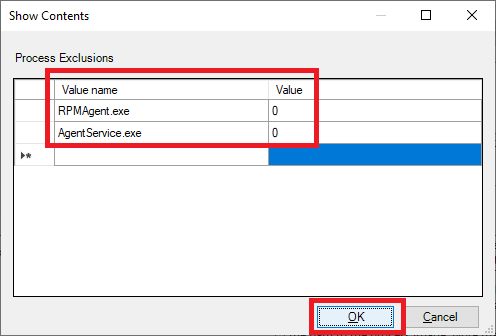
Enter the following, as shown in Figure 57, and click OK.
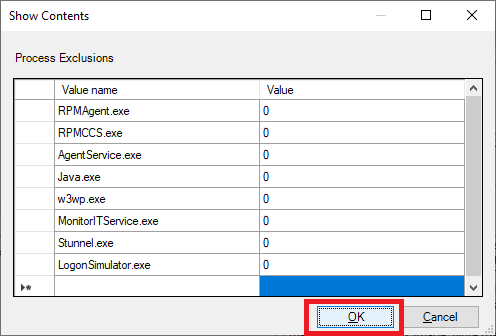
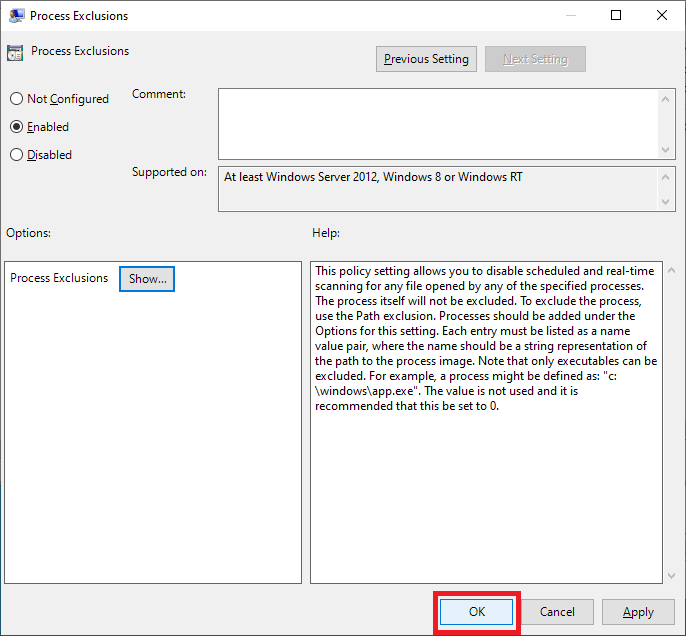
Click OK, as shown in Figure 58.

Exit the GPME.
Follow the same process as shown in Figures 43 through 50 to remove Authenticated Users and add the Goliath server, as shown in Figure 59.

Scroll to the up in the GPMC.
Expand Domains.
Expand your AD domain.
Expand the Lab OU.
Expand the Infrastructure OU.
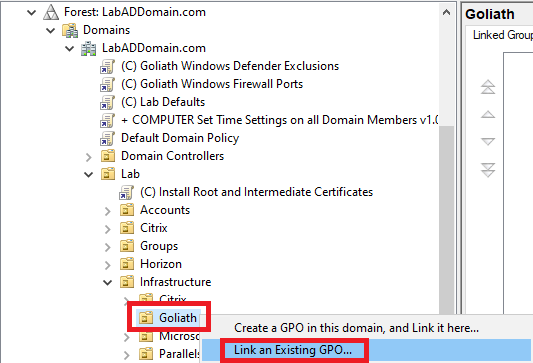
Right-click the Goliath OU and click Link an Existing GPO…, as shown in Figure 60.
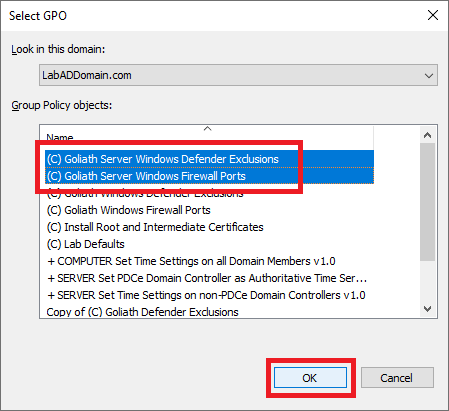
Select both Goliath server GPOs and click OK, as shown in Figure 61.
Now that we have the two Goliath server GPOs created, on to the GPOs for the monitored computers.
Let’s work on the (C) Goliath Windows Firewall Ports GPO first.
From the Goliath Prereq and Install Guide PDF, we need the following Windows Firewall ports configured for the monitored computers.
Goliath Intelligent Agent
- HTTPS 443* opened outbound for agent connection to the Goliath Server
- TCP 135, 445, 49164 open inbound for remote agent installation via web console
In the GPMC, right-click the (C) Goliath Windows Firewall Ports GPO in the Group Policy Object node and click Edit.
Expand Policies.
Expand Windows Settings.
Expand Security Settings.
Expand Windows Defender Firewall with Advanced Security.
Expand Windows Defender Firewall with Advanced Security.
Right-click Inbound Rules and click New Rule…, as shown in Figure 62.
Select Port and click Next, as shown in Figure 63.
Select TCP, select Specific local ports, enter 135,443,49164, and click Next, as shown in Figure 64.
Select Allow the connection and click Next, as shown in Figure 65.

Click Next, as shown in Figure 66.
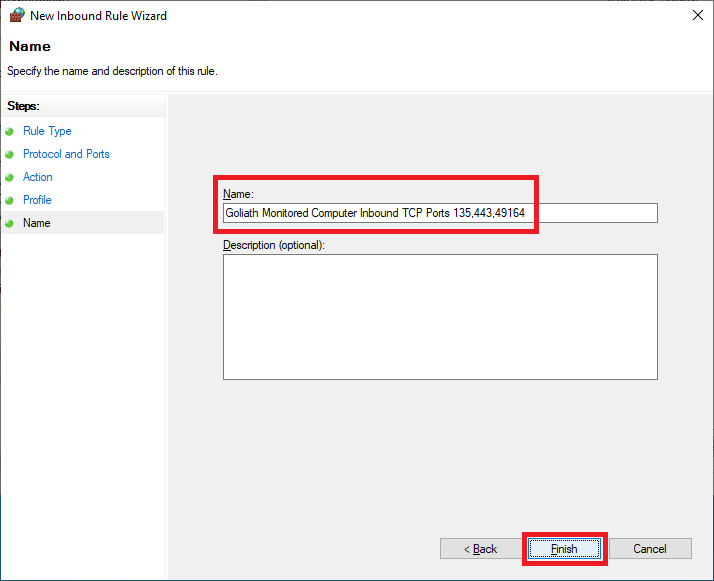
Enter a Name and click Next, as shown in Figure 67.
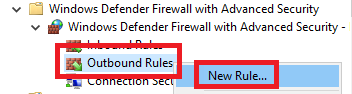
Right-click Outbound Rules and click New Rule…, as shown in Figure 68.
Select Port and click Next, as shown in Figure 69.

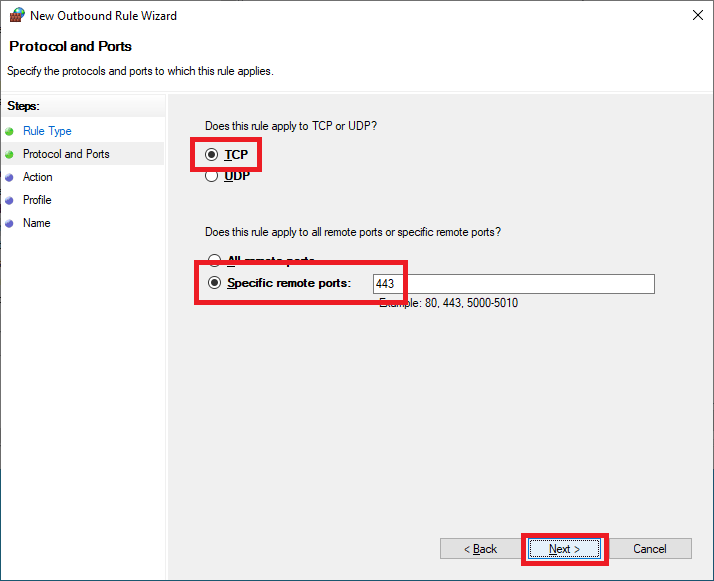
Select TCP, select Specific remote ports, enter 443, and click Next, as shown in Figure 70.
Select Allow the connection and click Next, as shown in Figure 71.

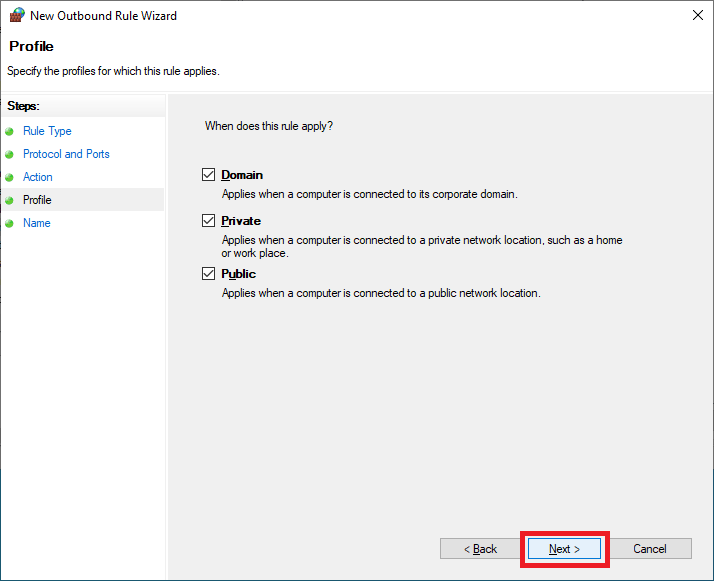
Click Next, as shown in Figure 72.
Enter a Name and click Finish, as shown in Figure 73.
Exit the Group Policy Management Editor (GPME).
This GPO applies to the computers monitored by the Goliath server.
Now on to the (C) Goliath Windows Defender Exclusions GPO.
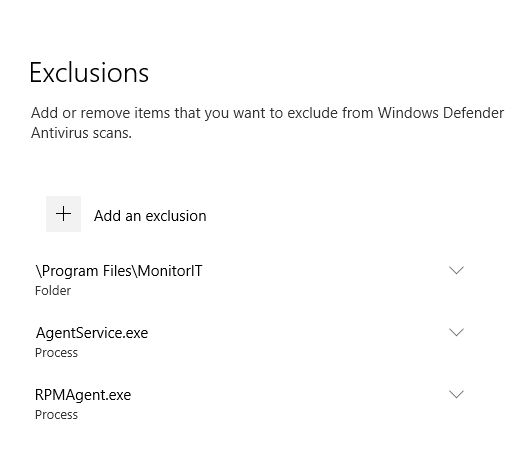
From the Prereq & Install Guide PDF, here are the exclusions needed for the monitored computers.
- VMs/Servers with Agents on them (Citrix machines, VMware Horizon machines, VMs, etc)
- Directory Exclusions:
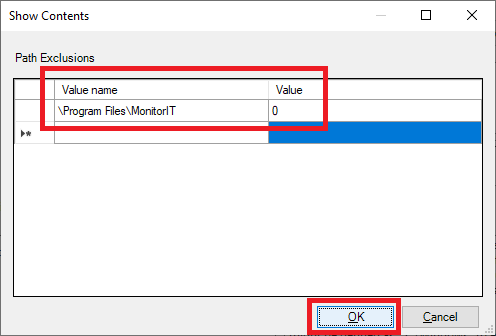
- Path: “\Program Files\MonitorIT” & “C:\Users\All Users\Goliath”
- Ensure recursive exclusions for the subfolders is allowed
- Process Exclusions:
- exe – This is the process launched by the Agent’s Service
- exe – Process supporting the Agent’s Windows Service
- Directory Exclusions:
In the left pane, right-click the (C) Goliath Windows Defender Exclusions GPO and click Edit.
Expand Policies.
Expand Administrative Templates.
Expand Windows Components.
Expand Windows Defender Antivirus.
In the left pane, click on Exclusions, and in the middle pane, double-click Path Exclusions, as shown in Figure 74.

Select Enabled and click Show…, as shown in Figure 75.
Enter the following, as shown in Figure 76, and click OK.
Click OK, as shown in Figure 77.

Double-click Process Exclusions, as shown in Figure 78.
Select Enabled and click Show…, as shown in Figure 79.
Enter the following, as shown in Figure 80, and click OK.
Click OK, as shown in Figure 81.
Exit the GPME.
Collapse the Lab OU.
These two GPOs do not apply to the Goliath server. To do that, we configure a GPO Deny Policy. A Deny right is not something you should do as a normal course of working with GPOs as it complicates GPO troubleshooting.
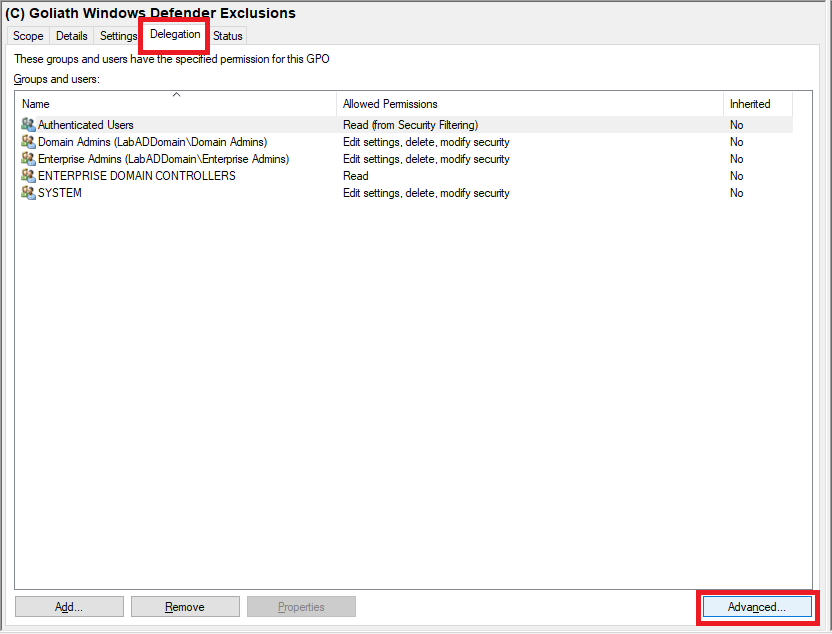
Click on the (C) Goliath Windows Defender Exclusions GPO, and in the middle pane, click the Delegation tab and click Advanced, as shown in Figure 82.
Click Add…, as shown in Figure 83.
Click on Object Types…, as shown in Figure 84.
Select only Computers and click OK, as shown in Figure 85.
Type in the name of the Goliath server and click Check Names, as shown in Figure 86.
When the server name is validated, click OK, as shown in Figure 87.
Verify that the Goliath server is selected, and in the Permissions area, scroll down and select Deny for Apply group policy, as shown in Figure 88. Do NOT change any other permission.
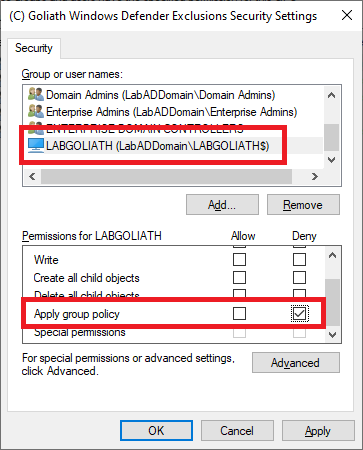
Click Yes, as shown in Figure 89.

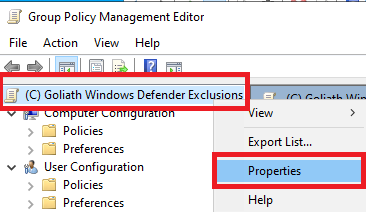
Right-click the GPO and click Edit, as shown in Figure 90.

Right-click the top level of the GPO and click Properties, as shown in Figure 91.
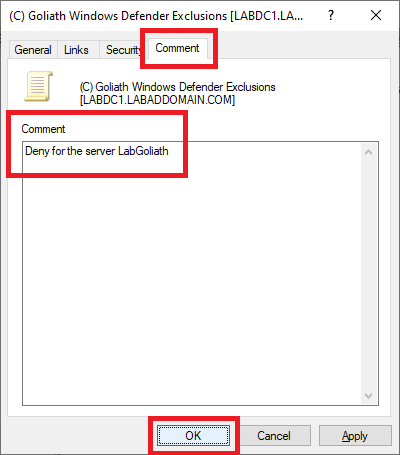
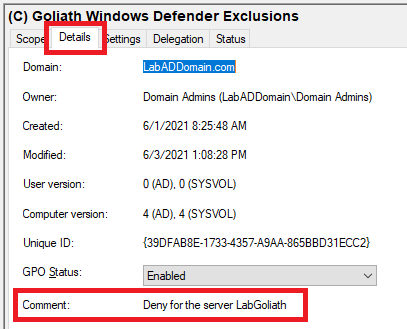
Click the Comment tab. For the comment, type in Deny for the server <Goliath server name>, and click OK, as shown in Figure 92. This comment makes it easier when troubleshooting the GPO later.
Exit the GPME.
In the middle pane, click the Details tab, and the comment you enter shows in Figure 93.
Repeat the process to add the Deny permission to the other GPO.
Scroll to the top in the GPMC.
Expand Domains.
Expand your AD domain.
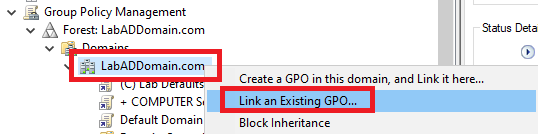
Right-click the domain and click Link an Existing GPO…, as shown in Figure 94.
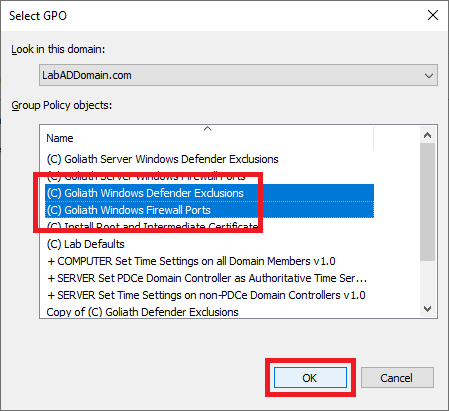
Select both Goliath monitoring GPOs and click OK, as shown in Figure 95.
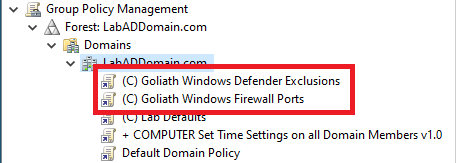
The two GPOs are now linked at the domain level, as shown in Figure 96.
To verify the GPOs work, log in to the file server and the Goliath server.
Tip: If the GPOs do not work at first, either restart the VM or do a Right-click Start, Run, gpupdate. Then log off and back on to see if it took effect. Gpupdate is a command-line utility from Microsoft that comes with all versions of the Windows operating system to refresh the Group Policy engine on the client. There are many ways of running gpupdate. As an administrator, you can even force a group policy refresh remotely using PowerShell or the GPMC.
On the Goliath server, right-click Start, Run, wf.msc, and Windows Defender Firewall with Advanced Security starts, as shown in Figure 97.
Click Inbound Rules and verify that the Inbound Firewall Rule configured by the GPO is there, as shown in Figure 98.

Do the same verification for the Outbound Rules, as shown in Figure 99.

Exit Windows Defender Firewall with Advanced Security.
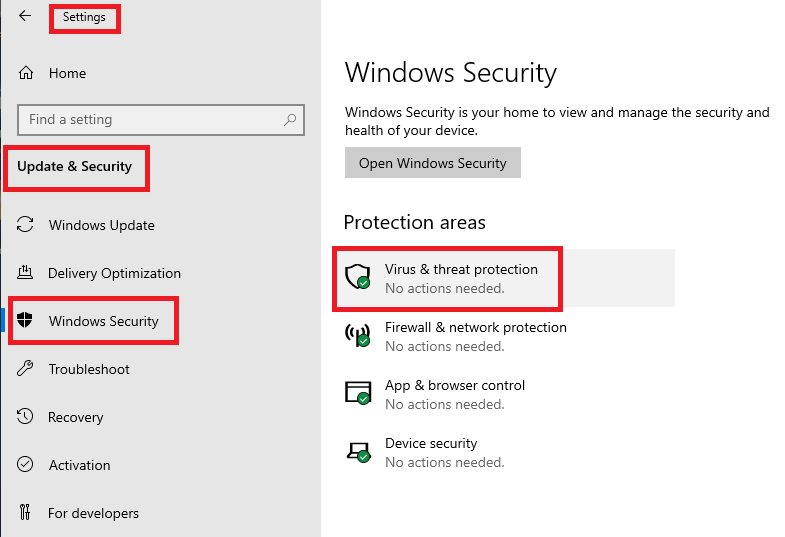
To verify the Windows Defender Exclusions, click Start, Settings, Update & Security, Windows Security, and Virus & threat protection, as shown in Figure 100.
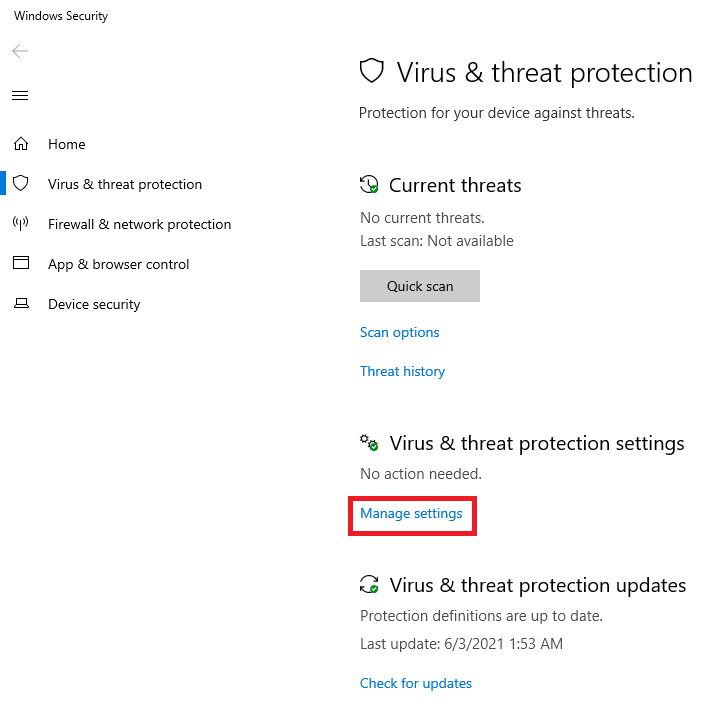
Under Virus & threat protection settings, click Manage settings, as shown in Figure 101.
Scroll down to Exclusions and click Add or remove exclusions, as shown in Figure 102.
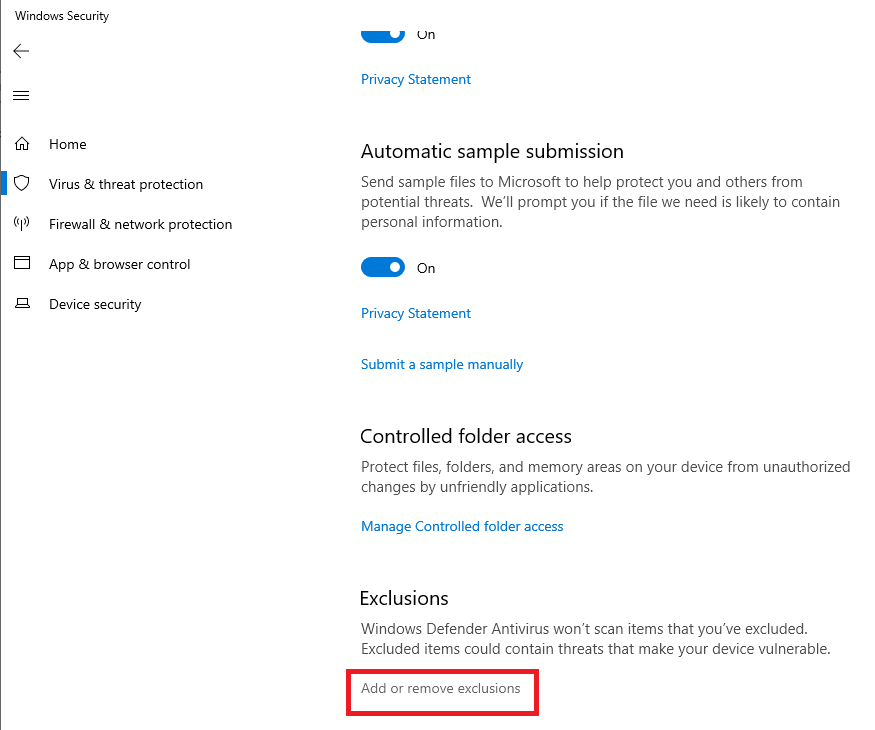
Figure 103 shows the Exclusions are in place.
Follow the same process to validate the GPO settings on the file server, as shown in Figures 104 through 106.


Configuring Goliath Performance Monitor
Configure IIS
Before we continue, we need to add the Goliath server’s SSL certificate to Internet Information Services (IIS).
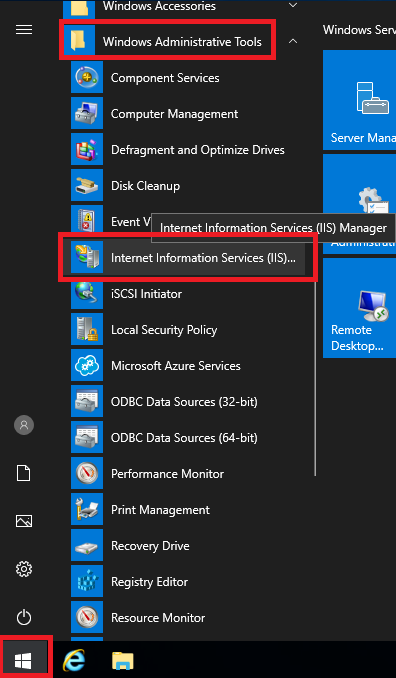
Start IIS Manager.
Click Start, expand Windows Administrative Tools, and click Internet Information Services (IIS)…, as shown in Figure 107.
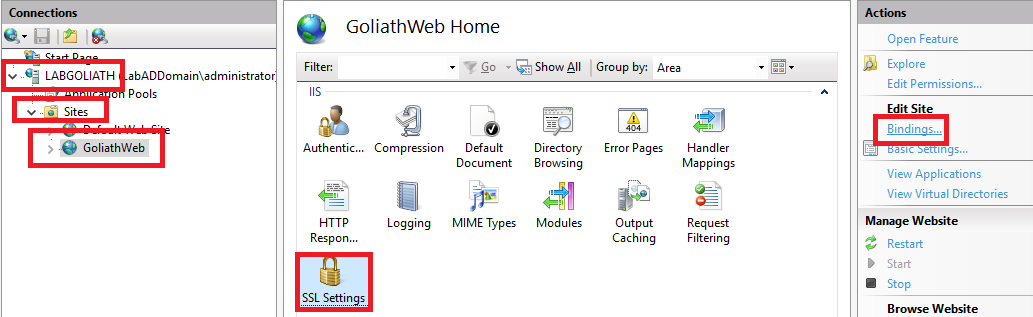
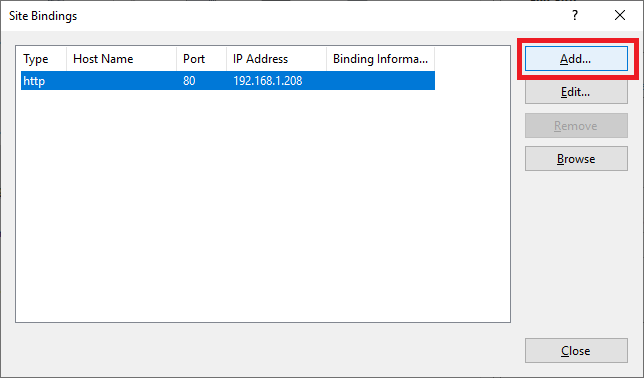
In the left pane, expand <Goliath server name>, expand Sites, click GoliathWeb, in the middle pane click SSL Settings, and in the right pane, click Bindings…, as shown in Figure 108.
Click Add…, as shown in Figure 109.
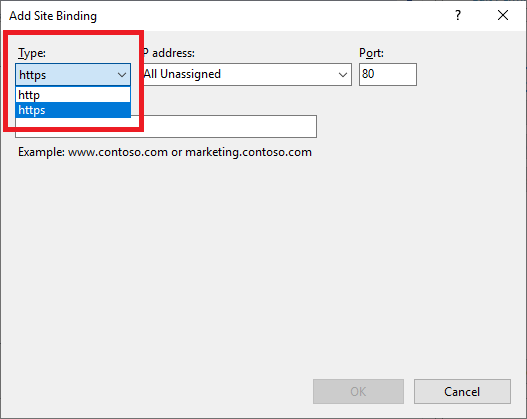
Select https from the Type dropdown list, as shown in Figure 110.
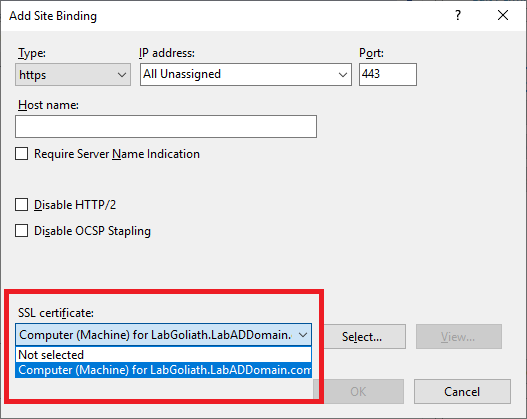
From the SSL certificate dropdown, select the Goliath server’s certificate, as shown in Figure 111.
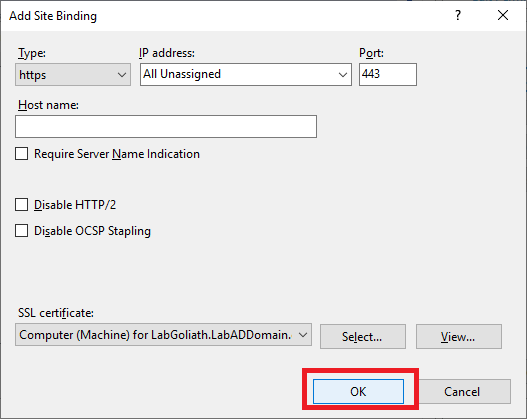
Click OK, as shown in Figure 112.
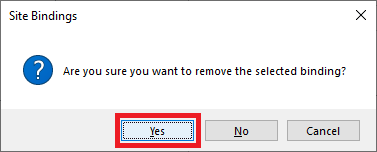
Select the http binding and click Remove, as shown in Figure 113.
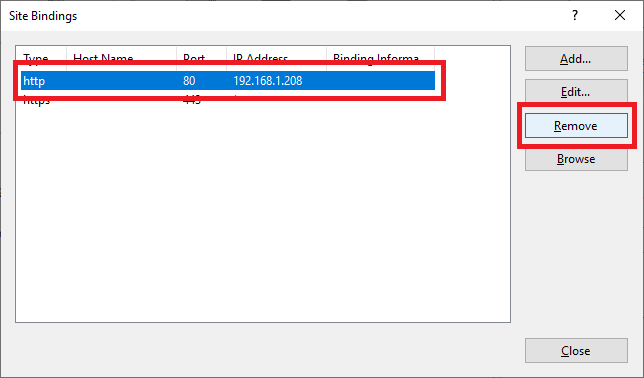
Click Yes, as shown in Figure 114.
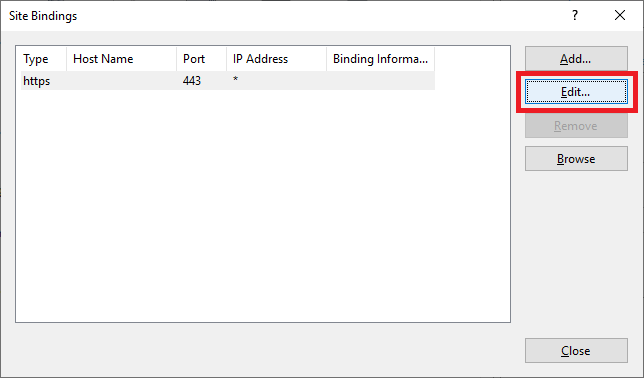
Click Edit, as shown in Figure 115.
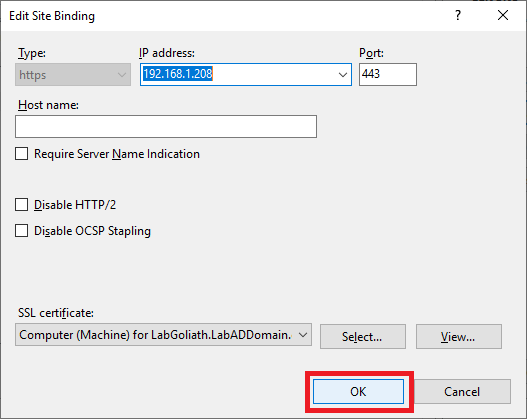
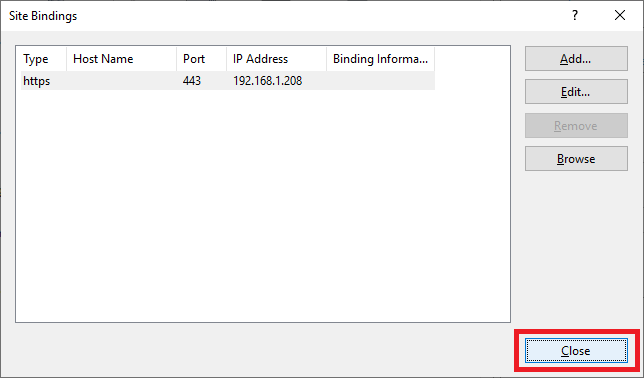
Select the IP address of the Goliath server from the dropdown, as shown in Figure 116.

Click OK, as shown in Figure 117.
Click Close, as shown in Figure 118.
Exit the IIS Manager console.
Add vCenter and the XenServer Pool
From either the Goliath server or the management computer, from your non-IE11 internet browser, browse to https://GoliathServerFQDN, as shown in Figure 119. For me, that is https://LabGoliath.LabADDomain.com.
Note: For the configuration steps, I am using the Goliath server.

Notice that the padlock shows that our SSL certificate is working.
Click Settings, as shown in Figure 120.

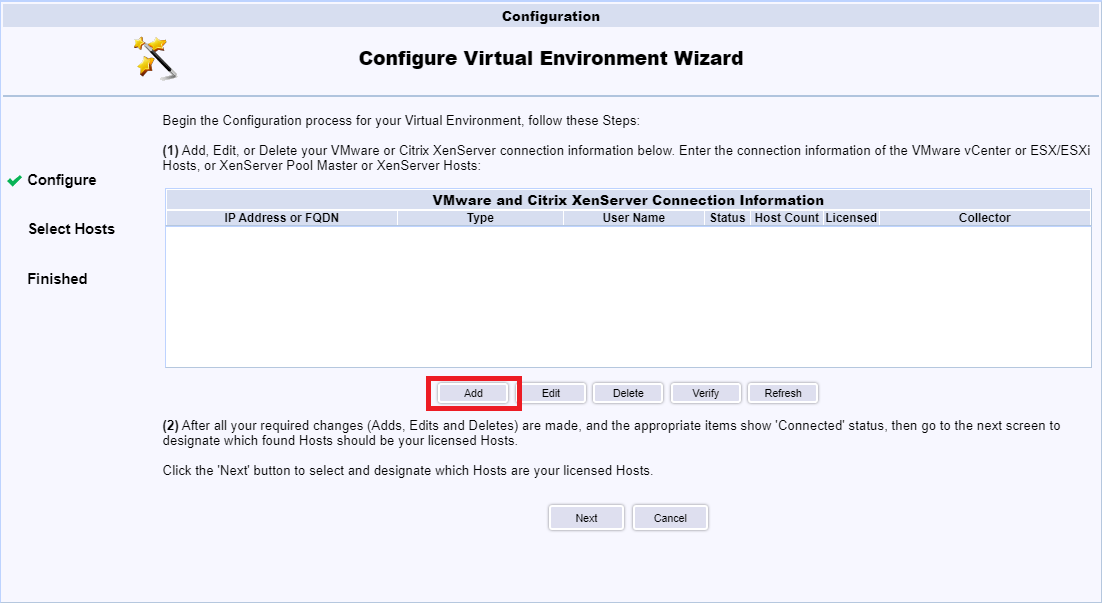
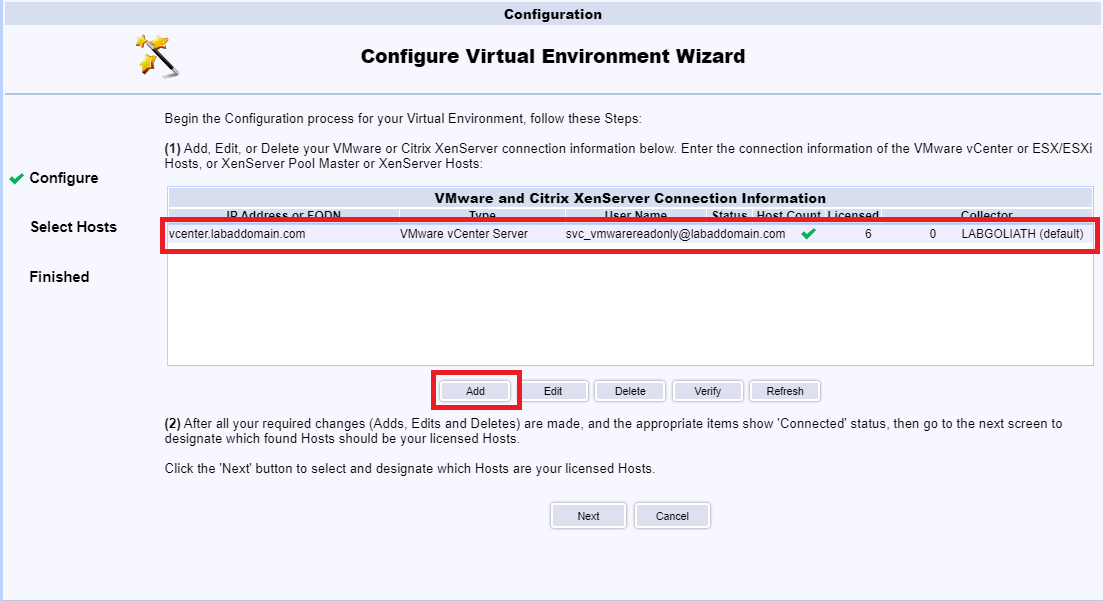
Click Configure VMware Virtual Environment, as shown in Figure 121.

Click Add, as shown in Figure 122.
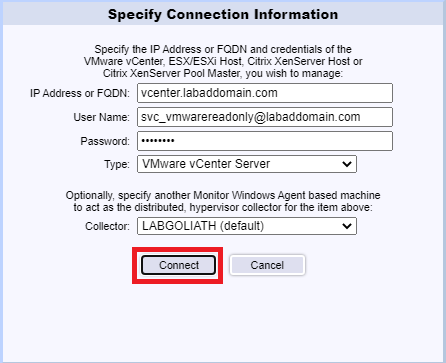
Enter the FQDN for vCenter, enter the User Name and Password for the Read-only service account created earlier, select VMware vCenter Server from the Type dropdown, and click Connect, as shown in Figure 123.
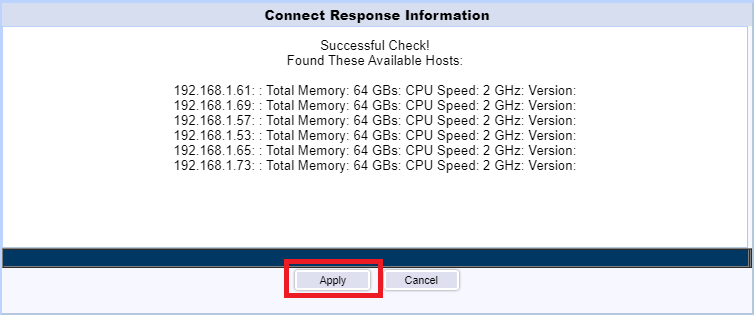
After a successful connection, click Apply, as shown in Figure 124.
The vCenter server is added. Click Add to add the XenServer Pool, as shown in Figure 125.
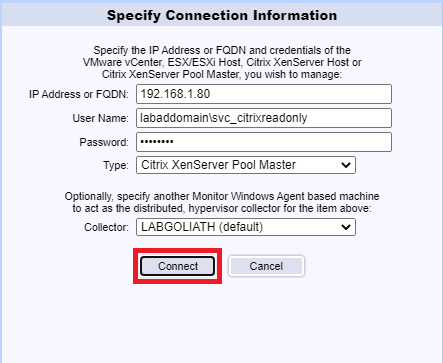
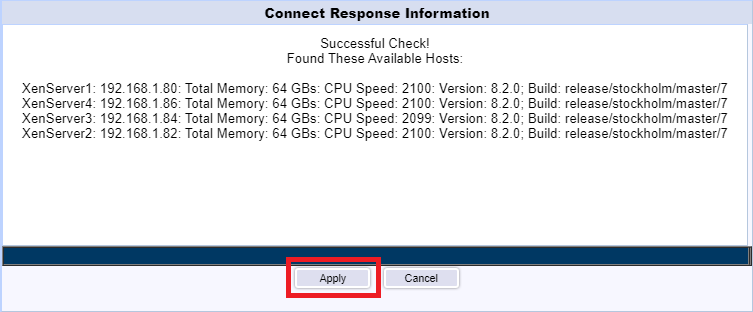
Enter the FQDN for the XenServer Pool, enter the User Name and Password for the Read-only service account created earlier, select Citrix XenServer Pool Master from the Type dropdown, and click Connect, as shown in Figure 126.
After a successful connection, click Apply, as shown in Figure 127.
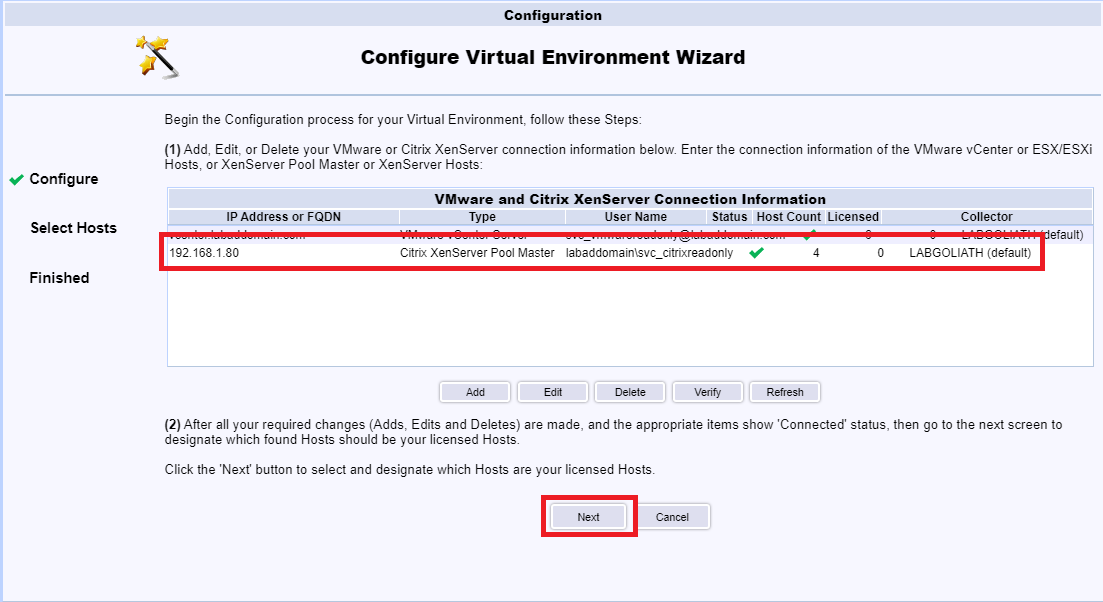
The XenServer Pool is added. Click Next, as shown in Figure 128.
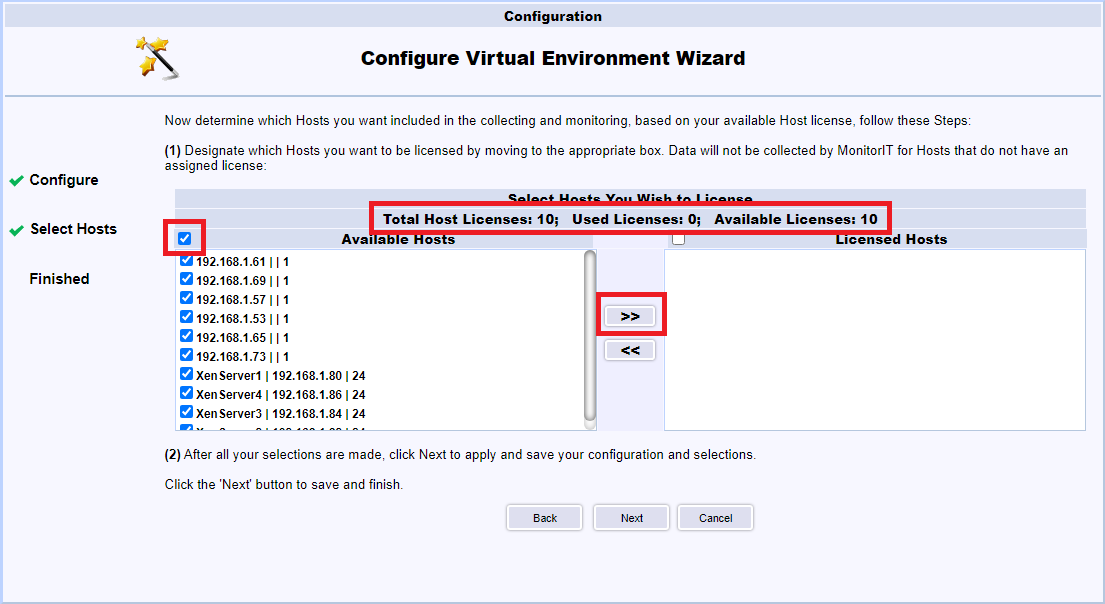
Select all hosts and click the >>, as shown in Figure 129. Notice the license information.
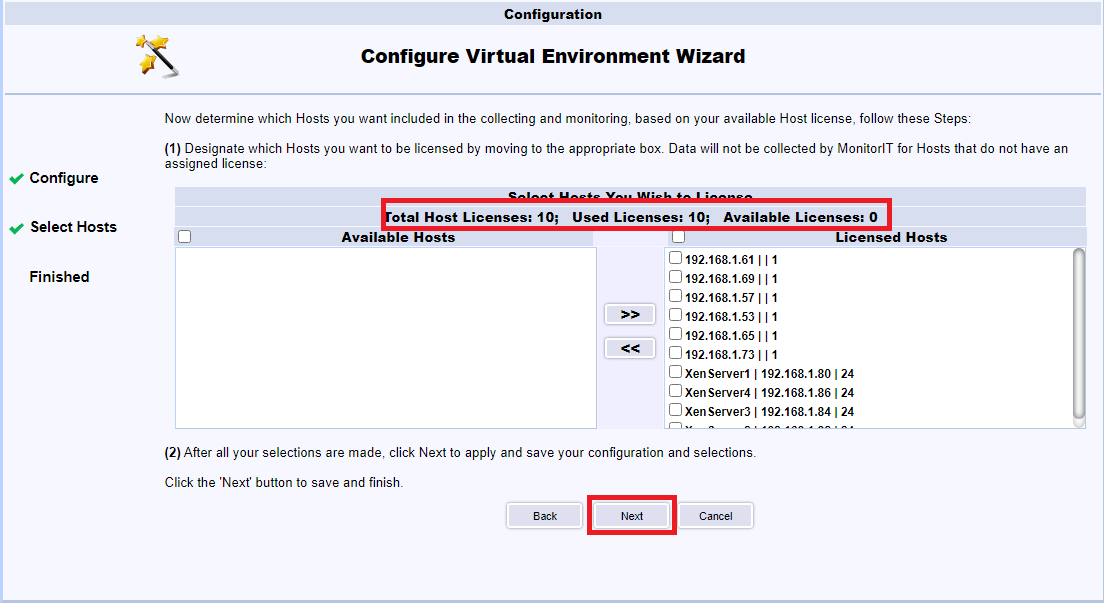
All the hosts are licensed. Click Next, as shown in Figure 130.
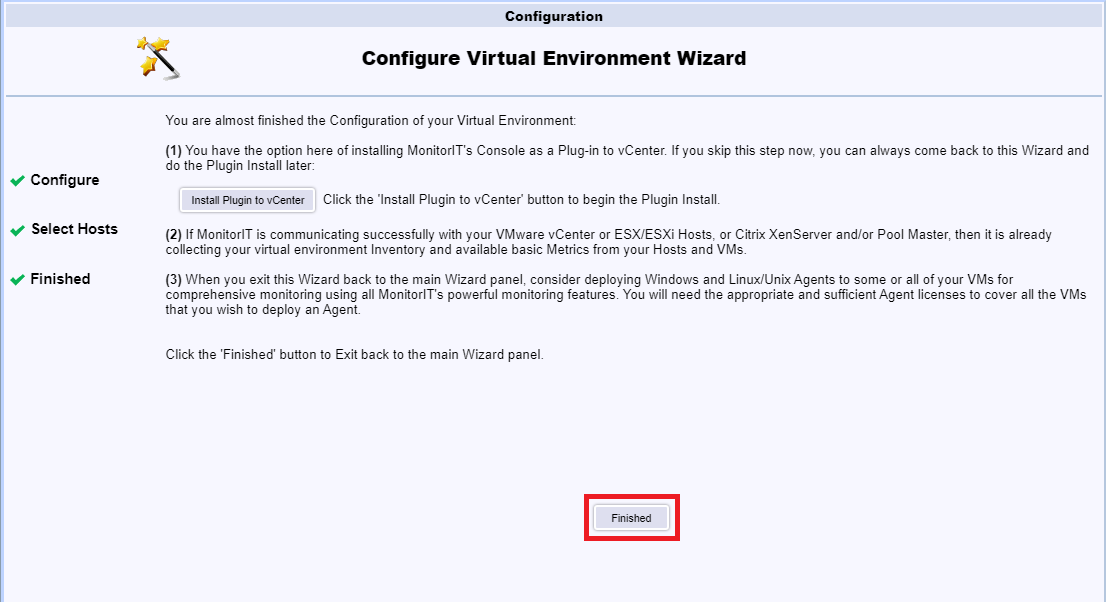
Click Finished, as shown in Figure 131.
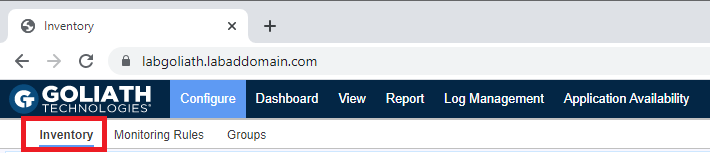
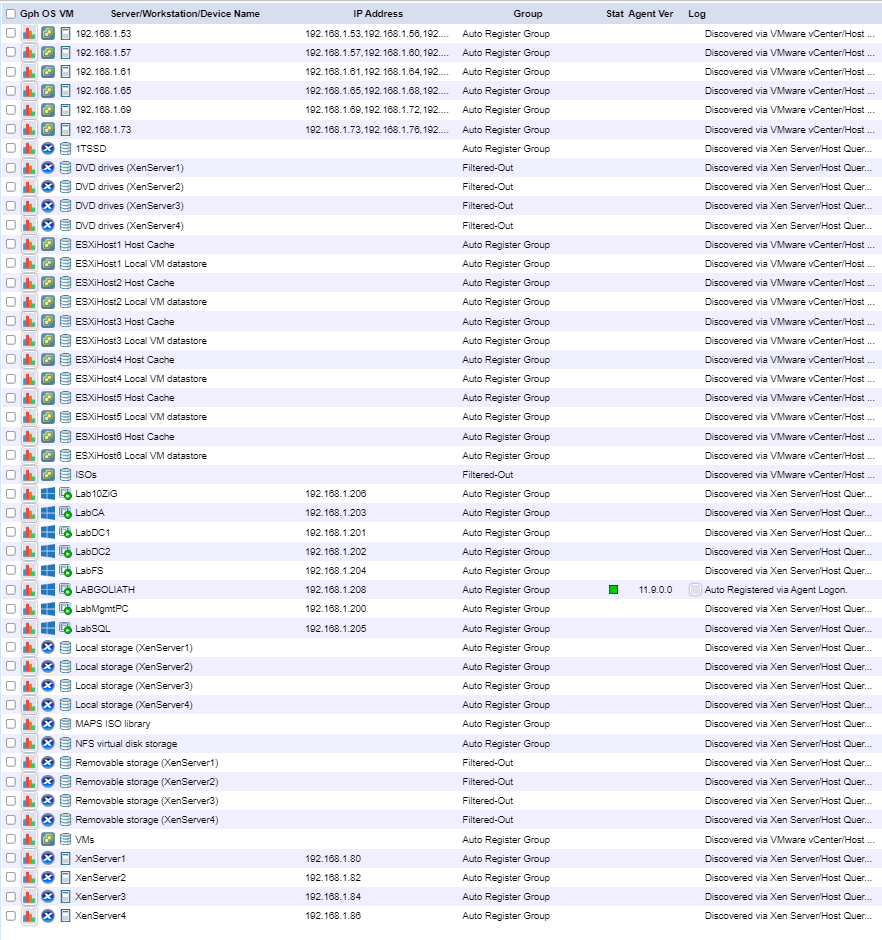
Click Inventory, as shown in Figure 132.
After several minutes, the inventory starts building and shows in the browser, as shown in Figure 133.
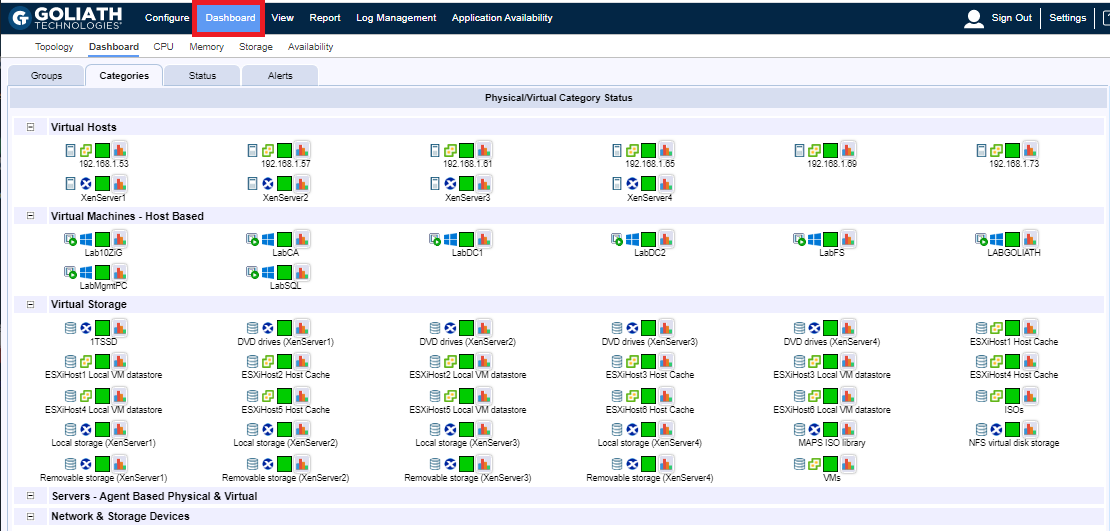
Click Dashboard to get an overview of the virtual hosting environments, as shown in Figure 134.
Configure Security
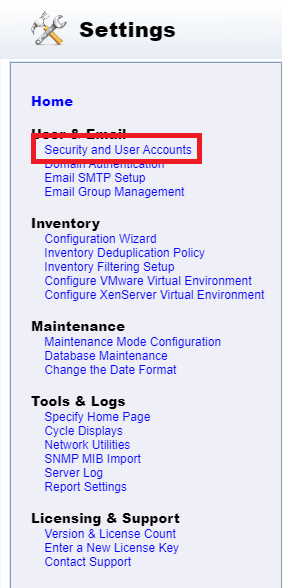
Click Settings, as shown in Figure 135.

In the left pane, click Security and User Accounts, as shown in Figure 136.
We need to add our admin and helpdesk users. First up are the admins.
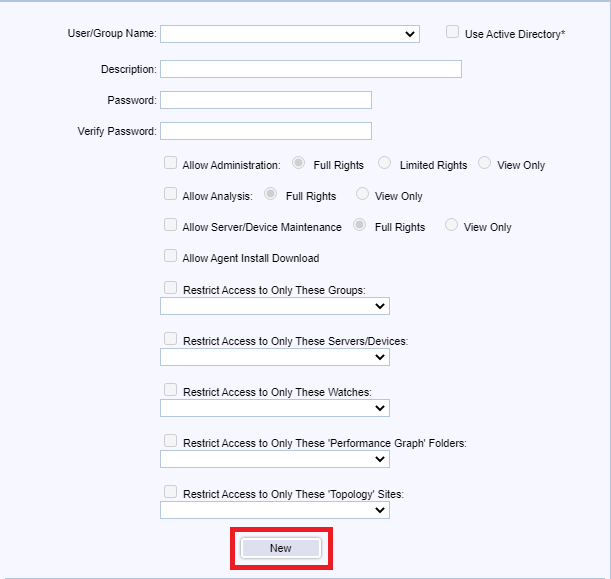
Click New, as shown in Figure 137.
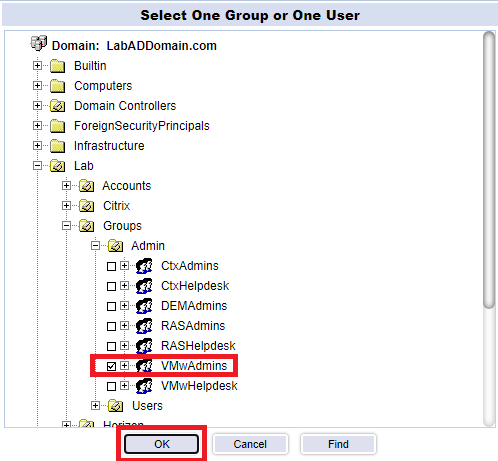
Select Use Active Directory and click the “…“, as shown in Figure 138.

Browse, find and select one admin account, and click OK, as shown in Figure 139.
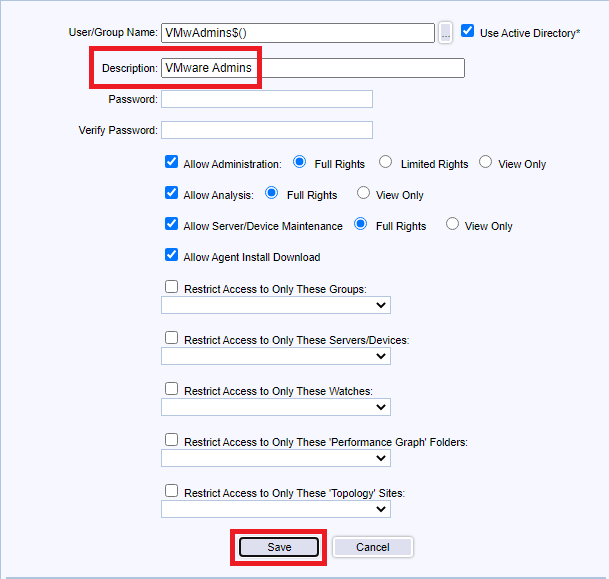
Use the following settings, and click Save, as shown in Figure 140.
- Enter an optional Description
- Select Allow Administrator and select Full Rights
- Provides full Administration rights.
- Select Allow Analysis and select Full Rights
- Provides full Analyst rights to view, edit, and create Graphs, Reports and start/stop Monitoring.
- Select Allow Server/Device Maintenance and select Full Rights
- Is allowed to manage Server/Device Maintenance Schedules via the Server/Device Maintenance function.
- Select Allow Agent Install Download
- Is allowed to initiate an Agent download installation via the InstallAgent.htm page.
Repeat the process shown in Figures 137 through 140 to add additional full admins. In addition, you may want to add the domain’s Administrator account.
Now for the helpdesk accounts.
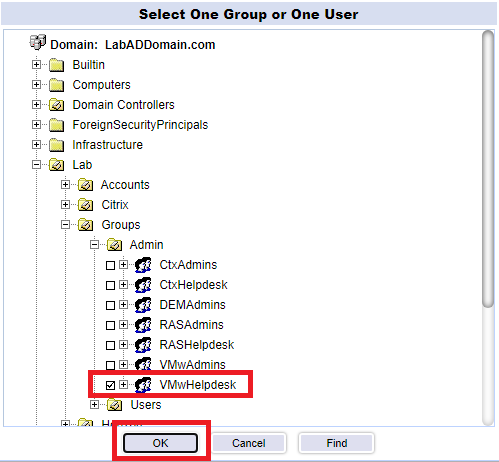
Click New, select Use Active Directory, click the “…“, browse, find and select one helpdesk account, and click OK, as shown in Figure 141.
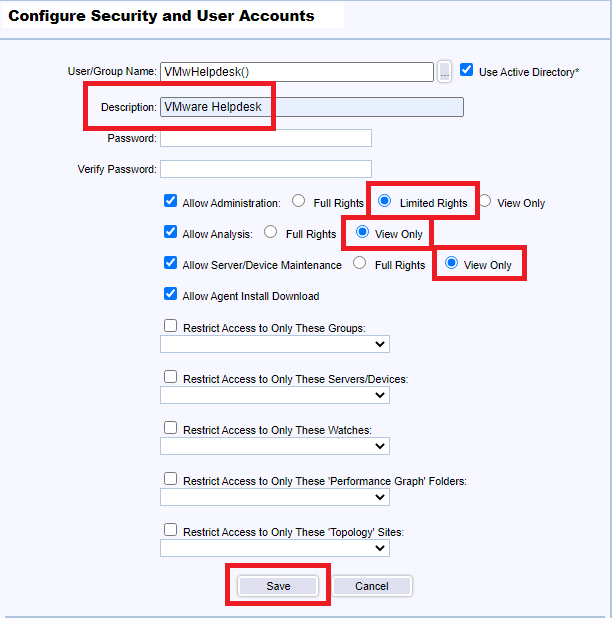
Use the following settings, and click Save, as shown in Figure 142.
- Enter an optional Description
- Select Allow Administrator and select Limited Rights
- Provides full Administration rights EXCEPT no access to Configure->Security, Utilities->Database Maintenance, SMTP Server Parameters for All Email & Email Group Delete, and assigning ownership for Reports or Graphs, assigning them to All users or their logon Name.
- Select Allow Analysis and select View Only
- Provides restricted Analyst rights to view only on Graphs, Reports and not permitted to schedule reports or start/stop monitoring.
- Select Allow Server/Device Maintenance and select View Only
- Is allowed to view Server/Device Maintenance Schedules via the Server/Device Maintenance function.
- Select Allow Agent Install Download
- Is allowed to initiate an Agent download installation via the InstallAgent.htm page.
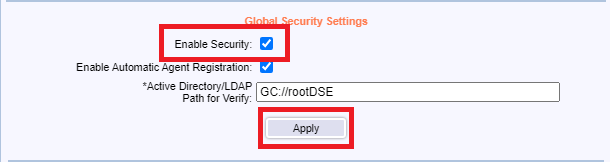
Under Global Security Settings, select Enable Security, and click Apply as shown in Figure 143. Enabling security means access to the GPM Console requires log-in credentials.
Click OK, as shown in Figure 144.
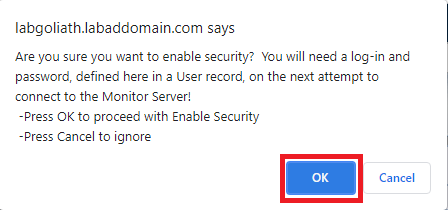
The next connection to GPM requires a log-in.
Install Agents on Servers
Note: For this process, I am using the management computer.
From the management computer, from your non-IE11 internet browser, browse to https://GoliathServerFQDN. For me, that is https://LabGoliath.LabADDomain.com.
If the Configuration Wizard doesn’t start (as it did for me), click Settings, as shown in Figure 145.

Click Configuration Wizard, as shown in Figure 146.

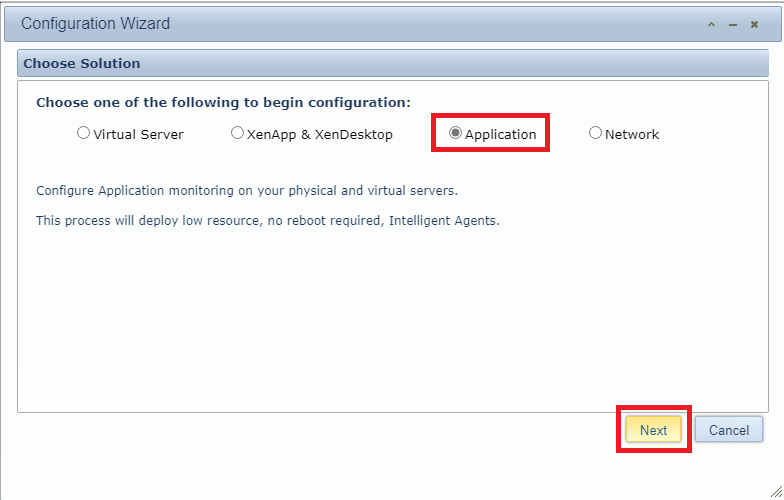
Select Application and click Next, as shown in Figure 147.
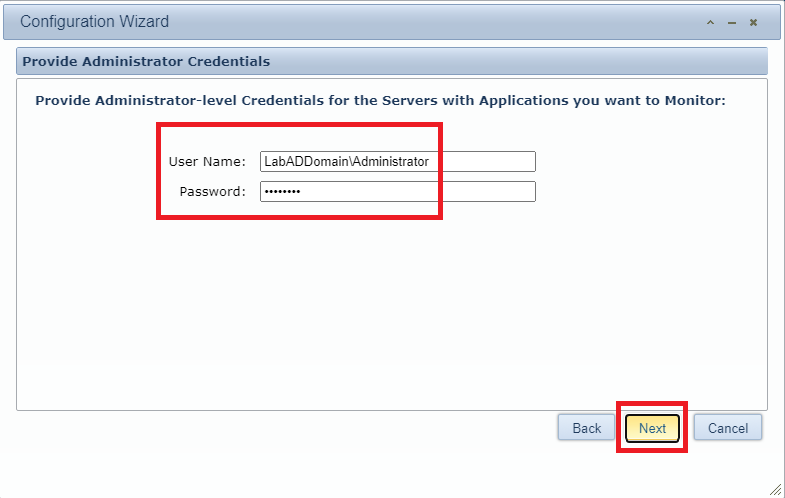
Because I intend to install the agent on every server, including the domain controllers, enter the domain’s administrator account credentials, and click Next, as shown in Figure 148.
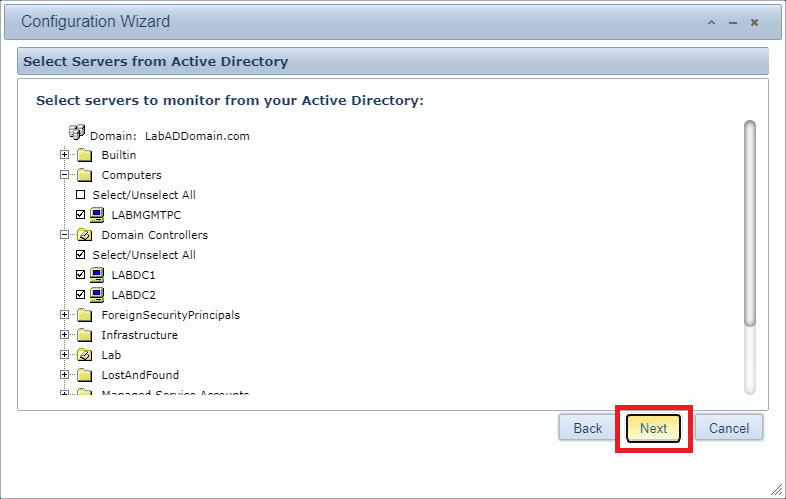
Select Active Directory and click Next, as shown in Figure 149.

Browse through the OU tree, select which computers to install the Goliath agent, and click Next, as shown in Figure 150.
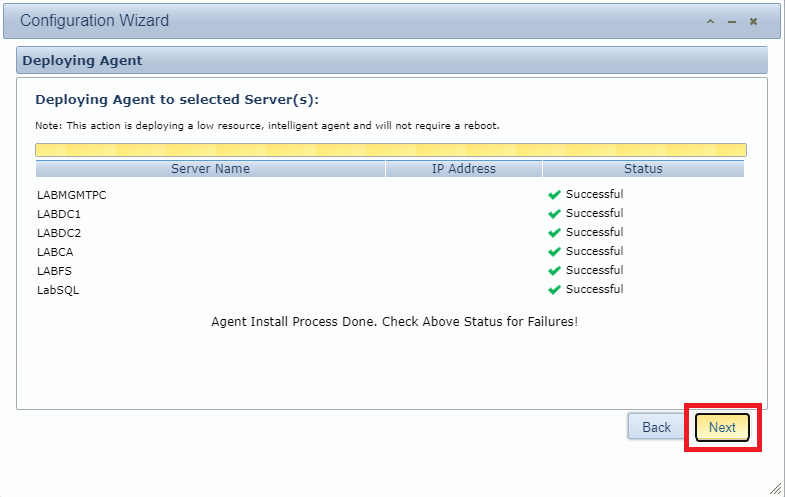
After the agent installs on the selected computers, click Next, as shown in Figure 151.
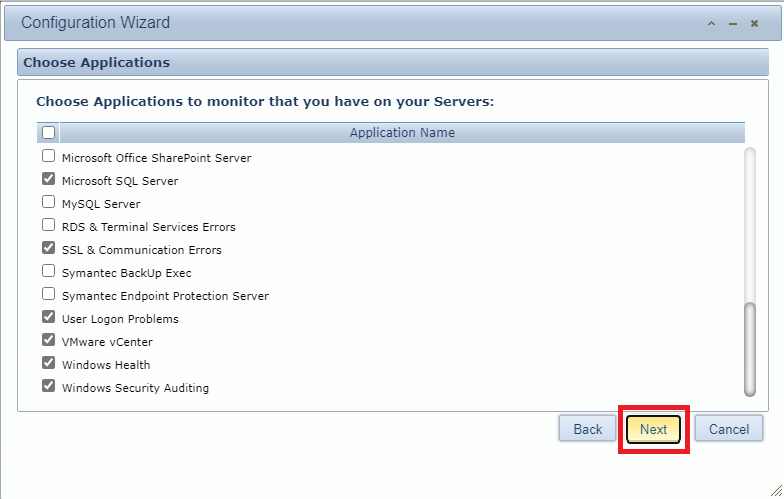
Select which applications you wish to monitor. I selected the following:
- Active Directory
- Microsoft IIS
- Microsoft SQL Server
- SSL & Communication Errors
- User Logon Problems
- VMware vCenter
- Windows Health
- Windows Security Auditing
Once you have selected applications, click Next, as shown in Figure 152.
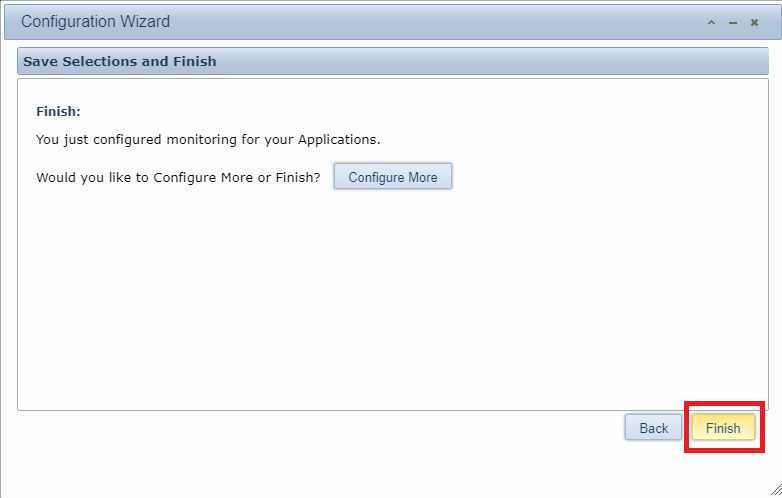
Click Finish, as shown in Figure 153.
The Goliath server is ready for use. You can contact Goliath to schedule a time to have someone review the console in detail with you.
Uninstall Agents on Servers
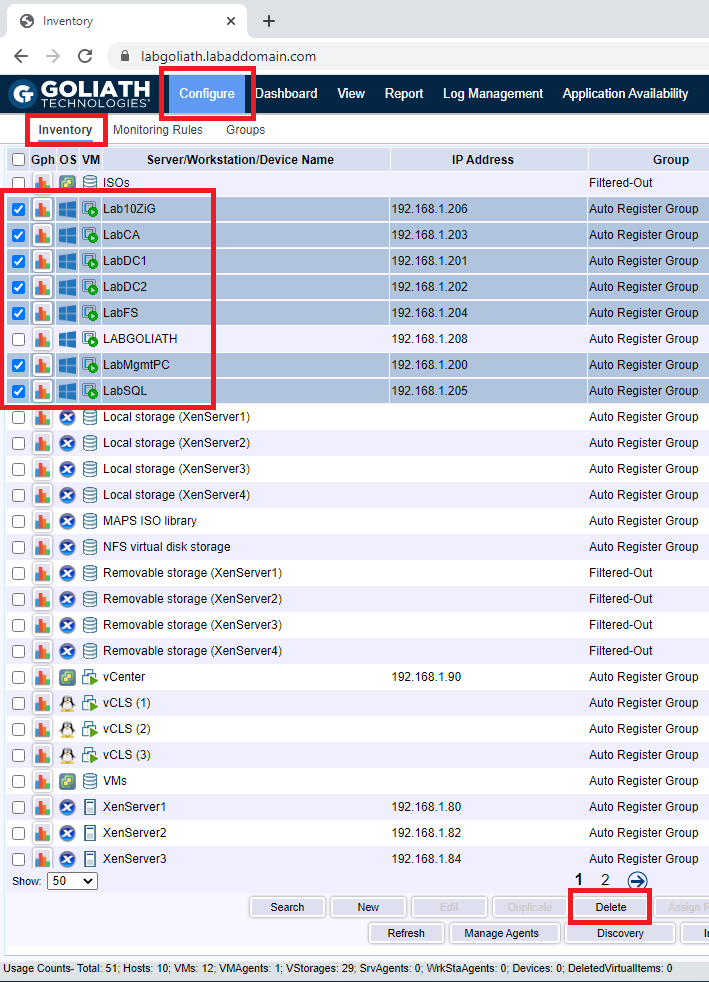
To uninstall the agents we installed using the console, click Configure, click Inventory, select the computers with the agents to uninstall, and click Delete, as shown in Figure 154.
This process uninstalls the agent from the selected computers and removes the selected computers from the Goliath console.
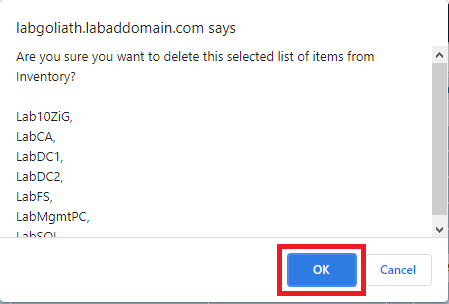
Click OK to uninstall the agents, as shown in Figure 155.
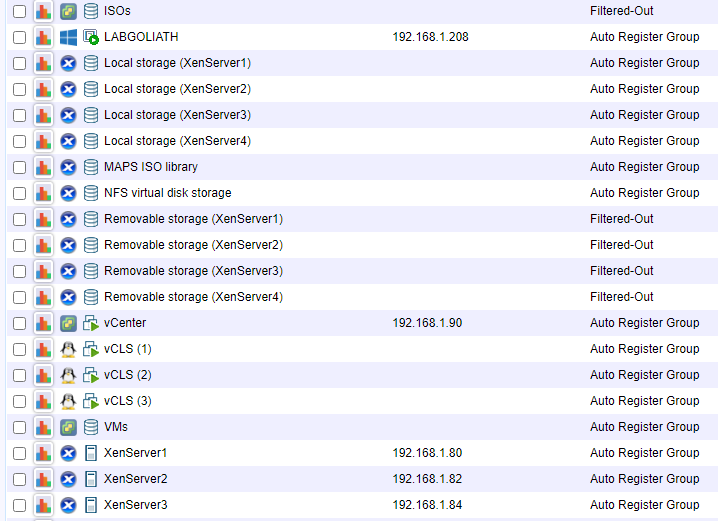
The selected computers no longer appear in the console, as shown in Figure 156.
Log into each selected computer and delete the MonitorIT folder located by default in the “C:\Program Files” parent folder if desired.
Up next: Create an IGEL Management Server