Recently, I started a new job where I needed to learn Microsoft’s Azure and Azure Virtual Desktop (AVD). My friend Claudio Rodrigues recently released his excellent book DAAS The Complete Guide, and I am using his book to guide my learning.
At the end of the first chapter, Claudio walks you through creating a site-to-site VPN using a Ubiquiti router. I don’t have one of those and needed to try something else. Claudio links to a Microsoft article where Microsoft gives configuration settings for many devices. Unfortunately, my NETGEAR Nighthawk X6 R8000 WiFi router was not on the Microsoft list. Claudio told me I could use Microsoft’s Routing and Remote Access Server (RRAS) to create the site-to-site VPN, but oddly, Microsoft provides no instructions on how to do so.
Claudio then sent me a link to a helpful article, and I adapted https://charbelnemnom.com/create-site-to-site-vpn-between-azure-and-windows-rras-server/ [Webster: That site’s owner has blocked me from linking to his article, but the link is still valid.] for my NETGEAR router, Claudio’s book, and my lab.
Assumptions:
- You followed my Building Webster’s Lab V2 series
- You are following Claudio’s DAAS The Complete Guide Book
The following instructions replace Claudio’s on page 52, the section Establishing the VPN Connection. The following instructions are for implementing Windows Routing and Remote Access Server (RRAS) on Server 2019.
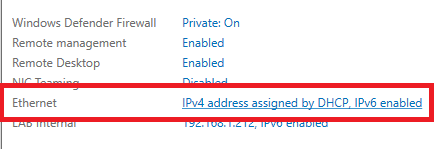
The first thing we need is to determine the internal IP for our Windows RRAS Server. For me, that is 192.168.1.212.
Create port forwarding rules on NETGEAR Router
Login to the router.
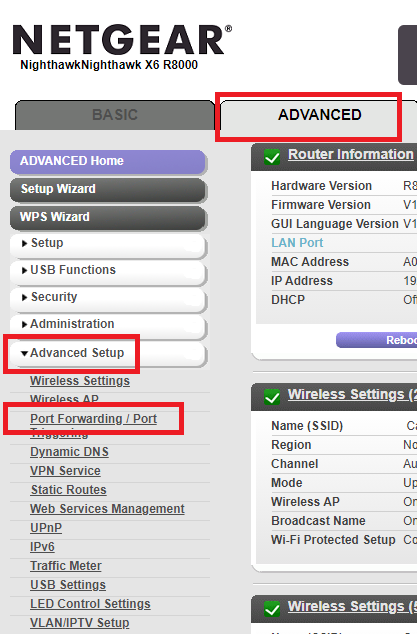
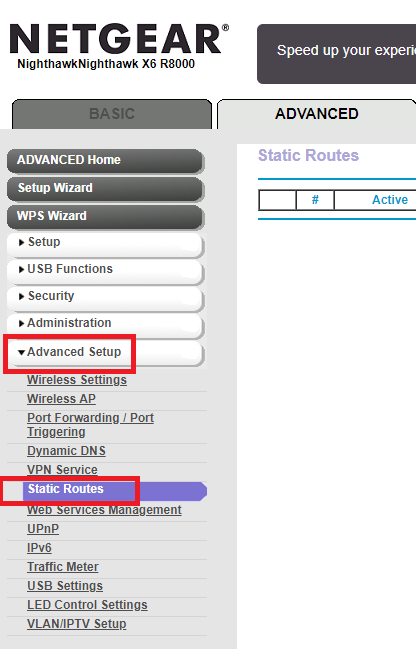
Click on the Advanced tab, then Advanced Setup, and Port Forwarding / Port, as shown in Figure 1.
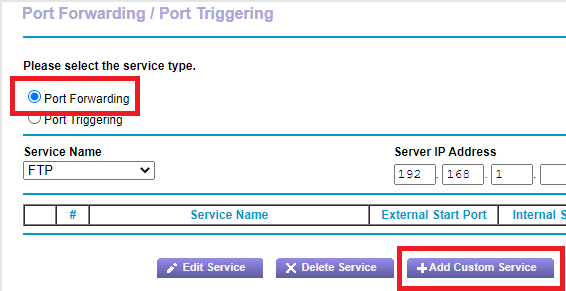
Select Port Forwarding and click the Add Custom Service button, as shown in Figure 2.
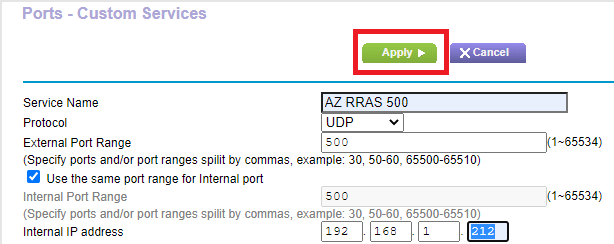
Enter the following information, as shown in Figure 3. After entering all information, click Apply.
- Service Name: A descriptive name for the service. I used AZ RRAS 500.
- Protocol: UDP
- External Port Range: 500
- Use the same port range for Internal port: Selected
- Internal IP address: IP address of the RRAS server. For me, that is 168.1.212.
Repeat the process shown in Figures 2 and 3 and enter the following information in Figure 4.
- Service Name: A descriptive name for the service. I used AZ RRAS 4500.
- Protocol: UDP
- External Port Range: 4500
- Use the same port range for Internal port: Selected
- Internal IP address: IP address of the RRAS server. For me, that is 168.1.212.
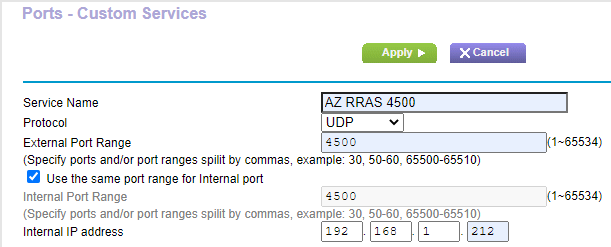
Figure 5 shows the two services added to the router.

Create Static Route on NETGEAR Router
Now we need to configure the router to route traffic to Azure from our on-premises virtual machines.
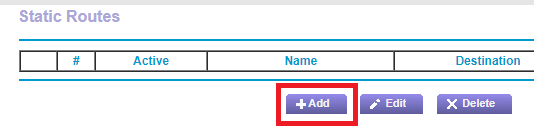
From Advanced Setup, click Static Routes, as shown in Figure 6.
Click Add, as shown in Figure 7.
Enter the following information and click Apply, as shown in Figure 8.
- Route Name: A name for the route. I used Azure.
- Verify that Private is not selected.
- Select Active.
- Destination IP Address: If you follow Claudio’s book, the Destination IP Address is on page 41 or Step 4 of the Creating a Virtual Network and Subnets section. I used what Claudio used: 16.0.0.
- IP Subnet Mask: If you follow Claudio’s book, the IP Subnet Mask is on page 41 or Step 4 of the Creating a Virtual Network and Subnets section. I used what Claudio used: 255.0.0.
- Gateway IP Address: The IP address of the RRAS server. For me, that is 168.1.212.
- Metric: 10
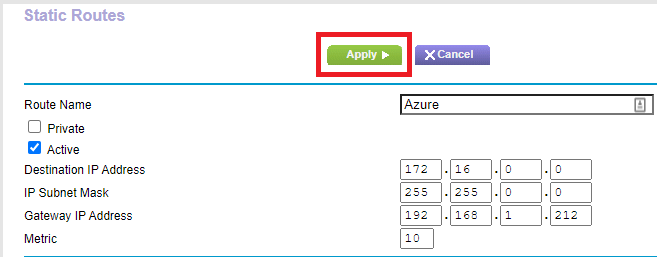
Figure 9 shows the Static Route added.

Log out and exit the router’s web interface.
Create VM from Server 2019 Template
Follow the instructions from Building Webster’s Lab V2 – Create VMs from the Server 2019 Template.
This RRAS computer is not domain-joined.
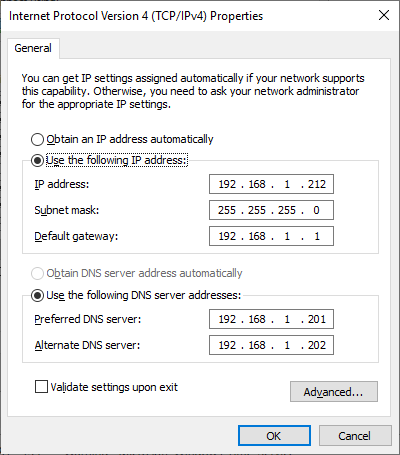
Assign a static IP address to the server, as shown in Figure 10.
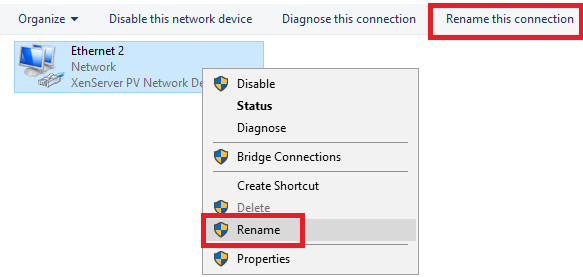
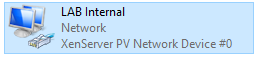
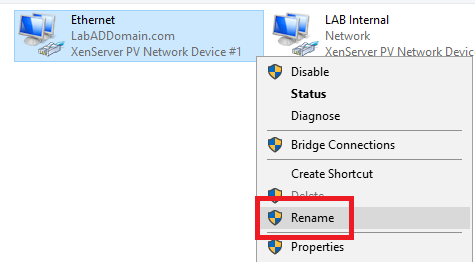
Rename the current network adapter to LAB Internal, as shown in Figures 11 and 12.
Install RRAS
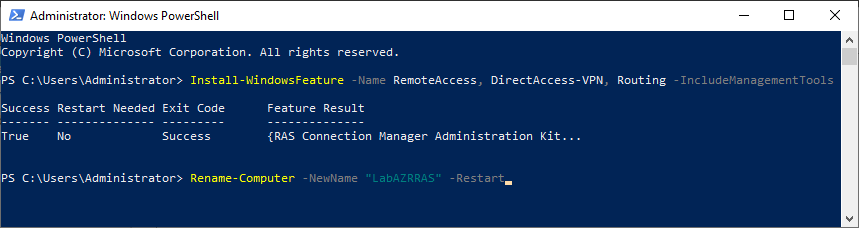
Open an elevated PowerShell session and run the following commands, as shown in Figure 13.
Install-WindowsFeature -Name RemoteAccess, DirectAccess-VPN, Routing -IncludeManagementTools

Rename-Computer -NewName "LabAZRRAS" -Restart
Those commands install the RRAS, DirectAccess VPN, and Routing features, RRAS management tools, rename the computer and restart the computer.
After the computer restarts, shut down the computer. We need to add a second network adapter.
VMware Add Network Adapter
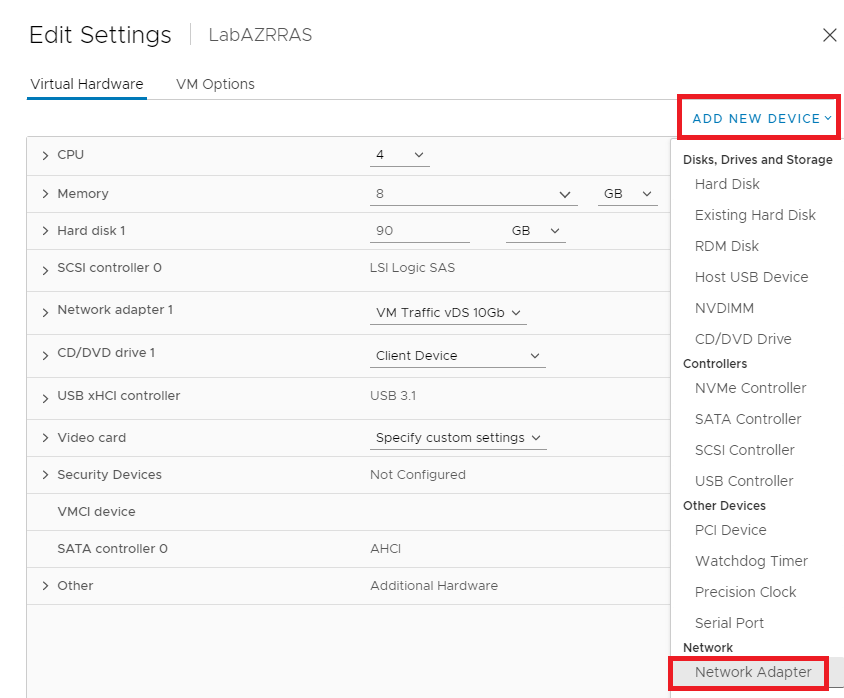
In vCenter, right-click the new RRAS VM, click Edit Settings…, click the Add New Device dropdown and click Network Adapter, as shown in Figure 14.
Verify that the new Adapter Type is VMXNET3, as shown in Figure 15.
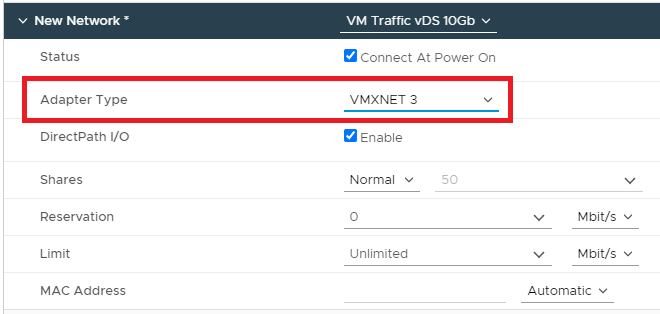
Click OK.
Power on the RRAS VM and go ahead and install all Windows Updates.
XenServer Add Network Adapter
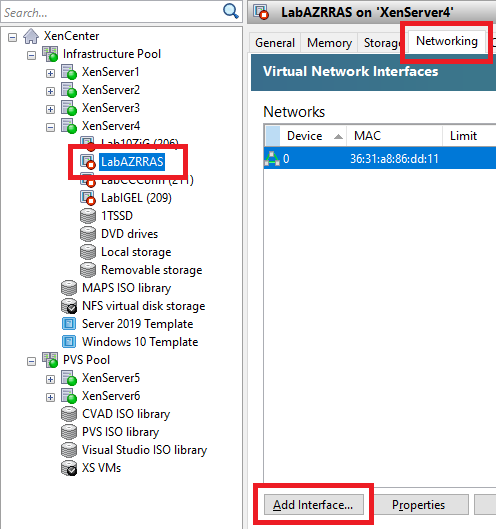
Select the RAS VM, click the Networking tab, and click Add interface…, as shown in Figure 16.
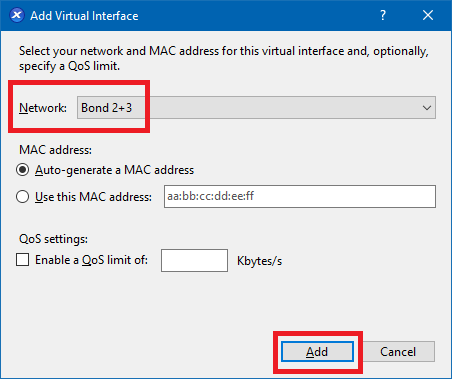
Select the correct Network and click Add, as shown in Figure 17.
Power on the RRAS VM and go ahead and install all Windows Updates.
Configuring the New Network Adapter
In Server Manager, click the new adapter, as shown in Figure 18.
Rename the new adapter to Azure External, as shown in Figures 19 and 20.

Configuring RRAS
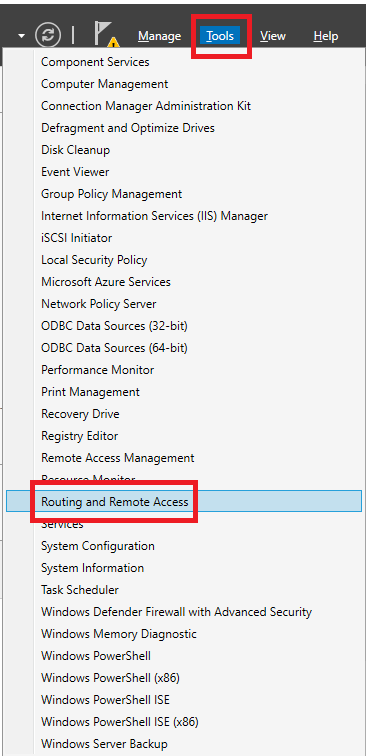
Click Tools, Routing and Remote Access, as shown in Figure 21.
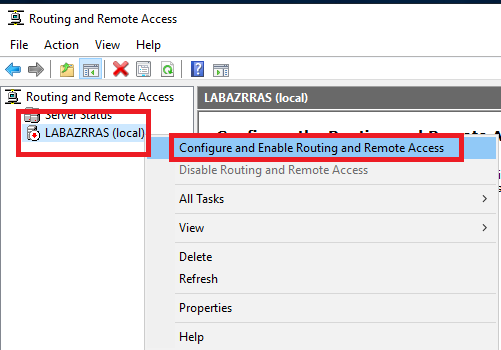
Right-click the RRAS server and click Configure and Enable Routing and Remote Access, as shown in Figure 22.
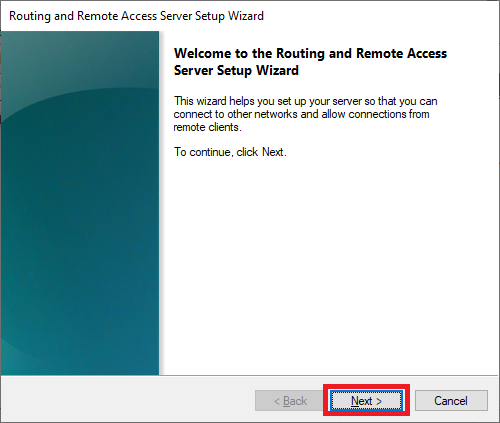
Click Next, as shown in Figure 23.
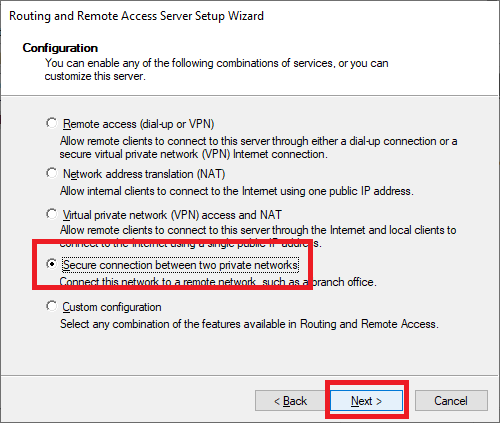
Select Secure connection between two private networks and click Next, as shown in Figure 24.
Select Yes and click Next, as shown in Figure 25.

Select Automatically and click Next, as shown in Figure 26.

Click Finish, as shown in Figure 27.
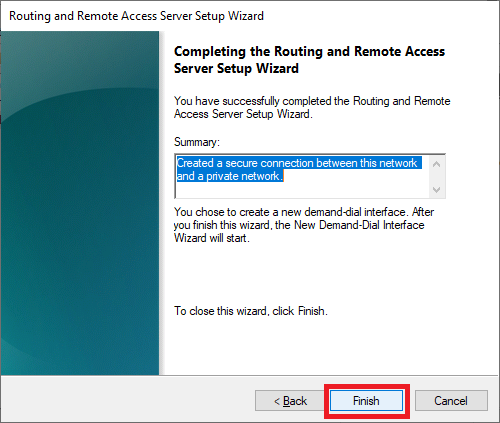
As shown in Figure 28, the Routing and Remote Access service starts.

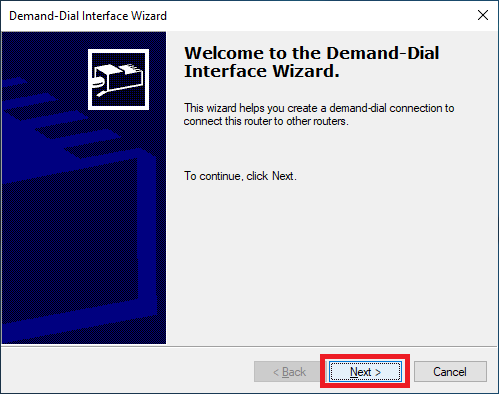
The Demand-Dial Interface Wizard starts.
Click Next, as shown in Figure 29.
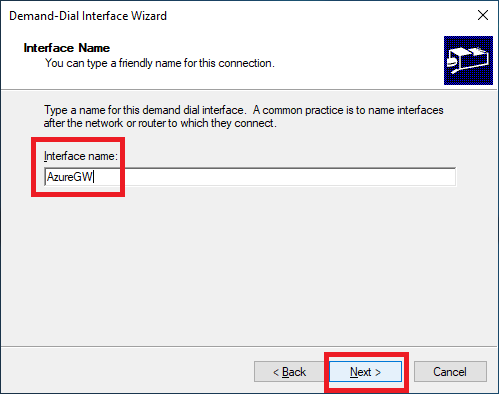
Enter an Interface name and click Next, as shown in Figure 30. I used AzureGW.
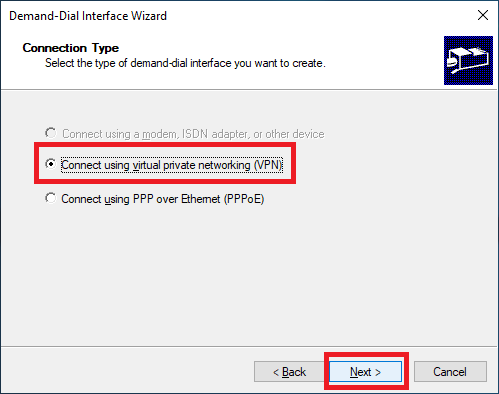
Select Connect using virtual private networking (VPN) and click Next, as shown in Figure 31.
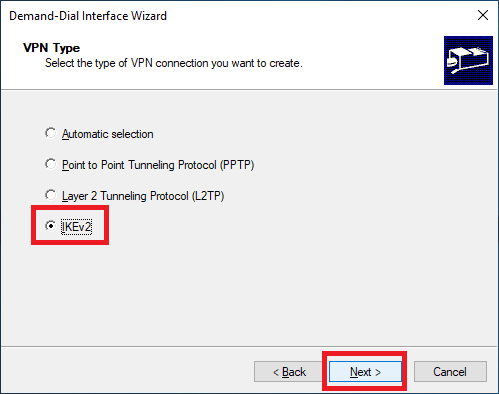
Select IKEv2 and click Next, as shown in Figure 32. We select IKEv2 because that is the default value, as shown on page 50 of Claudio’s book or Step 6 of the Creating a Connection section.
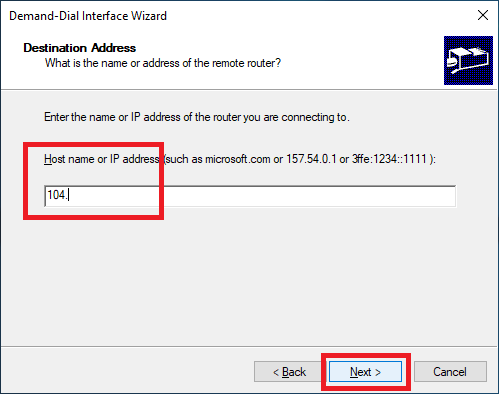
Enter the Public IP from your Azure Virtual Network Gateway (VNG following Claudio’s naming scheme) and click Next, as shown in Figure 33.
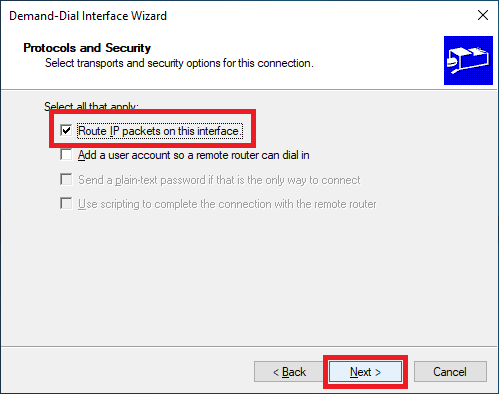
Select only Route IP packets on this interface and click Next, as shown in Figure 34.
Click Add, as shown in Figure 35.
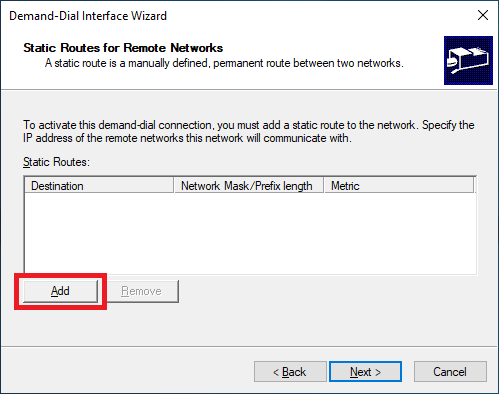
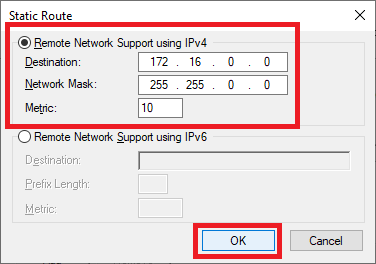
Enter the address space on the Azure virtual network, enter 10 for the Metric and click OK, as shown in Figure 36. If you follow Claudio’s book, the address space is on page 41 or Step 4 in the Creating a Virtual Network and Subnets section. I used the same address space as Claudio of 172.16.0.0/16.
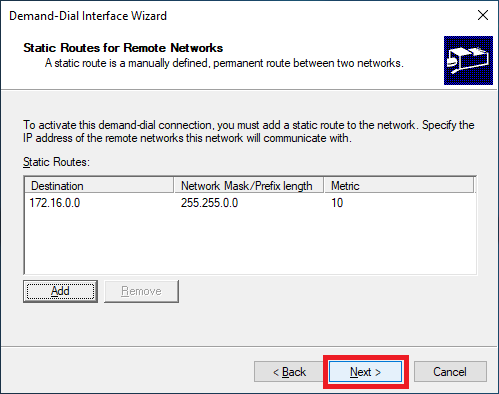
Click Next, as shown in Figure 37.
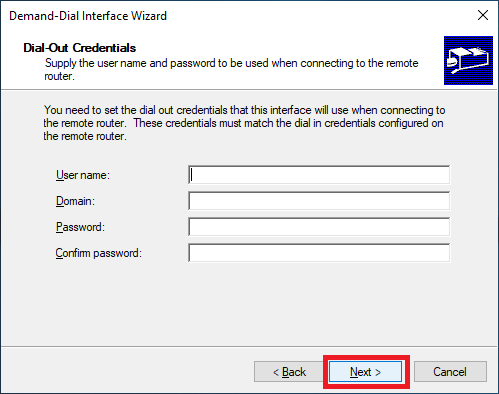
Click Next, as shown in Figure 38.
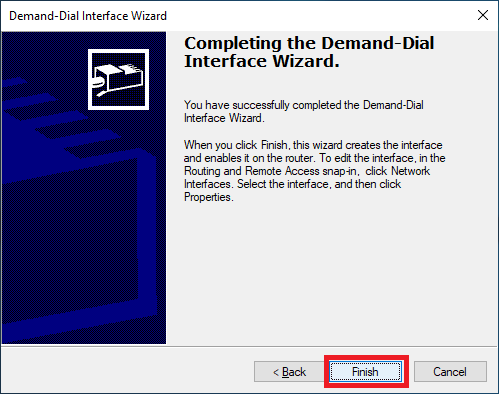
Click Finish, as shown in Figure 39.
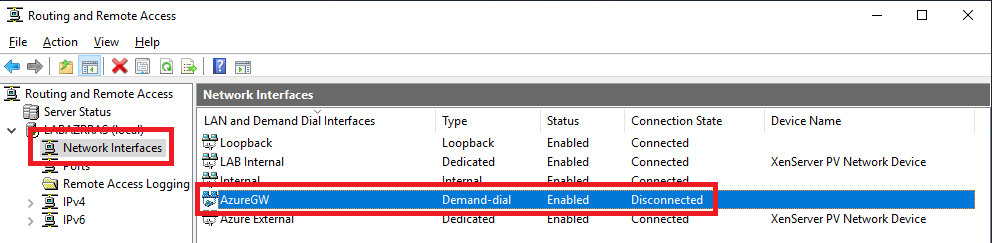
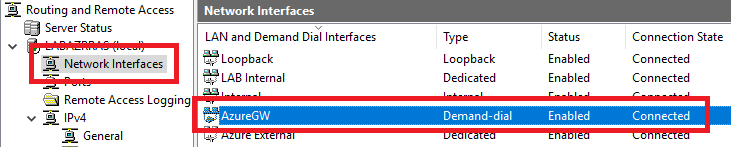
In the Routing and Remote Access console, expand the RRAS server and click on Network Interfaces. Figure 40 shows the new network interface in the expected Disconnected state.
Double-click the new network interface, click the Options tab, and enter 3 for Redial attempts, as shown in Figure 41.

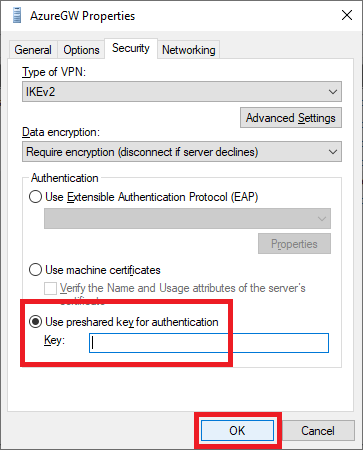
Click the Security tab, select Use preshared key for authentication, enter the Shared key (PSK) from page 50 in Claudio’s book or Step 6 in the Creating a Connection section, and click OK, as shown in Figure 42.
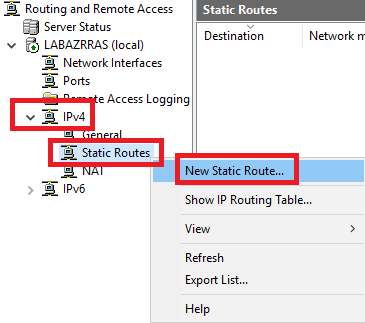
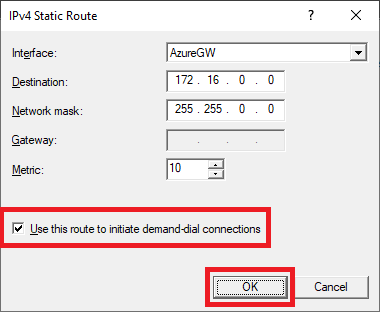
In the Routing and Remote Access console, expand IPv4, right-click Static Routes, and click New Static Route…, as shown in Figure 43.
Enter the following information and click OK, as shown in Figure 44.
- Interface: The new network interface from Figure 30.
- Destination: The Azure address space from Figure 36.
- Network mask: From Figure 36.
- Metric: From Figure 36.
- Use this route to initiate demand-dial connections: Selected.
Verifying the Connection between Webster’s Lab and Azure
Go to your Azure portal, Local Network Gateway Connections, and your connection should show as Connected, as shown in Figure 45.

The new network interface shows as Connected in the Routing and Remote Access console, as shown in Figure 46.
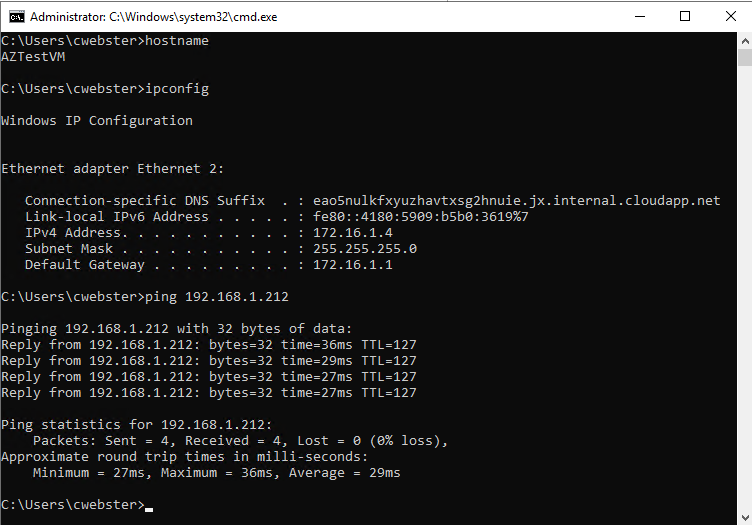
At this point, Claudio had me create a basic VM to test pinging between my lab and Azure. After creating a basic Windows Server 2019 VM, I logged in and disabled the Windows Firewall on the Azure VM.
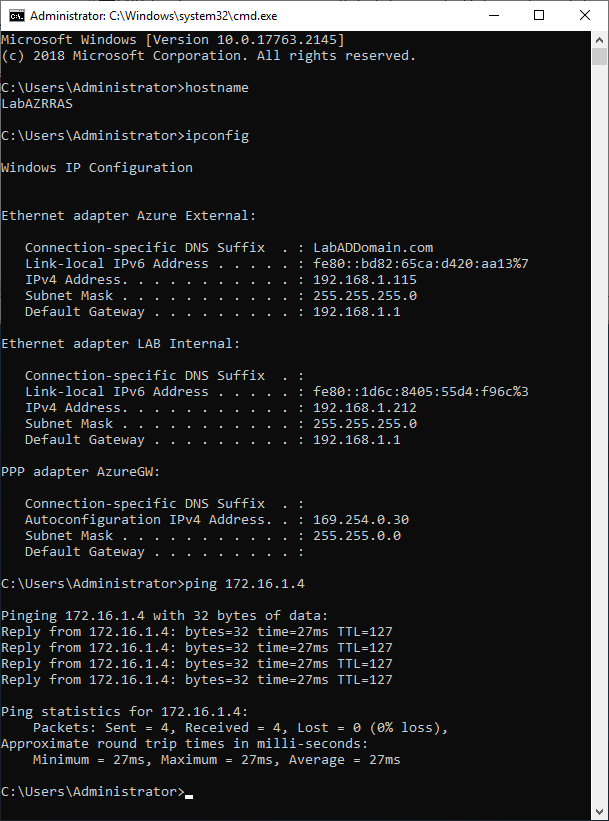
On my RRAS server, I enabled the Windows Firewall Inbound Rule File and Printer Sharing (Echo Request – ICMPv4-In), as shown in Figure 47.

I opened a command prompt from the Azure VM and pinged my RRAS server, as shown in Figure 48.
I opened a command prompt from the RRAS server and pinged my Azure VM, as shown in Figure 49.
I now shut down my Azure Test VM and deleted it, and all its resources before Microsoft started charging me money!
At this point, I am ready to continue to the Azure Virtual Desktop chapter in Claudio’s book.