[Updated 8-Nov-2021]
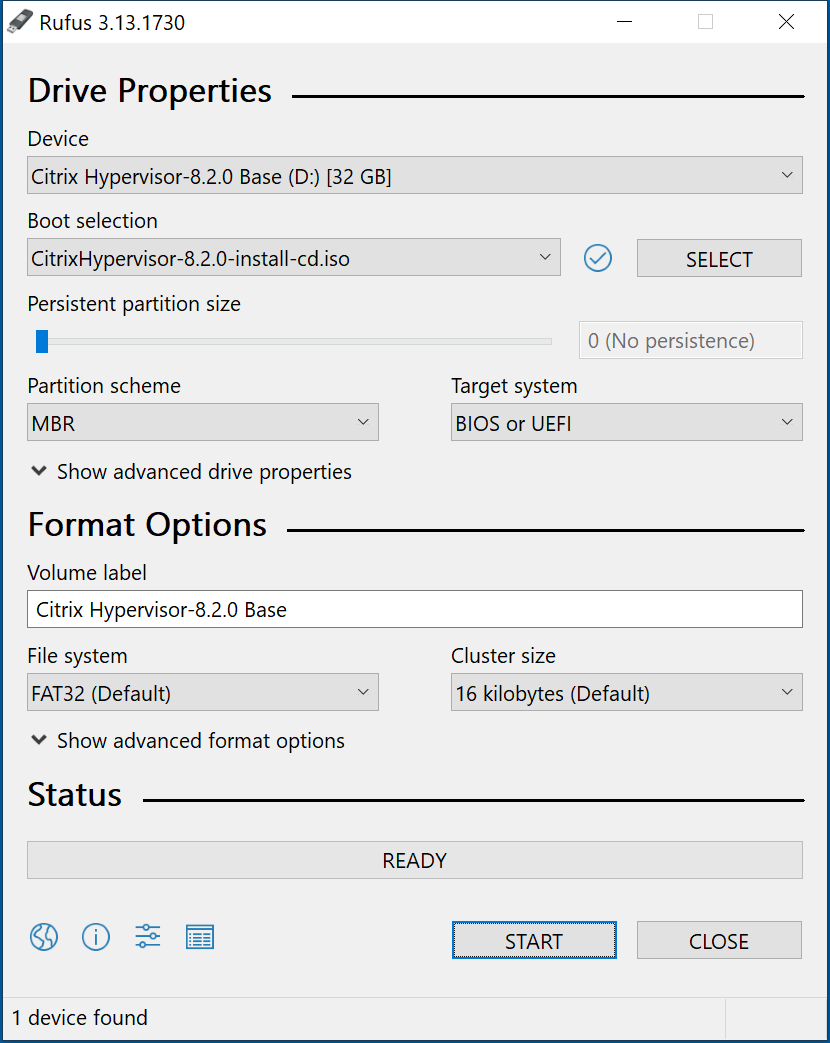
Installing Citrix Hypervisor (XenServer) 8.2 is easy as there are not many options. It is almost a “Next, Next, Install, Finish, Reboot” process. The first thing is to download the latest XenServer 8.2 ISO and the Citrix VM Tools for Windows. I saved the Citrix VM Tools for Windows to a shared location for use later. After I downloaded the XenServer ISO, I used Rufus to create a bootable 32GB thumb drive from my laptop, as shown in Figure 1.
Note 1: I am using a USB drive for this install, but you can also use TFTP and NFS, FTP, or HTTP along with installing from a CD/DVD drive.
Note 2: I cover XenCenter in the following article, but if you want to go ahead and download XenCenter now, you can.
Note 3: TinkerTry provides a 32GB thumb drive with each of their servers.
I used the Intelligent Platform Management Interface (IPMI) built into the TinkerTry server to install. Before IPMI is usable, configure IPMI in the server’s BIOS. For this install, I am using the new HTML5 client.
To configure IPMI in the BIOS of a TinkerTry Server, power on the server and press Delete on the appropriate screen, as shown in Figure 2.

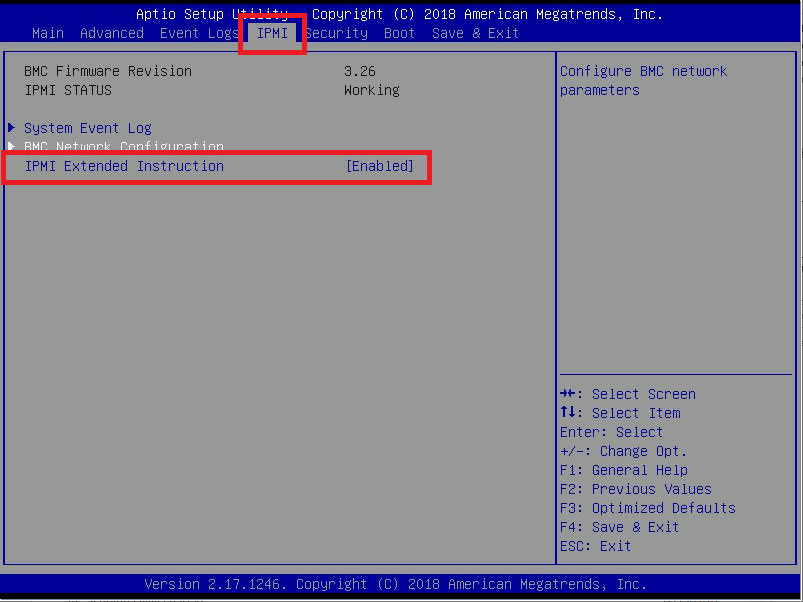
Using the arrow keys, navigate to IPMI, press the Down Arrow to select IPMI Extended Instruction, as shown in Figure 3, and press Enter.
Note: Initially, this setting is Disabled, but I can’t take a screenshot while it is disabled.
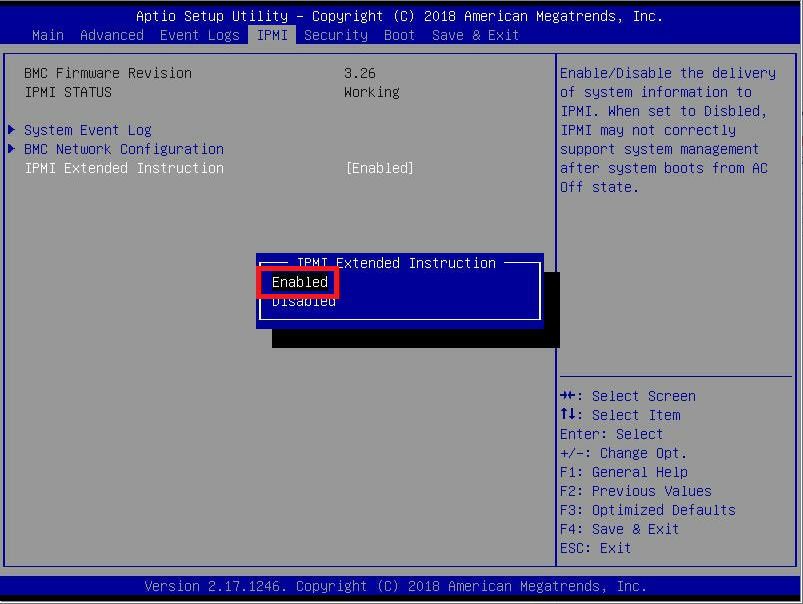
Select Enabled and press Enter, as shown in Figure 4.
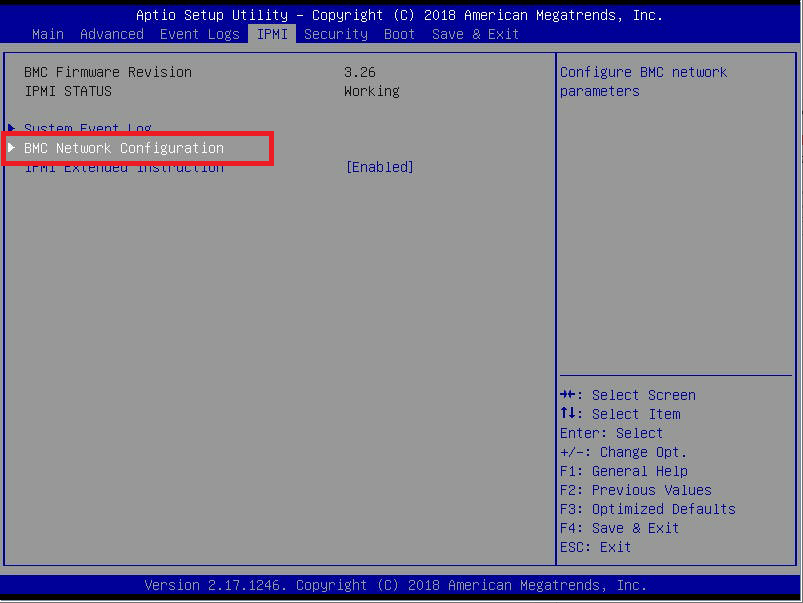
Press Up Arrow to select BMC Network Configuration and press Enter, as shown in Figure 5.
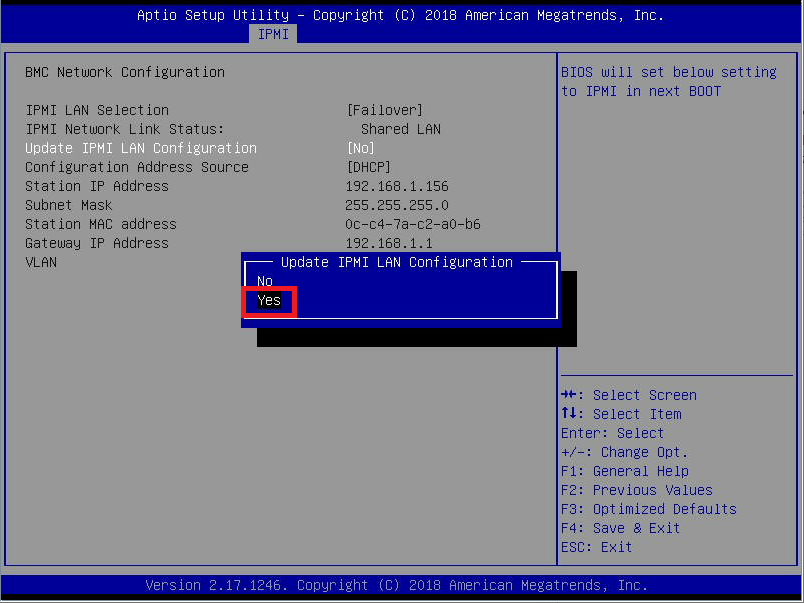
Update IPMI LAN Configuration is selected. Press Enter, down arrow to select Yes, and press Enter, as shown in Figure 6.
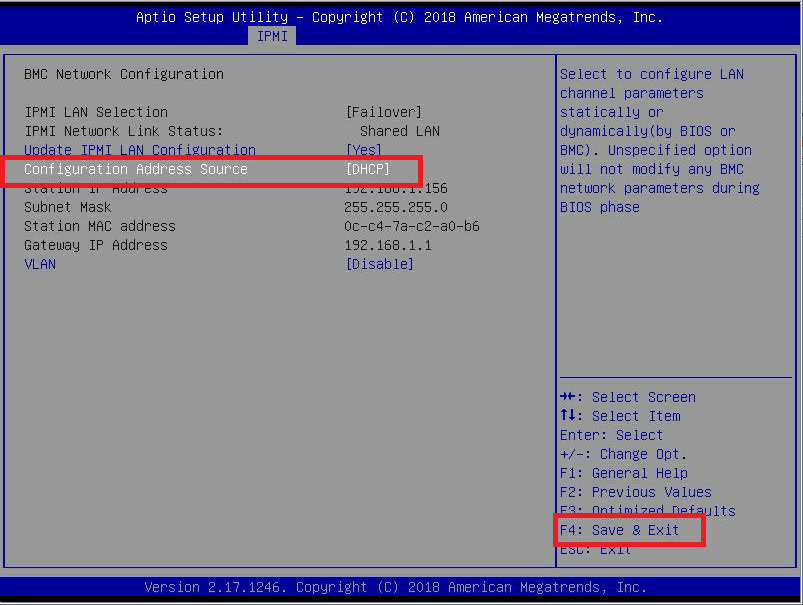
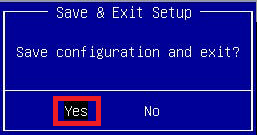
If you want to continue using DHCP, press F4 to Save & Exit, shown in Figure 7.
Select Yes to the Save & Exit Setup dialog, as shown in Figure 8.

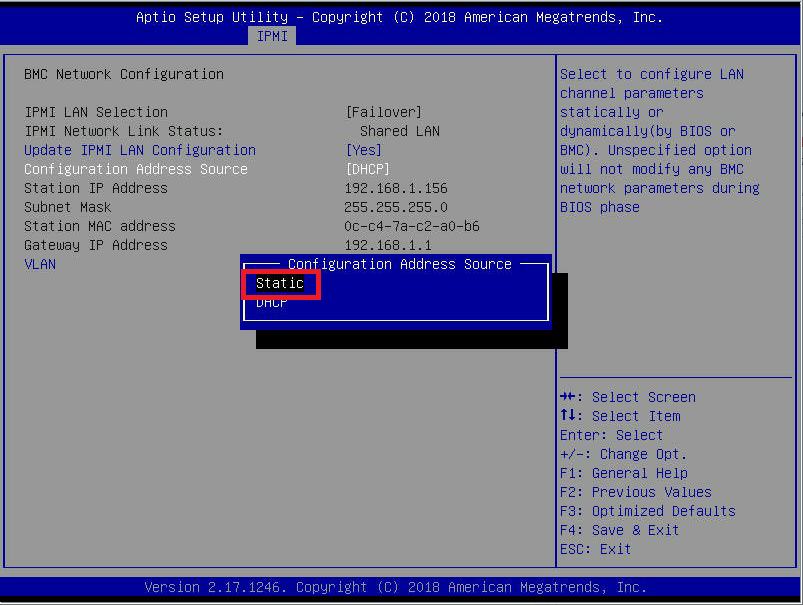
If, like me, you prefer to use a static IP address, press Enter, use the arrow keys to select Static, and press Enter, as shown in Figure 9.
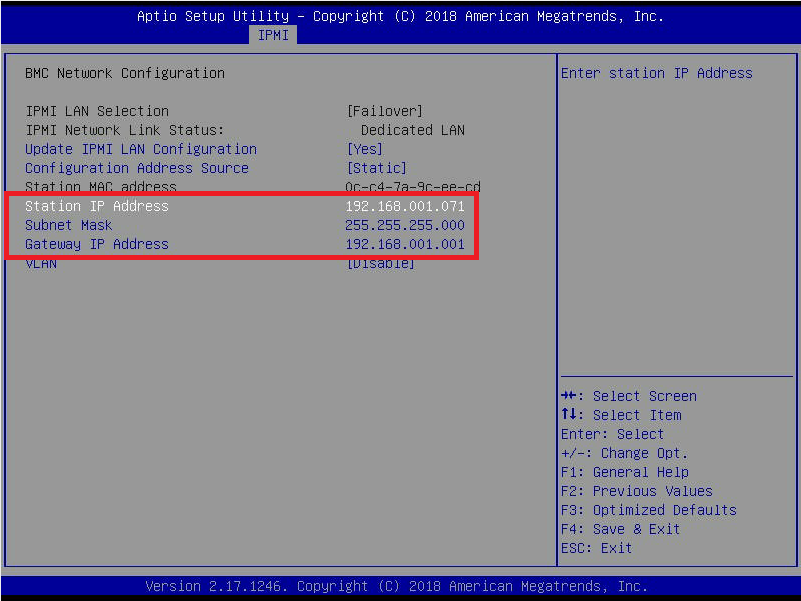
Use the arrow keys to navigate to and configure the Station IP Address, Subnet Mask, and Gateway IP Address, then press F4 to Save & Exit as shown in Figure 10.
Select Yes to the Save & Exit Setup dialog, as shown in Figure 11.
Now that you have configured IPMI, IPMI is used to do the install.
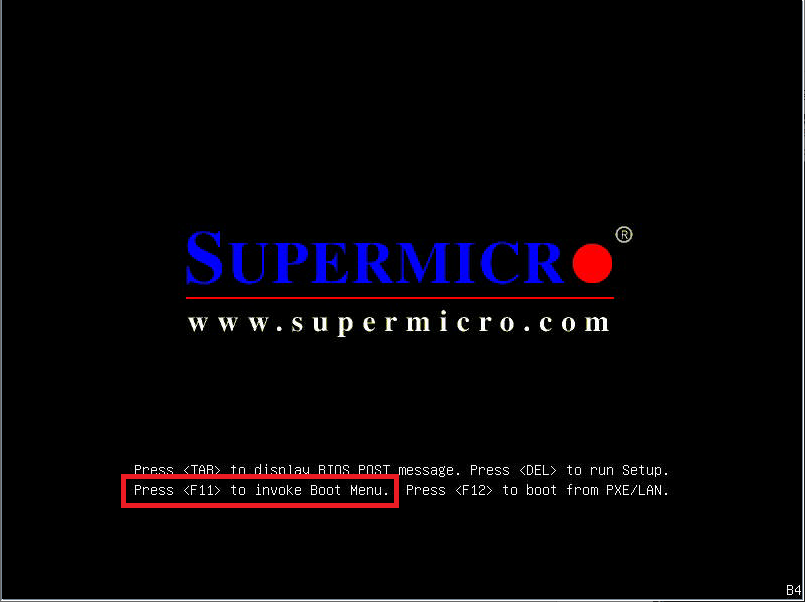
As the server restarts, press F11 on the appropriate screen to start the Boot Menu, shown in Figure 12.
The Rufus utility that created the bootable thumb drive for XenServer 8.2 created a drive usable with either a legacy BIOS or UEFI.
Note: See this article for an explanation of UEFI. What Is UEFI, and How Is It Different from BIOS?
As part of the “trials-and-errors” mentioned in the Introduction article, the system required the boot configuration set to UEFI to get XenServer to boot from the NVMe disk, not Legacy or Dual.
Note: If your host does not support UEFI, XenServer still supports legacy BIOS.
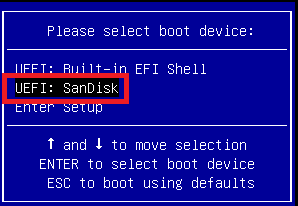
Select UEFI: SanDisk, as shown in Figure 13. Installing XenServer using the EUFI option gives a better visual experience than installing using the legacy BIOS option.
Note: SanDisk is the brand of thumb drive TinkerTry provided with their server.
After selecting to boot from the UEFI: SanDisk thumb drive, the XenServer installer begins. After a few minutes, the first installation popup appears. An initial Install screen appears, but it goes by so fast that I could not get a screenshot.
Note: Using the UEFI installer, the screen resolution is so detailed and extensive, it made sense only to include the input area for the following Figures. Otherwise, you would need a magnifying glass to read the text.
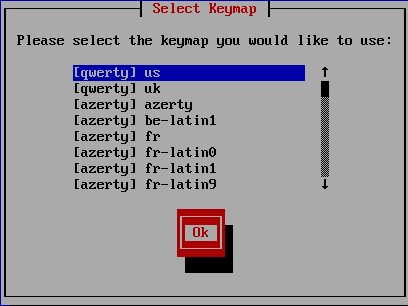
Use the arrow keys to select the correct keymap and press Enter, as shown in Figure 14.
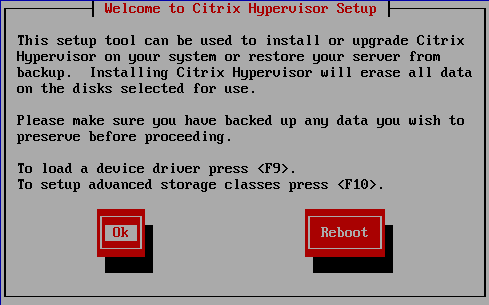
Press Enter on the Welcome to Citrix Hypervisor Setup screen, as shown in Figure 15.
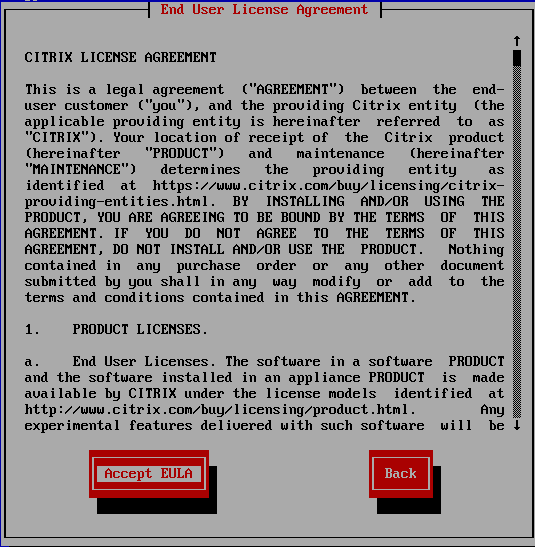
Press Tab until you get to the Accept EULA button and press Enter as shown in Figure 16.
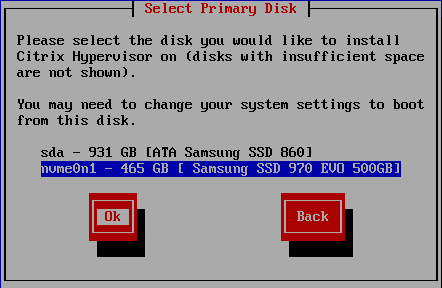
Select the drive to install XenServer 8.2 using the Up and Down arrow keys and press Enter, as illustrated in Figure 17. My hosts have two drives. I install XenServer on the 500GB NVMe drive, and the 1TB drive is for a local Storage Repository (SR).
Note: 500GB and 1TB are the advertised sizes. Usable capacity, as shown in Figure 17, is different.
Note: I had to change my server to boot using UEFI to get XenServer to boot from the NVMe disk.
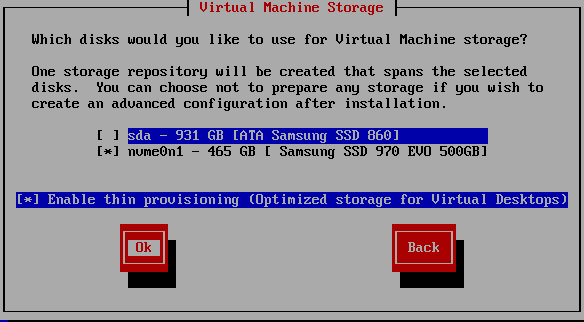
Select which disk to use as an SR, press Tab, then press Spacebar if you wish to enable thin provisioning, and then press Enter as shown in Figure 18.
Note: If you plan to use IntelliCache, you must enable thin provisioning.
What is IntelliCache?
IntelliCache is a XenServer feature used in a XenDesktop (Virtual Desktops) deployment to cache temporary and non-persistent operating-system data on the local XenServer host. IntelliCache is available for Machine Creation Services (MCS)-based desktop workloads that use NFS storage.
Selecting thin provisioning creates an SR with an EXT3 file system versus LVM (Logical Volume Management).
Note: XenServer treats all disks selected in this screen as a single SR. I am not selecting my 1TB SSD as I want that as a separate SR.
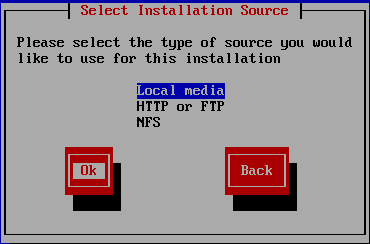
This installation source is the SanDisk thumb drive, so press Enter as shown in Figure 19.
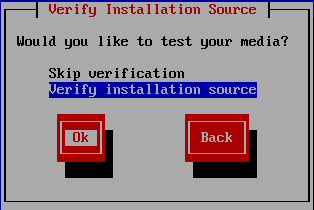
Decide whether to verify the installation media and press Enter, as shown in Figure 20.
Note: Citrix prefers you verify the installation source. 99 times out of 100, neither Tobias nor I verify the installation source.
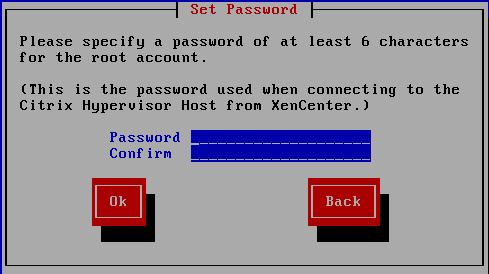
Type in your Root Password, Confirm the password, and press Enter, as shown in Figure 21.
Note: If you plan to build, like me, multiple XenServer hosts to join into a Pool, all the hosts must have the same password for the root user account. Fellow CTP and XenServer expert Tobias Kreidl recommends that after the install is complete, going to the shell to verify the root password works.
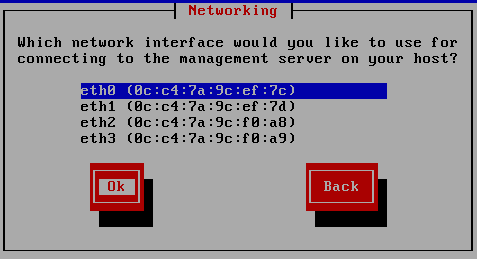
Use the arrow keys to select which network interface to use for managing the XenServer host and press Enter, as illustrated in Figure 22.
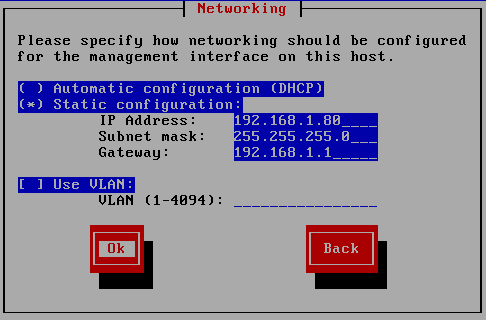
Decide whether to use DHCP or a static IP address to configure networking for the management network interface and press Enter as shown in Figure 23.
Note: A VLAN for the primary network interface is supported.
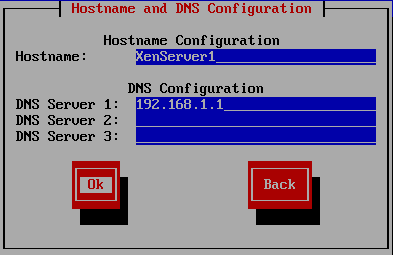
Enter a Hostname and DNS Server information and press Enter, as shown in Figure 24.
For DNS, note that an IP address pointing to a virtual interface containing multiple IP addresses is possible.
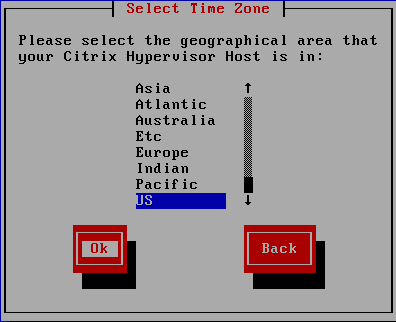
Use the arrow keys to select your geographical area for your Time Zone and press Enter, as shown in Figure 25.
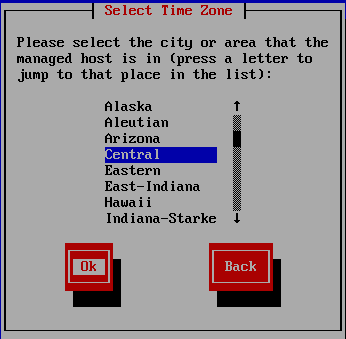
Use the arrow keys to select a city or area to refine further your Time Zone and press Enter, as shown in Figure 26.
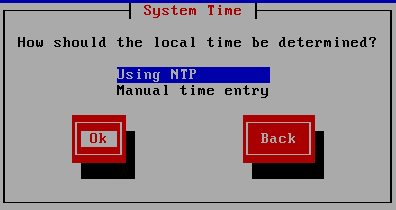
Press Enter to use NTP for System Time, as illustrated in Figure 27.
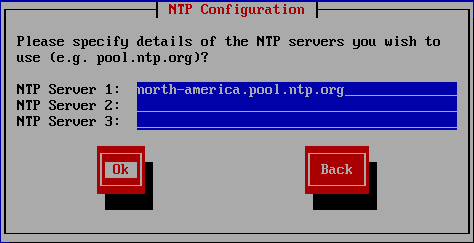
I prefer to use servers from pool.ntp.org for NTP configuration. Enter the server or servers or device to use for the NTP Configuration, and press Enter three times, as shown in Figure 28.
Note: Tobias disagrees with me on using the top-level NTP pool servers.
“As to NTP configuration choices, we could discuss this ’til the cows come home, but I’m a strong proponent for local NTP servers as well as using NTP peers; see discussions.citrix.com/topic/326639-tips-for-setting-up-ntp-on-xenserver-hosts/
I have intended to re-write this as a single, updated blog article someday and never got around to it.” [Webster: The link to the discussion thread Tobias referenced is no longer valid, and I can’t find it.]
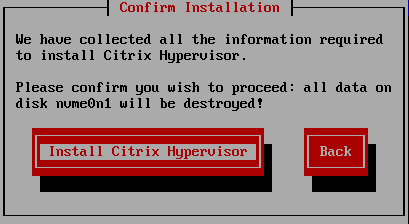
Press Tab to select Install XenServer and press Enter as illustrated in Figure 29.
The installation of XenServer 8.2 begins, as shown in Figure 30.

I have no Supplemental Packs to install, so press Enter as shown in Figure 31.

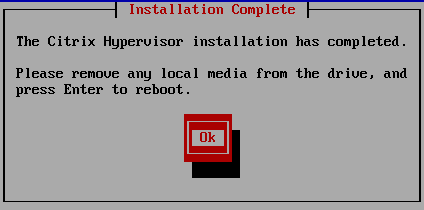
When the installation completes, physically remove the installation media (SanDisk thumb drive) from the server and press Enter to reboot the new XenServer 8.2 virtualization host, as shown in Figure 32.
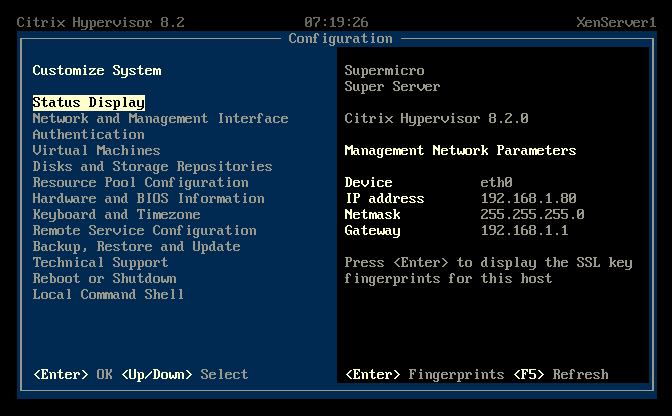
Once the server reboots, you have done the easy part. You now have a XenServer 8.2 host ready for the initial configuration, as shown in Figure 33.
From Tobias:
“Note that sometimes the network won’t show up on the XS console screen. This is a weird thing that has been happening over various XS/CH releases. Sometimes if you wait long enough, it eventually shows up. In most cases, the network is there. It’s just not visible through this interface. Conversely, occasionally, the whole network has been lost, and I’ve had to re-configure it all using an emergency network reset and going through the whole process. This is particularly painful if you have things like multiple networks, VLAN, and/or iSCSI address that all need to be redefined.”
Note: I followed the same process for the other hosts.
Hi Carl,
Do you have some tutorial for hyperconvergence to share the local Storage of each Xenserver.
The goal is to move from Vsphere with VSAN to XenServer.
Regards,
Sorry, I do not.
Webster
Is their a way of automating the installation of Xenserver rather than doing all the steps above manually if you have lots of servers to build or want to ensure that all servers that are built the same way?
Regards
Saff
Here you go, courtesy of Trond Erik Haavarstein.
New-HypervisorPXESetup
Webster
Nice article,
Im new to citrix, I’m using XenServer 8.2
I needed to understand how could I check if Citrix VM tools is installed pls.
Also how could I uninstall Citrix VM tools as well.
I wished to understand the above processes for Linux VMs and Windows VMs
As Citrix VM tools has recently launched I do not find much information on it. Would you be kind to let me know.
I can only tell you for Windows.
In XenCenter, click a VM, look in the General tab, in the General section, and look at Virtualization state.
You could also look in Programs and Features and see if the Citrix Hypervisor PV Tools are installed.
You can also look in Settings, Update & Security, View update history, Driver Updates.
Installing Citrix VM Tools
Updates to Citrix VM Tools for Windows – For XenServer and Citrix Hypervisor
Webster