I received an email from a reader asking me if I had ever changed a production Provisioning Services (PVS) database from a single database to use mirroring. I had not, so I thought this was a good time to try it out and document the process.
My lab runs two PVS 7.1 servers on Microsoft Windows Server 2012 R2 and three Microsoft SQL Server 2012 SP1 servers also running on Server 2012 R2.
Note: The Witness SQL server can run SQL Server Express, but I already had full SQL Server installed on three servers, so I decided to use full SQL Server and not SQL Server Express for the Witness server.
Because I am using SQL Server 2012 SP1, I had to download the Native Client for SQL Server 2012 SP1 (ENU\x64\sqlncli.msi) and install it on all PVS servers.
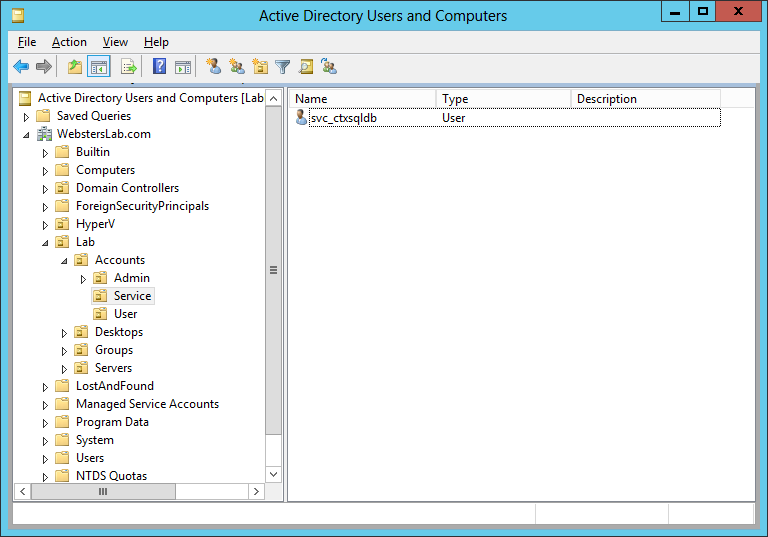
I have a service account created in Active Directory for the PVS database.
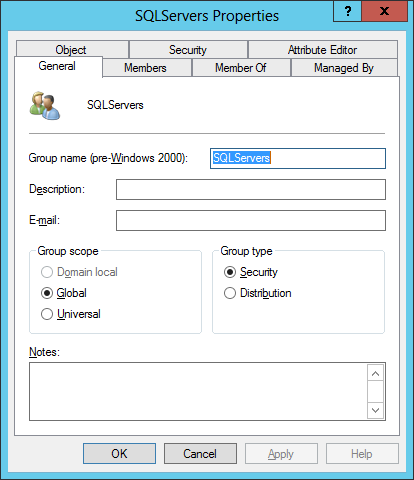
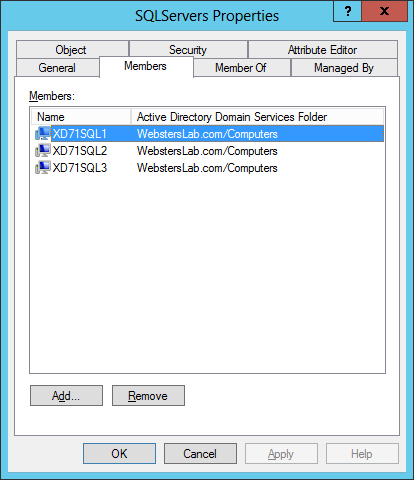
I also created a security group named SQLServers that has all three SQL Servers as members. This security group will be used when mirroring is configured later using a wizard in SQL Server.
The members of the SQLServers security group.
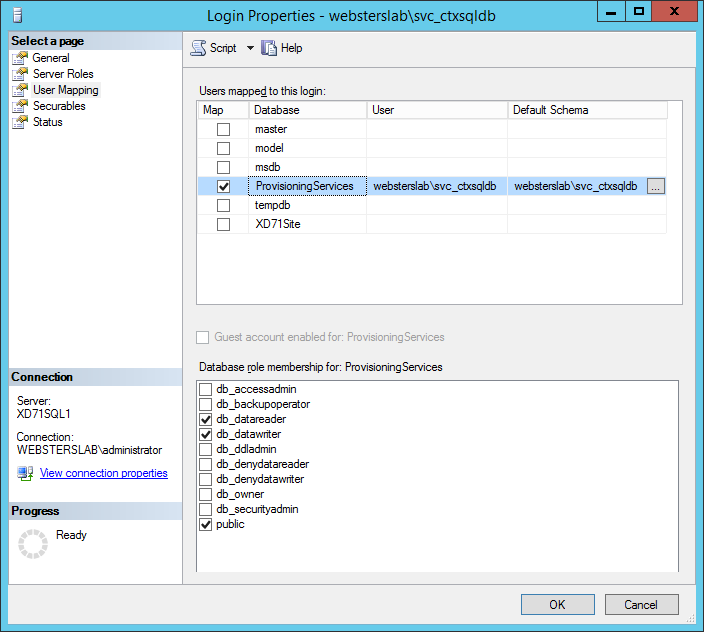
The PVS Configuration Wizard configured the PVS database for the service account.
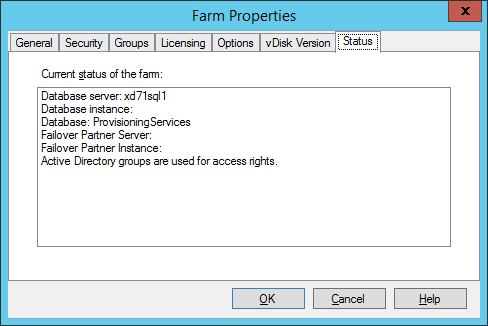
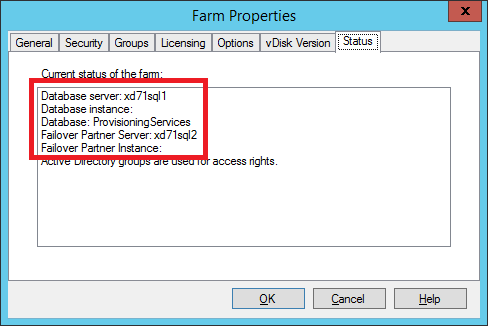
The Farm properties, as shown in the PVS console, show I am not configured for database failover.
The first thing that must be done is to change the database’s Recovery model that PVS created automatically. PVS created the database using the Simple Recovery model, but mirroring requires the Full Recovery model. Please see Prerequisites, Restrictions, and Recommendations for Database Mirroring.
“The database must use the full recovery model. The simple and bulk-logged recovery models do not support database mirroring. Therefore, bulk operations are always fully logged for a mirrored database.”
On the SQL Server with the PVS database, open the SQL Server Management Studio, expand Databases, right-click the PVS database, click Properties and click Options in the left pane.
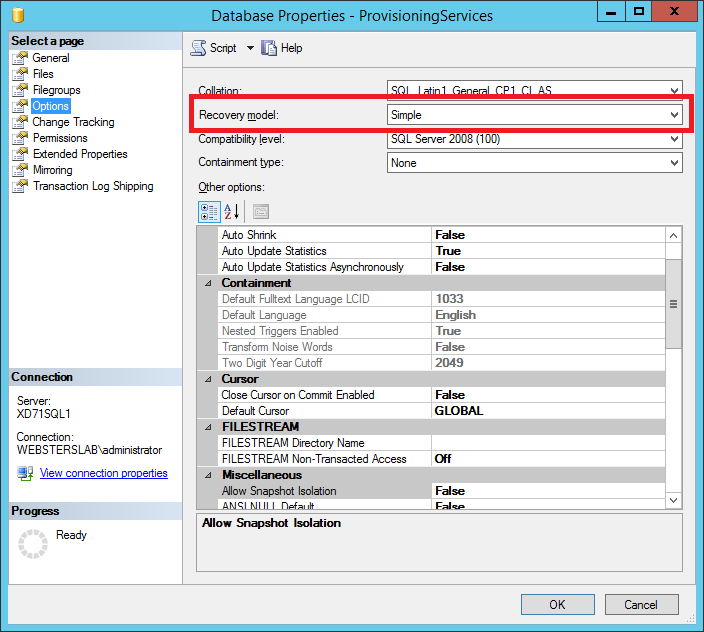
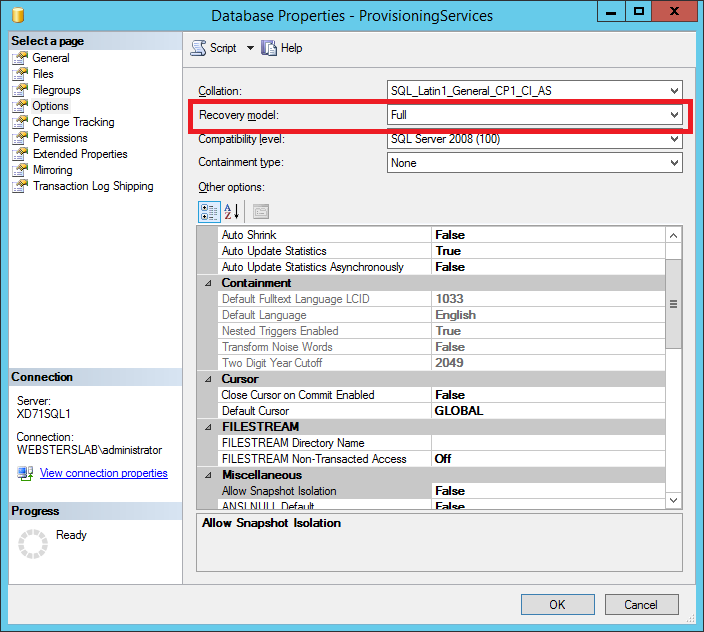
Change the Recovery model to Full and click OK.
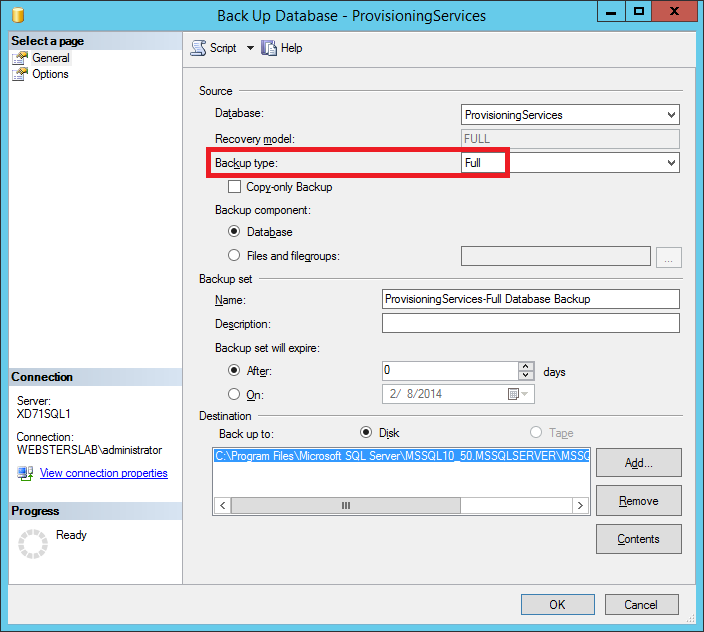
The next step is to do two backups of the PVS database. One for the database and one for the transaction logs.
Still in the Databases node of the SQL Server Management Studio, right-click the PVS database, click Tasks and click Back Up.

Leave the Backup type as Full and click OK.
Click OK.

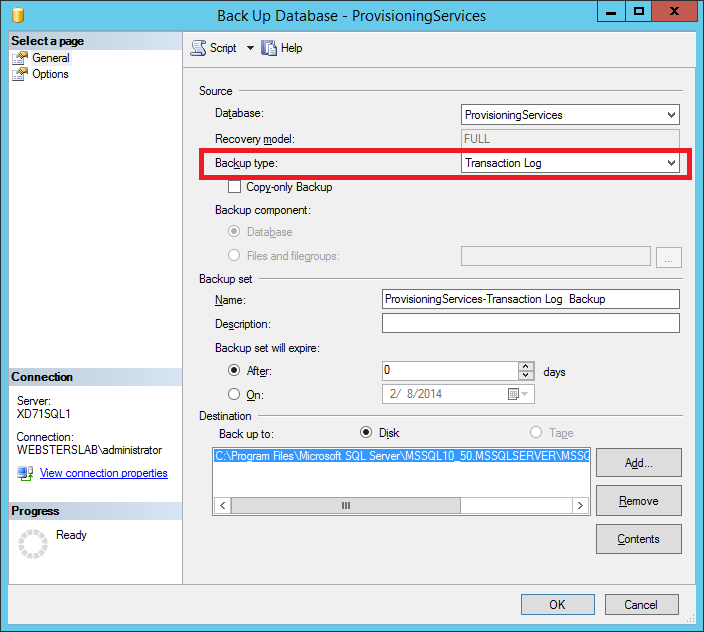
Repeat the process for the second backup. Right-click the PVS database, click Tasks, and click Back Up.
Click OK.
Change the Backup type to Transaction Log and click OK.
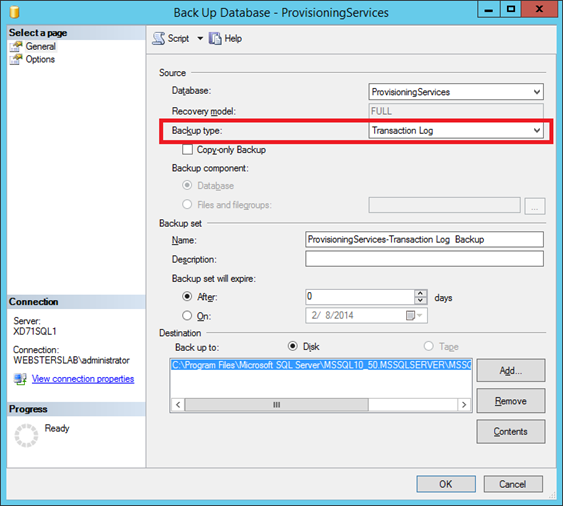
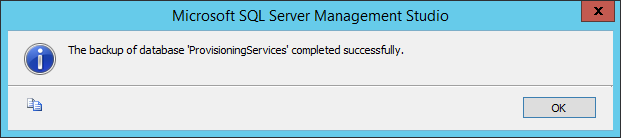
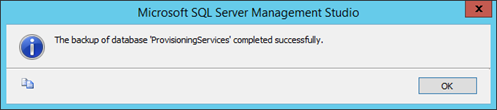
Click OK.
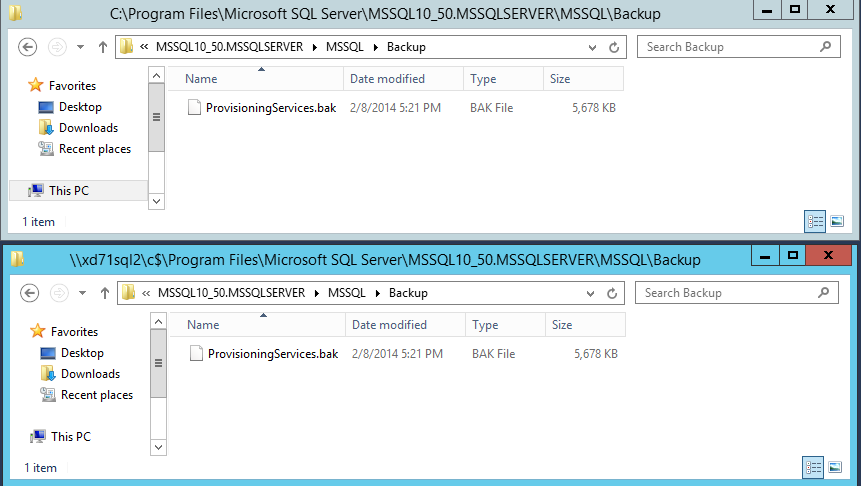
The backup on the primary SQL server needs to be copied to the same location on the mirror SQL server. For my lab, XD71SQL1 is the primary, and XD71SQL2 is the mirror.
What I did is on SQL1 open up Windows Explorer to C:\Program Files\Microsoft SQL Server\MSSQL10_50.MSSQLSERVER\MSSQL\Backup and also open up an Explorer window to \xd71sql2\c$\Program Files\Microsoft SQL Server\MSSQL10_50.MSSQLSERVER\MSSQL\Backup. I then copied and pasted the backup file from SQL1 to SQL2.
Exit both explorer windows.
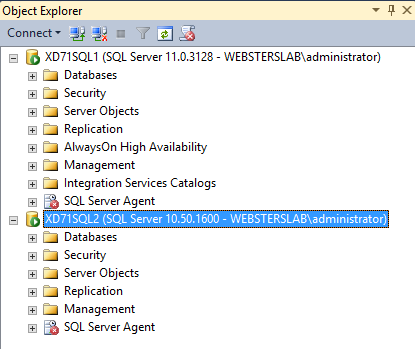
Either go to SQL2 or add SQL2 to the SQL Server Management Studio on SQL1 (which is what I did).
Note: Please make sure your SQL Servers are running the same version, or you will run into issues. Don’t ask me how I found that out. 🙂
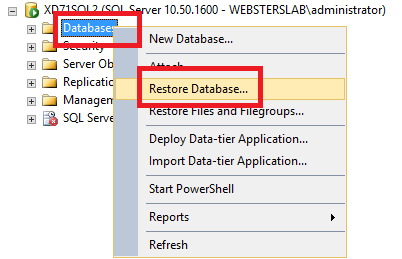
For the mirror server connection (SQL2 for me), right-click Databases and click Restore Database.
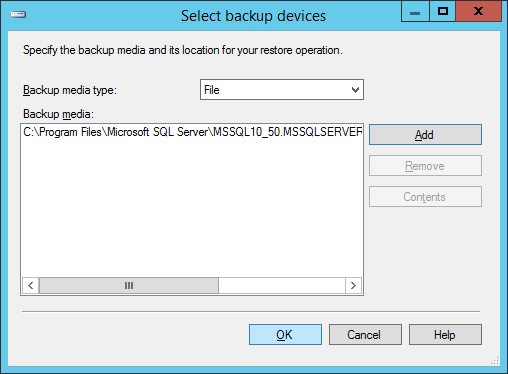
Change Source to Device and click the browse button.
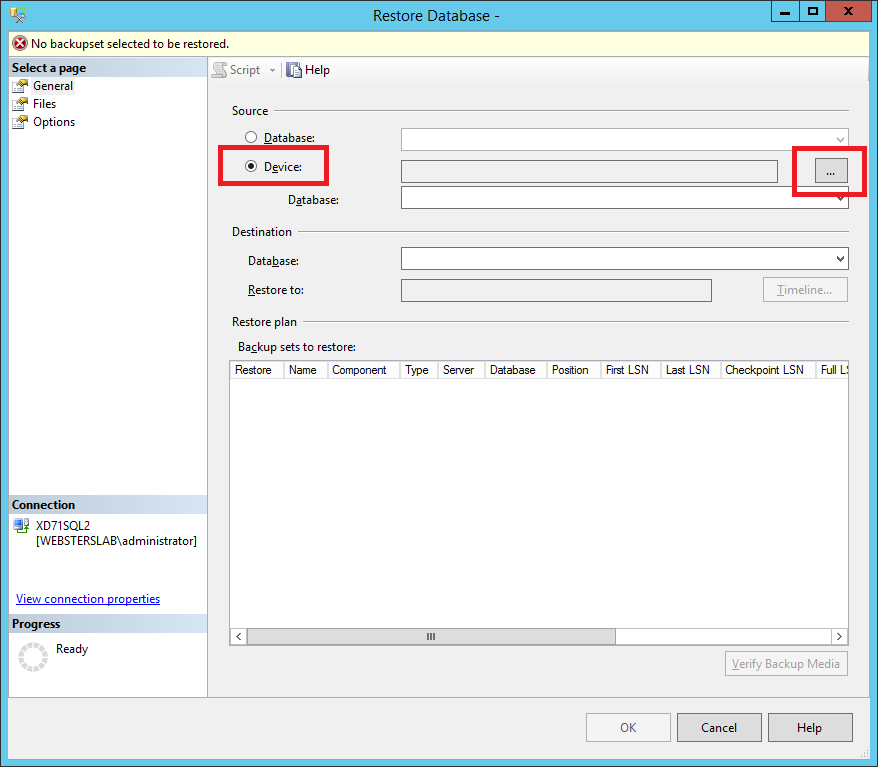
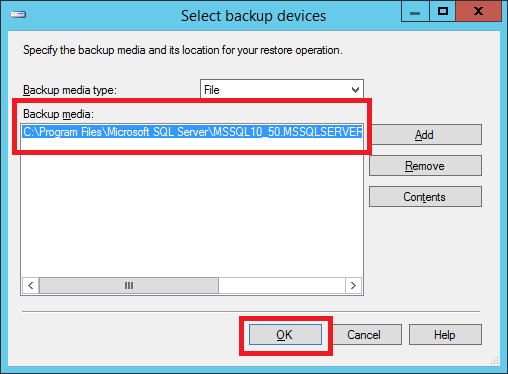
Browse to the backup file copied from the primary SQL server, click on the backup file and click OK.
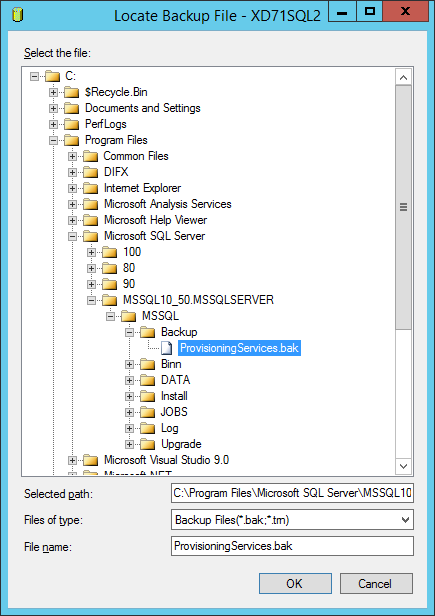
Click OK.
Make sure the Database is your PVS database and both Backup sets to restore are selected. DO NOT click OK at this time.
Click Options in the left pane, change the Recovery state to RESTORE WITH NORECOVERY, and click OK.
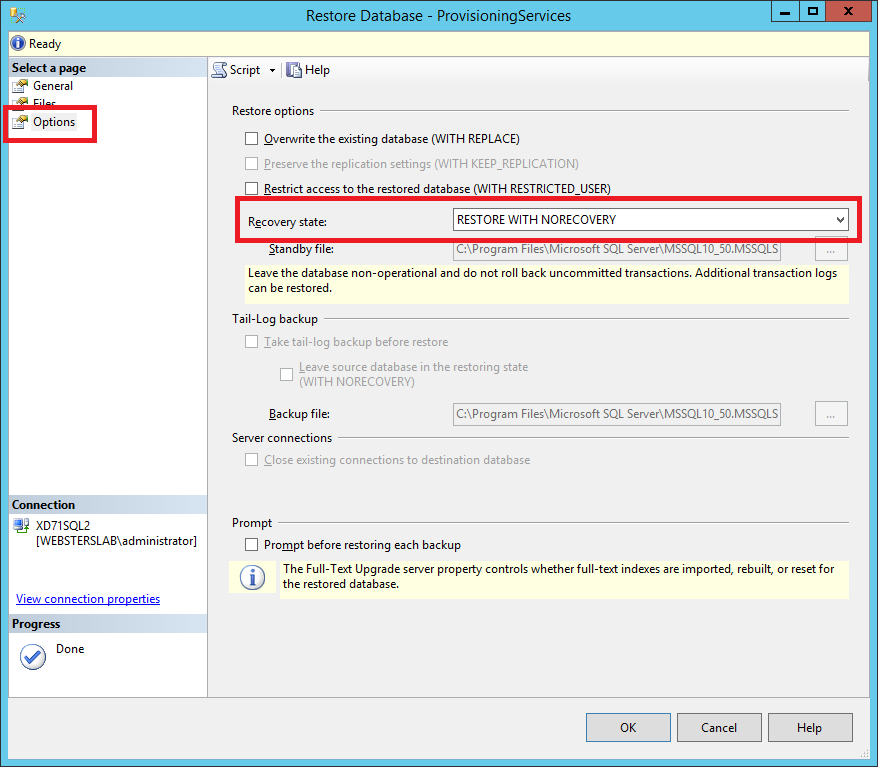
Click OK.
Expand Databases on the mirror server. The PVS database should say “(Restoring…)“.

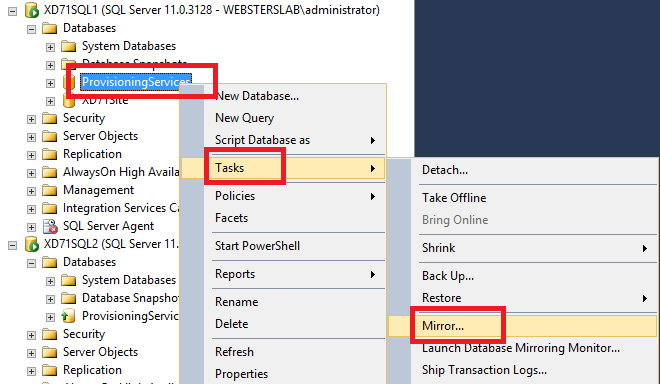
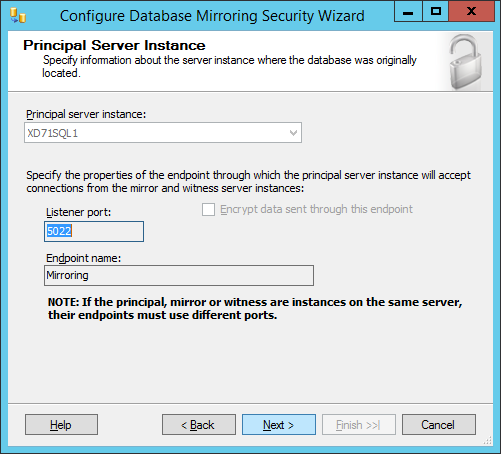
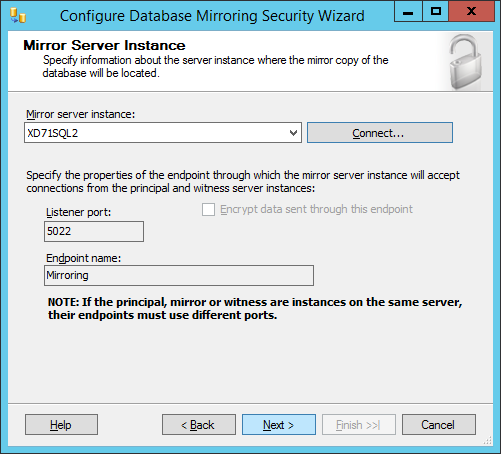
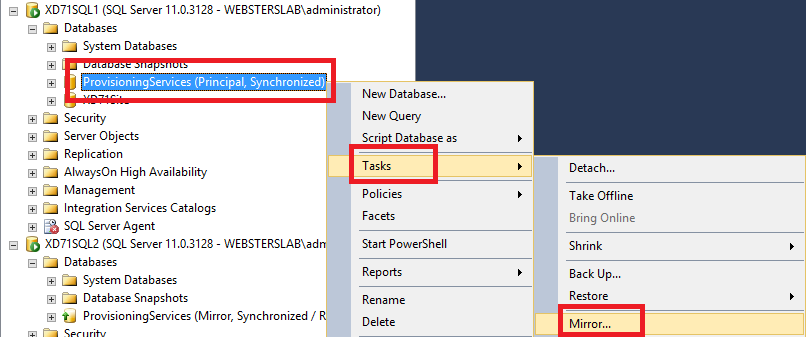
On the principal server, expand Databases, right-click the PVS database, click Tasks and click Mirror.
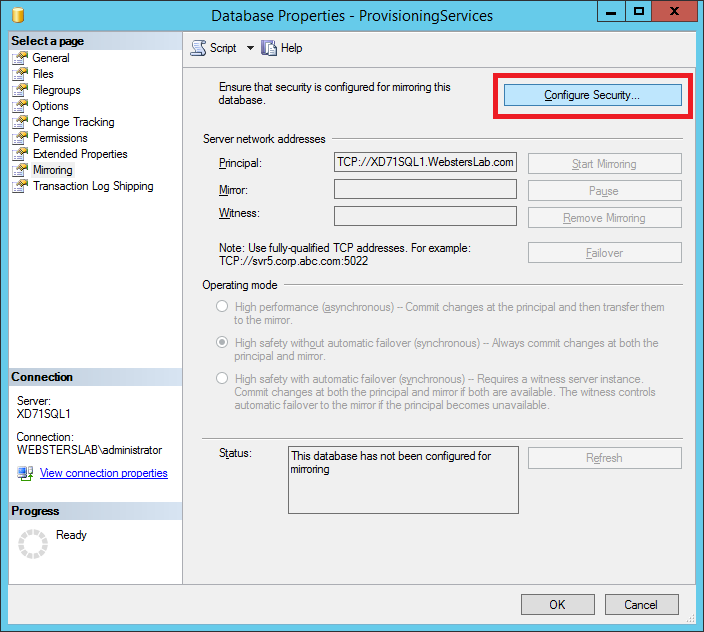
Click Configure Security.
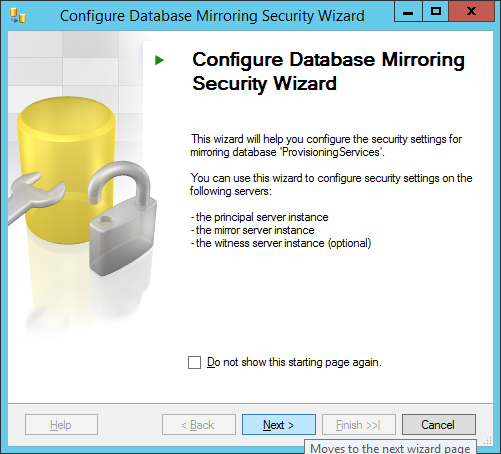
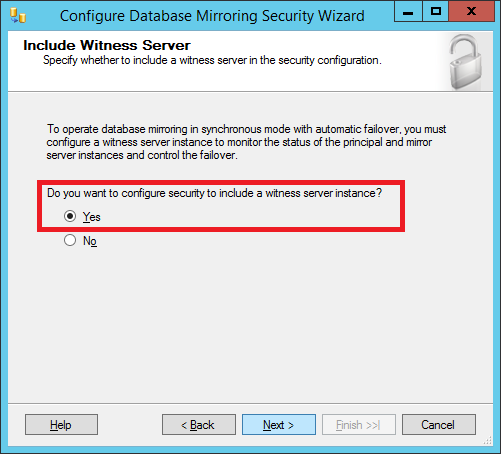
Click Next.
Verify Yes is selected and click Next.
Verify Witness server instance is selected and click Next.
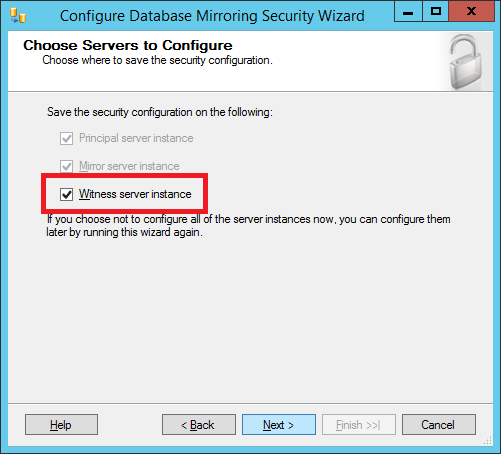
Click Next
Select the mirror server from the Mirror server instance dropdown and click Connect.
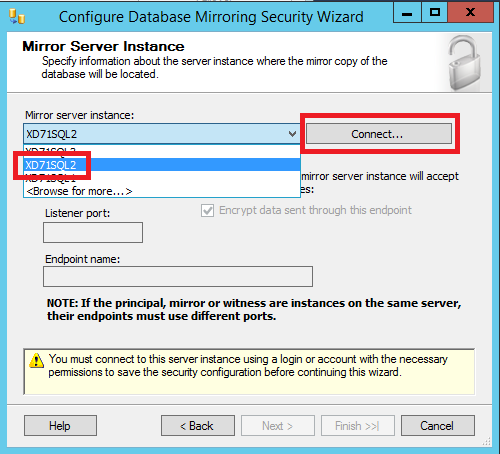
Click Connect to authenticate and connect to the mirror server.
Click Next.
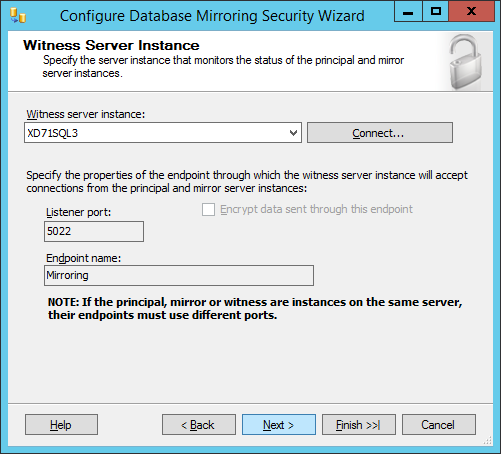
Select the witness server from the Witness server instance dropdown and click Connect.
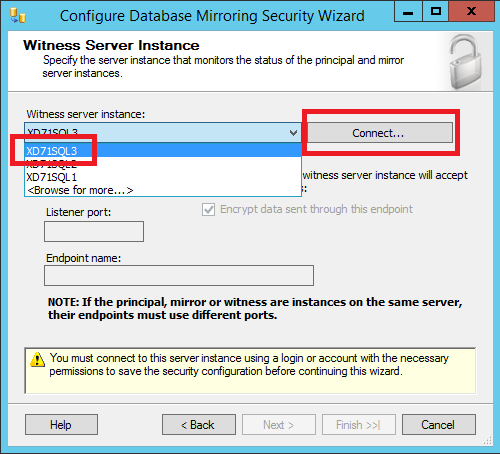
Click Connect to authenticate and connect to the witness server.

Click Next.
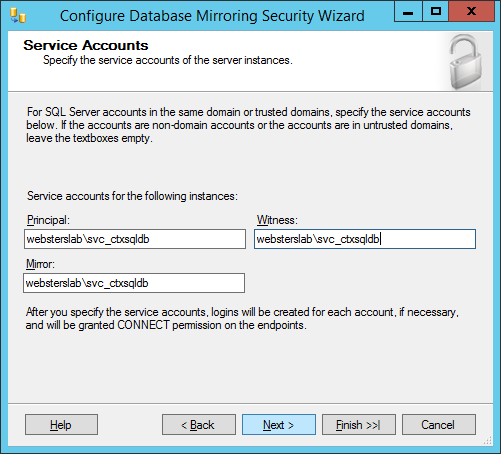
Enter the SQLServers security account for all three instances and click Next.
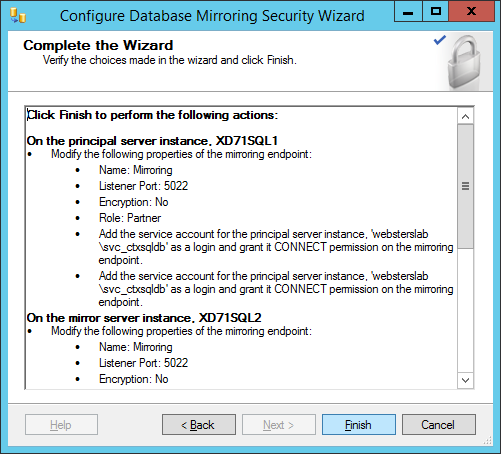
Click Finish.
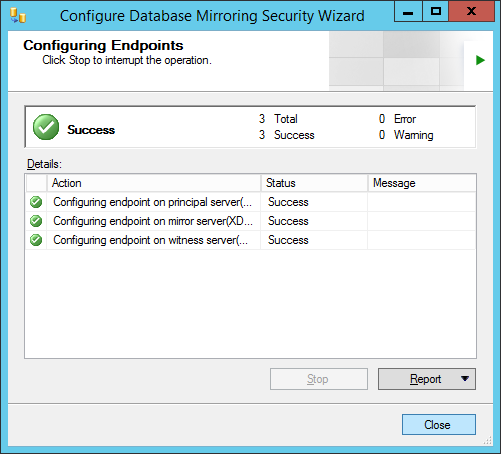
If all Action columns have a status of success, click Close. Otherwise, view the report generated, resolve the issues reported, and rerun the Configure Security wizard.
Click Start Mirroring (and pray that everything works).
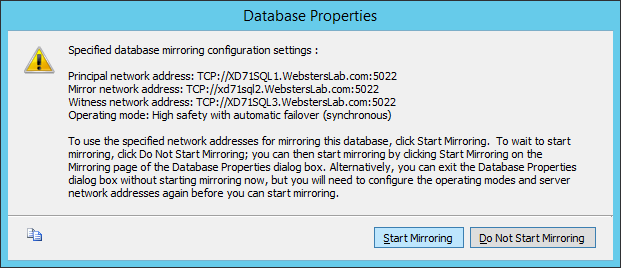
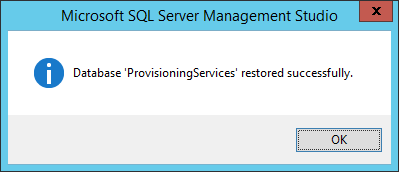
WHEW, it worked. Click OK.
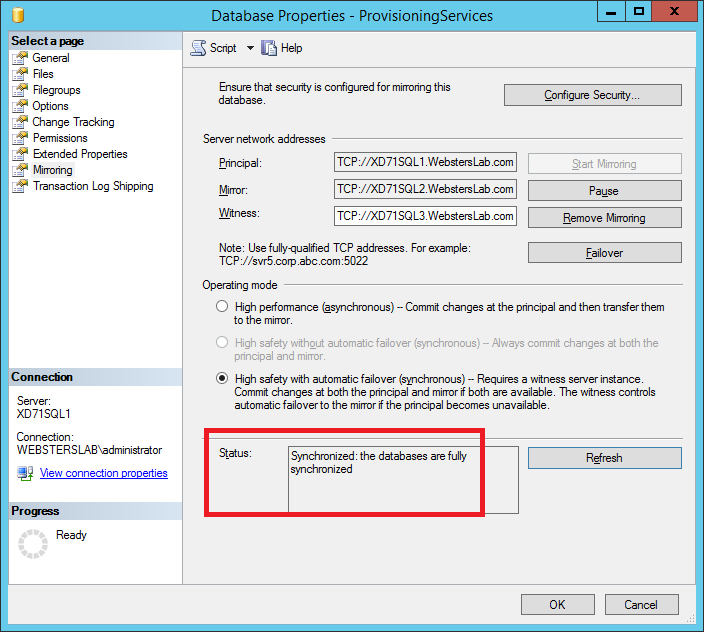
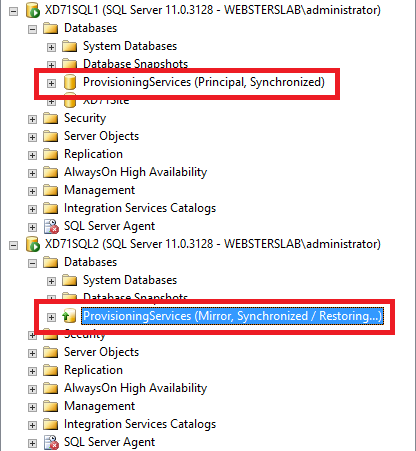
In the SQL Server Management Studio, refresh the primary and mirror servers. Expand Databases on both servers. The principal server should show the PVS database as (Principal, Synchronized), and the mirror server should show the PVS database as (Mirror, Synchronized / Restoring…).
Now the PVS servers need to be reconfigured.
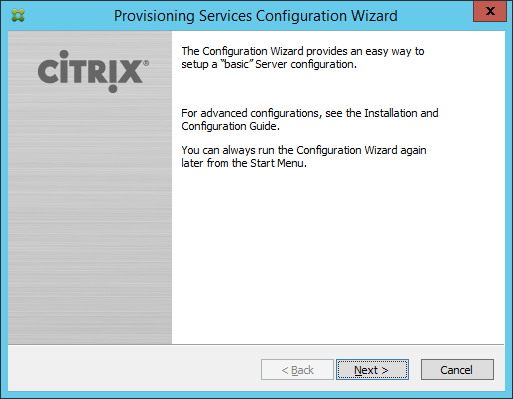
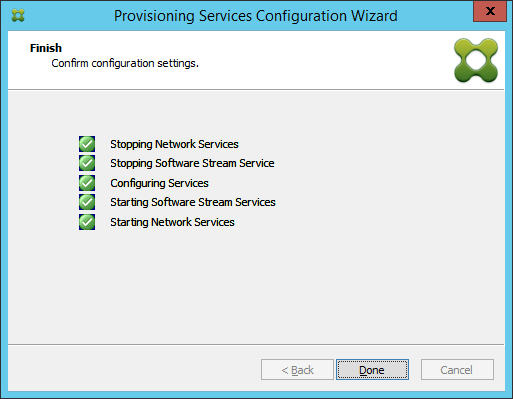
On each PVS server, run the Provisioning Services Configuration Wizard.
Click Next.
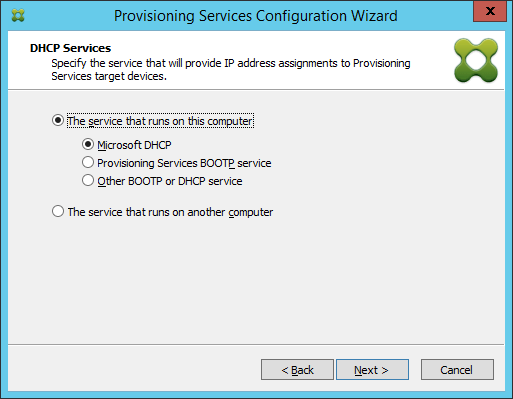
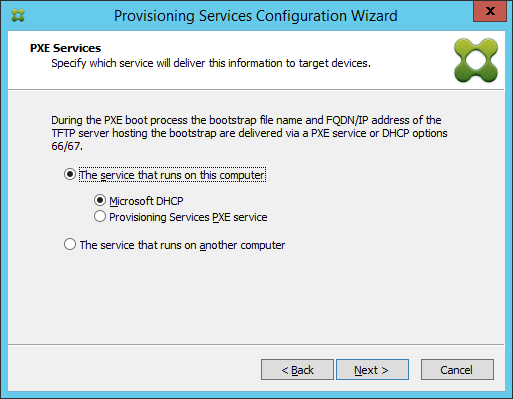
Select the option appropriate for your environment and click Next.
Select the option appropriate for your environment and click Next.
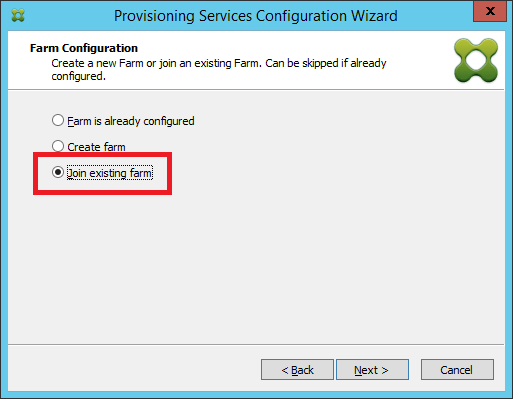
Select Join existing farm and click Next.
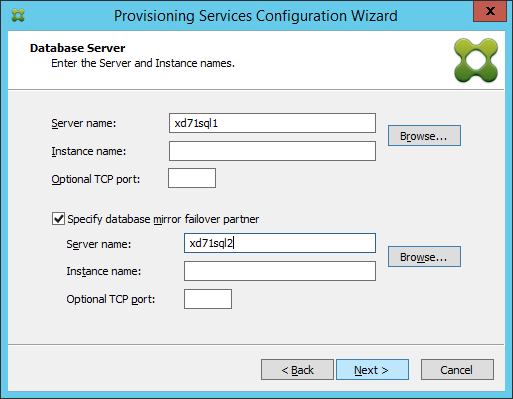
Enter the principal and mirror SQL server names and click Next.
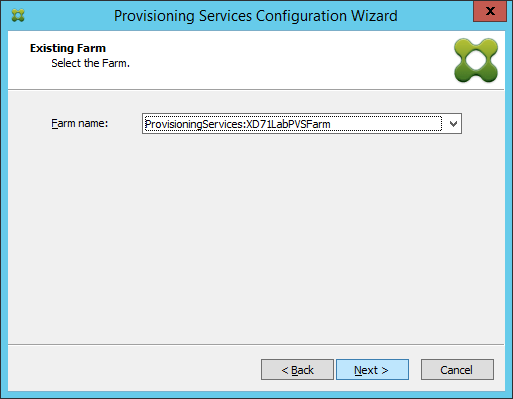
Select your PVS Farm and click Next.
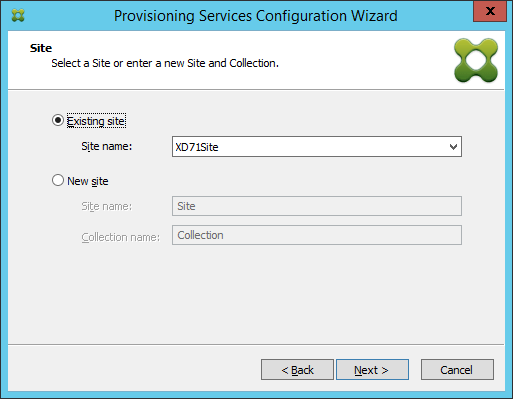
Select your Site option and click Next.
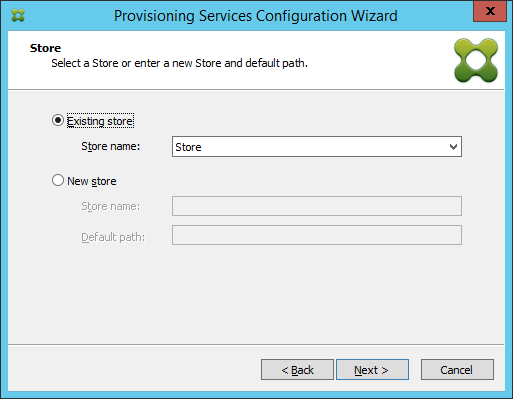
Select your Store option and click Next.
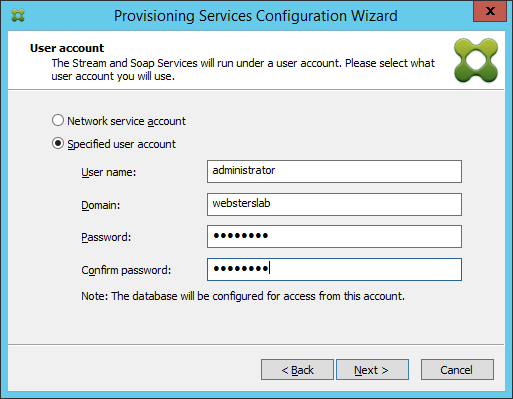
Enter the credentials for your environment and click Next.
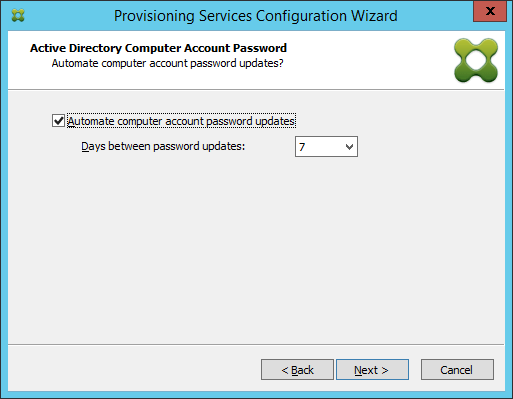
Select the password option appropriate for your environment and click Next.
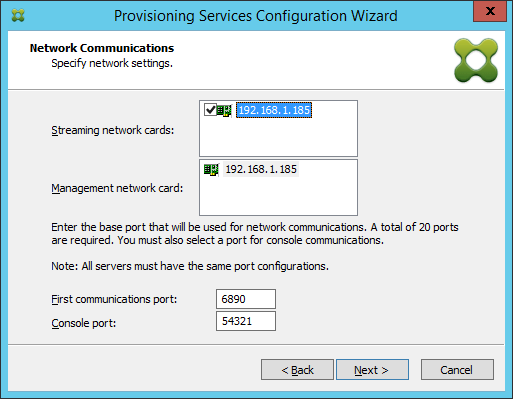
Select the options and ports appropriate for your environment and click Next.
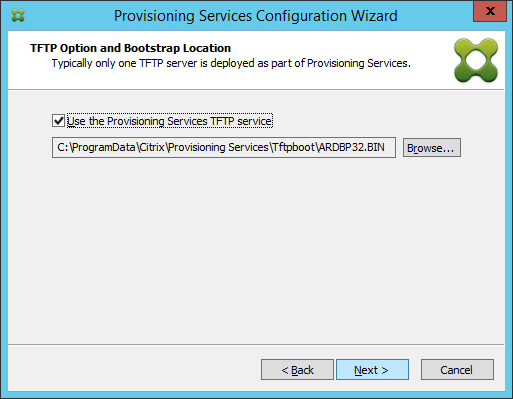
Select the option appropriate for your environment and click Next.
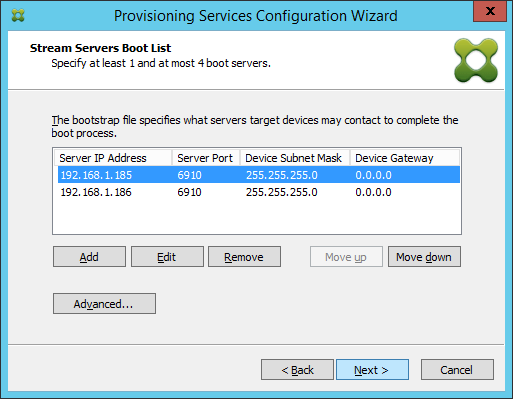
Select the settings appropriate for your environment and click Next.
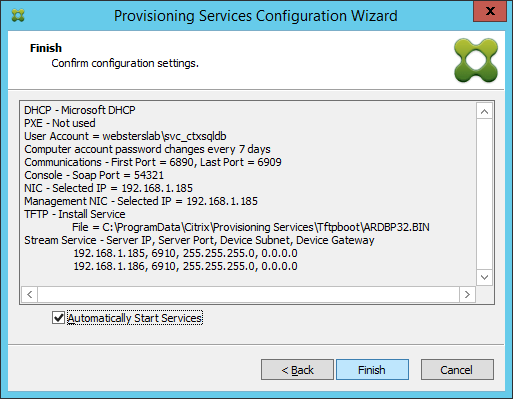
Click Finish.
Click Done. If there are errors, view the log file generated, resolve any errors and rerun the Configuration Wizard.
Repeat this process for any other PVS servers.
Open the PVS Console, right-click the Farm, click Properties and click the Status tab. The status should now show the failover partner configured.
Time to test mirror failover to ensure the PVS console still works and changes can be made to the PVS Farm.
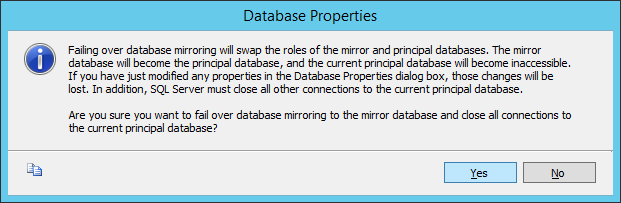
Go back to the SQL Server Management Studio. On the principal server, expand Databases, right-click the PVS database, click Tasks and click Mirror.
Click the Failover button.
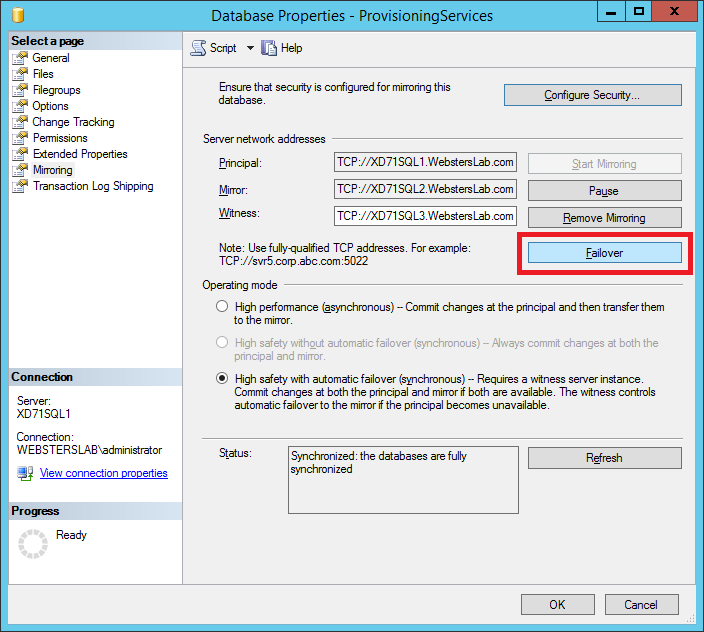
Click Yes.
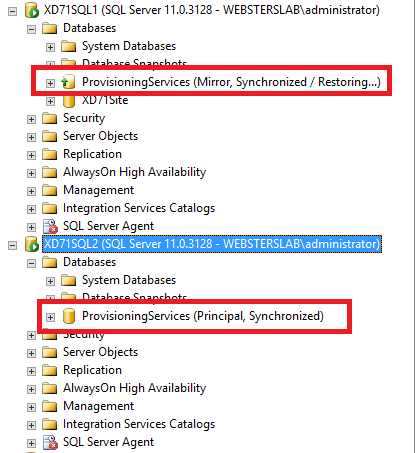
Refresh both the principal and mirror servers, expand Databases and look at the database status.
The principal server now shows (Mirror, Synchronized / Restoring…) and the mirror server shows (Principal, Synchronized).
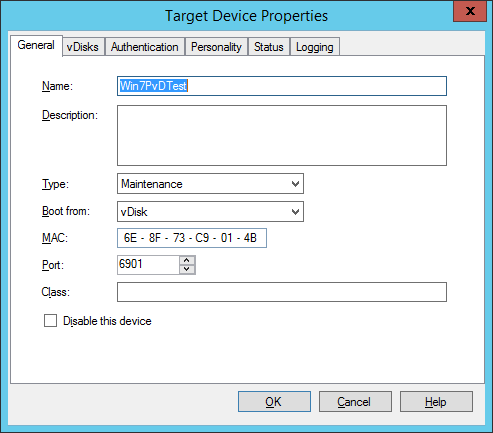
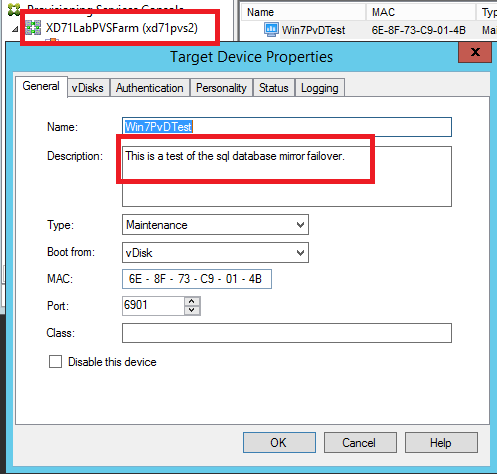
Now go to the PVS Console and test making a small change. For me, I am going to change a target device to add a description. This will test whether a change can be saved to the SQL database.
Target device before.
Target device after.
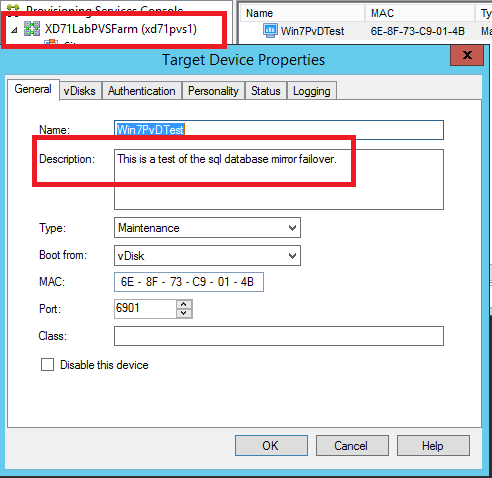
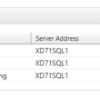
Now go to another PVS server, open the PVS console and see if the change made is seen on that server.
And the change is there. We know the SQL Database mirroring and failover are working.
Go back to the SQL Server Management Studio, click on the mirror server’s PVS database, and failover the database back to the principal server.
I hope this article helps you understand the mirror setup process necessary to implement SQL mirroring with failover for PVS.
Thanks
Webster
Thanks for a Detailed article Carl,
How can we make it work for SQL Always On Availability Group?
-J
Use the Listener name for the Mirror Partner.
Webster
Good document. Thank you..
Excellent and very helpful!! Thanks a lot!
One question:
Do I have to stop the running target devices before switching to the database(s)?
I did not do so in my lab. None of my target devices had any issues.
Webster
Carl
Excellent detailed blog! Much appreciated and keep up the hard work!
Great site and i wish you good luck in the future.
2 questions:
1.how does this defer from using the 2 sql server option in PVS. Is this better in any way other than letting sql manage the mirror and not PVS?
2. Is a witness server really needed? can i do this with just 2 servers?
Thank you!!
According to the PVS documentation, only a mirror with witness is supported.
http://support.citrix.com/proddocs/topic/provisioning-7/pvs-install-task1-plan-6-0.html
Database mirroring
Considerations:
•For Provisioning Services to support MS SQL database mirroring, the database needs to be properly configured with High-safety mode with a witness (synchronous).
Webster